Contents: Removal ⇩ Installation ⇩
NOTE: The end panel must be separated from the front side member and upper suspension mount; it is not serviced separately.
NOTE: The panel is serviceable without its mounting studs.
Removal
1. When replacing the front side member closing panel, the following elements are removed:
- Front bumper trim
- Front bumper
- Hood Latch Panel
- Both front wings
- Front bumper mount
- Lower wing apron panel
- Front reinforcement element of the wing apron panel
- Front spar
NOTE: It is also necessary to remove the engine and suspension as a single unit.
2. For additional information regarding this repair procedure, refer to: For additional information, refer to: Body and Frame (501-26 Body Repairs - Special Vehicle Information and Tolerance Checks, Description and Operation) / Standard Service Station Techniques (100-00 General Information, Description and Operation).
3. Remove the front side member. For more information, refer to the chapter: Front Side Member (501-27 Front Sheet Metal Repairs, Removal and Installation).
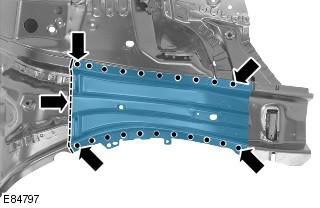
4. Mill out the weld spots.
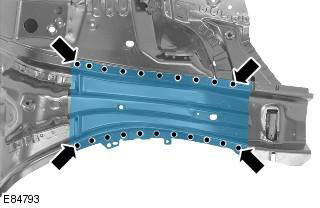
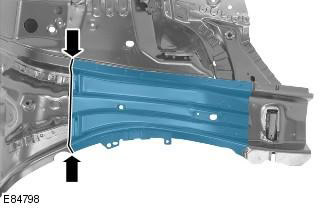
5. Cut off the old panel at the point shown.
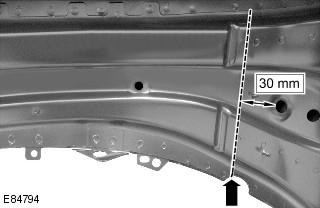
6. Separate the connections and remove the old panel.
Installation
1. Remove the panel from the service panel.
- 1. Mill out the weld spots.
- 2. Make the cut, aligning it with the one already made on the car.
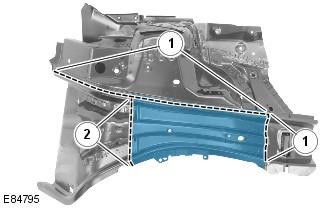
2. Prepare the connecting surfaces of the old and new panels.
3. Drill holes in the new panel for MIG welding.
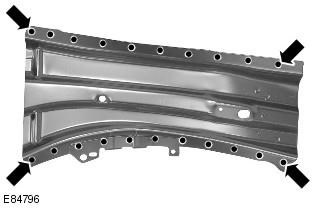
4. Apply the new panel and fix it in place. Check the alignment, if correct, proceed to the next step, if not, correct and check again before proceeding to the next step.
5. After fixing the panels:
- 1. Tack the butt joint.
- 2. MIG welding.
6. Clean the tack welds.
7. Perform butt welding using MIG technology.
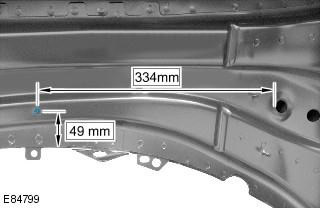
8. Install the weld stud.
9. Clean all welded joints.
10. To install the relevant panels and mechanical components, perform the removal procedure in reverse order.
Comments on this article