Contents: Removal ⇩ Installation ⇩
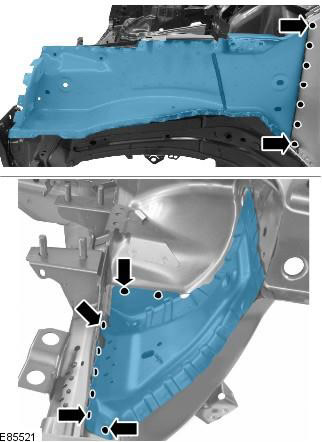
NOTE: The fender skirt panel is serviced as a separate welded panel. It consists of the fender skirt panel reinforcement, the lower fender skirt panel and the fender skirt panel forward extension.
NOTE: The panel is serviceable without its mounting studs.
Removal
1. In combination with the wing apron panel, the following is replaced:
- Front bumper trim
- Hood Latch Panel
- Both front wings
- Upper panel of the wing apron
2. For additional information regarding this repair procedure, refer to: For additional information, refer to: Body and Frame (501-26 Body Repairs - Special Vehicle Information and Tolerance Checks, Description and Operation) / Standard Service Station Techniques (100-00 General Information, Description and Operation).
3. Remove the upper mudguard panel. For more information, refer to the chapter: Upper Mudguard Panel (501-27 Front Sheet Metal Repairs, Removal and Installation).
4. Left side: Remove the air cleaner. For more information, refer to the chapter: Air cleaner (303-12A Intake Air Distribution and Filtration - 3.2L NA - I6, Removal and Installation).
5. Left side: Remove the air intake pipe.
6. Left side: Remove the battery tray. For more information, refer to the chapter: Battery tray (414-01 Battery, battery mount and cables, Removal and installation).
7. Left side: Remove the lower engine mount isolator. For more information, refer to the chapter: Lower Engine Mount Isolator (303-01A Engine - 3.2L NA - I6, Removal and Installation).
8. Left side: Disconnect the battery junction box and place it aside.
9. Right side: Drain the cooling system. For additional information, refer to: Draining/Filling Coolant and Bleeding the Cooling System (303-03A Engine Cooling - 3.2L NA - I6, General Procedures).
10. Right side: Evacuate the air conditioning system. For more information, refer to the chapter: Refrigerant Recovery, Evacuation, and Charging of the Air Conditioning (A/C) System (412-00 Climate Control System - General Information, General Procedures).
11. Right side: Remove the power steering fluid reservoir. For more information, refer to the chapter: Power steering fluid reservoir (211-02 Power steering, Removal and installation).
12. Right side: Disconnect the coolant expansion tank and place it aside.
13. Right side: Remove the engine support bracket. For more information, refer to the chapter: Right Engine Support (303-01A Engine - 3.2L NA - I6, Removal and Installation).
14. Right side: Remove the windshield washer reservoir. For more information, refer to the chapter: Windshield washer reservoir (501-16 Windscreen wipers and washers, Removal and installation).
15. Right side: Remove the wing apron air conditioner lines.
16. Remove the shock absorber and spring assembly. For more information, refer to the chapter: Shock Absorber and Spring Assembly (204-01 Front Suspension, Removal and Installation).
17. Release the wiring harness and place it aside.
18. Use a belt sander to remove 5 weld spots.
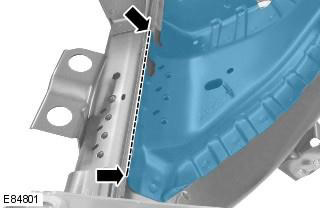
19. Mill out the remaining weld spots.
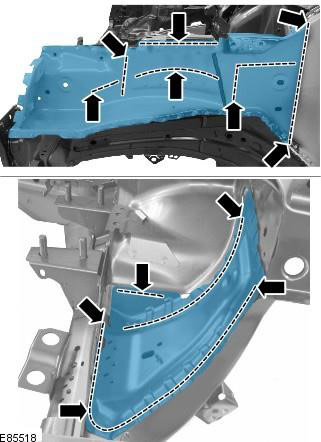
20. Separate the connections and remove the old panel.
Installation
1. Prepare the connecting surfaces of the old and new panels.
2. Drill holes in the new panel for MIG welding.
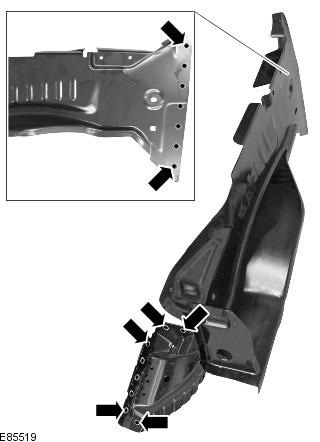
3. Apply the new panel and fix it in place. Check the alignment, if correct, proceed to the next step, if not, correct and check again before proceeding to the next step.
4. Spot welding.
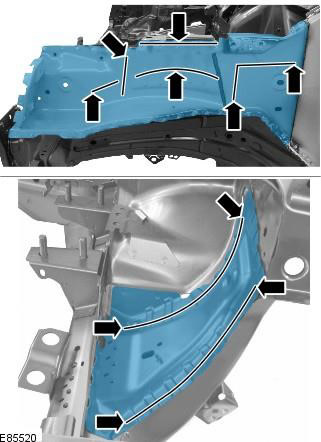
5. MIG welding.
6. Install new mounting studs.
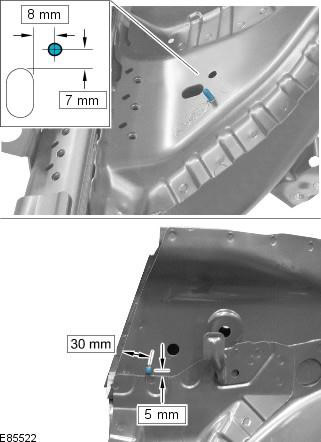
7. Clean all welded joints.
8. To install the relevant panels and mechanical components, perform the removal procedure in reverse order.
Comments on this article