Removing
1. Remove the upper trim panel of the left pillar "D". Refer to Procedure: 'D' Pillar Trim Panel (501-05 Interior trim, Removal and installation).
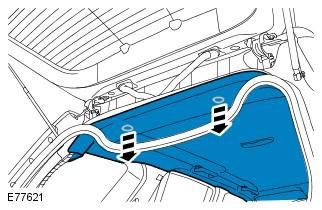
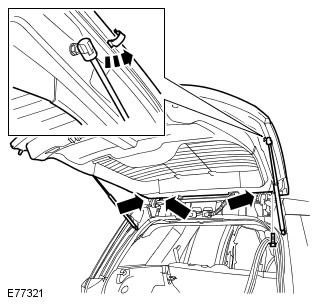
2. Release the rear headlining.
3.
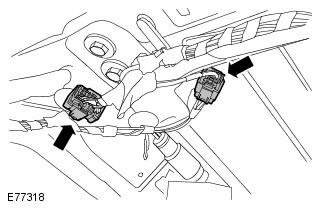
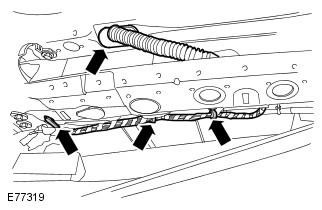
4. Release the tailgate wiring harness.
5.
6. Remove the tailgate.
WARNING: This step requires the assistance of a second mechanic.
CAUTION: Mark the position of the elements to facilitate subsequent installation.
Installation
1. Install the tailgate. Tightening torque: 24 Nm
WARNING: This step requires the assistance of a second mechanic.
CAUTION: Clean area around element and remove foreign material from area.
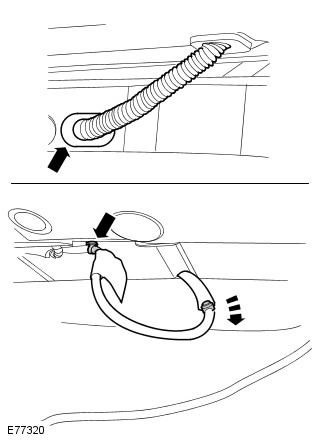
2. Connect the washer nozzle hose.
3. Attach the tailgate wiring harness.
4. Dock the electrical connectors of the tailgate wiring harness.
5. After opening the tailgate, check its position relative to the roof panel and body side panels. The tailgate must be centered in the door opening.
6. Loosen but do not completely remove the tailgate hinge bolts.
7. Center the tailgate in the door opening.
8. Tighten the tailgate hinge bolts. Tightening torque: 24 Nm
9. Attach the rear headlining.
10. Establish the top panel of furnish of the left rack "B". Refer to Procedure: 'D' Pillar Trim Panel (501-05 Interior trim, Removal and installation).
11. Check up correct work of a door of a luggage space and if necessary adjust a mating part of the lock.
Comments on this article