Contents: Dismantling ⇩ Installation ⇩
Dismantling
1. Remove the headliner.
INTERIOR TRIM DETAILS, REPAIR WORK, Ceiling panel for a 3-door car.
CAUTION: Wear protective gloves when handling glass, solvents and primers.
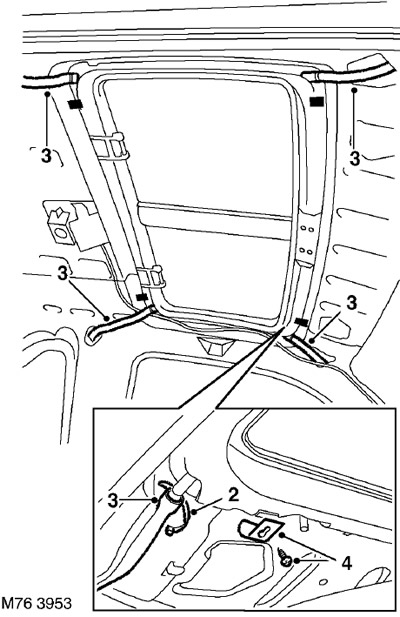
2. Remove the clamps from the drain pipes and discard them.
3. Disconnect the drain pipes from the hatch.
4. Remove the 4 Torx screws securing the brackets and remove the brackets.
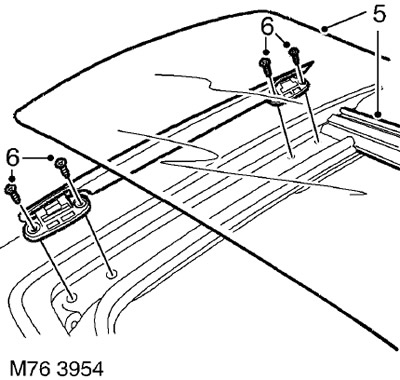
5. Remove the glass panels and T-bar.
6. Unscrew the 8 screws securing the deflectors and remove the deflectors.
7. Remove the hatch seal.
ROOF VENTILATION HALF, REPAIR WORK, Roof hatch seal.
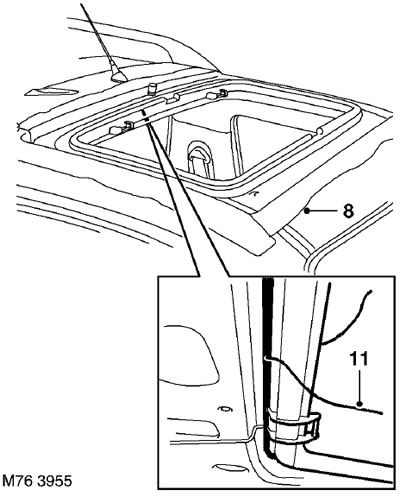
8. Close the roof and hatch opening.
9. Cover the interior elements of the car with protective covers.
10. Cut the seal at the rear of the hatch. This is easiest to do with a cutting tool bent at 90°.
CAUTION: Wear safety glasses when performing glass removal and installation work.
11. Using a suitable cutting wire, cut the polyurethane seal while pressing the sunroof against the roof.
NOTE: When using stranded wire, a sawing motion can be used to cut the sealant thickenings located in the corners of the glass.
12. Remove the hatch.
Installation
1. Clean the surfaces around the hatch with solvent.
CAUTION: Wear protective gloves when handling glass, solvents and primers.
2. Remove any remaining debris with a vacuum cleaner.
3. Trim off any remaining roof flashing until a smooth surface is created.
4. Treat damaged surfaces with etching primer and touch up.
5. Apply primer to the etched surfaces of the roof opening edge.
6. Apply the activating agent over the old sealant remaining on the edge of the roof opening.
7. Allow the activating reagent to dry.
8. Install the pre-cut tip onto the sealant cartridge, remove the cap and scrape off any hardened residue. Install the cartridge onto the sealant gun. If necessary, reshape the tip to obtain the desired sealant bead cross-section.
9. Apply a continuous layer of sealant along the entire edge of the roof opening. The layer of sealant should be slightly thicker in the corners.
10. Avoid creating gaps or air bubbles in the sealant.
11. With the help of a partner, install the hatch and align its position relative to the opening in the roof.
12. Install the hatch seal.
ROOF VENTILATION HALF, REPAIR WORK, Roof hatch seal.
13. Install the brackets, screw in and tighten the screws that secure them.
14. Connect the drain pipes and secure them with new clamps.
15. Remove protective covers from the body and interior trim.
16. Install the deflectors, screw in and tighten the screws that secure them.
17. Install the T-bar and glass covers.
18. Install the headliner.
INTERIOR TRIM DETAILS, REPAIR WORK, Ceiling panel for a 3-door car.
Comments on this article