Contents: Dismantling ⇩ Installation ⇩
Dismantling
1. Disconnect the negative battery terminal.
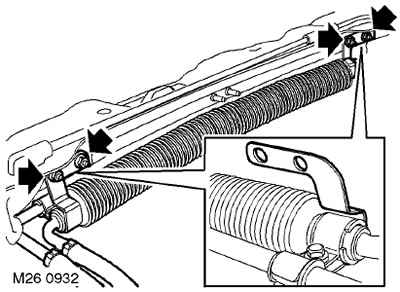
2. Unscrew the 4 nuts securing the fuel cooling radiator to the upper cross member of the radiator frame and carefully move the radiator to the side.
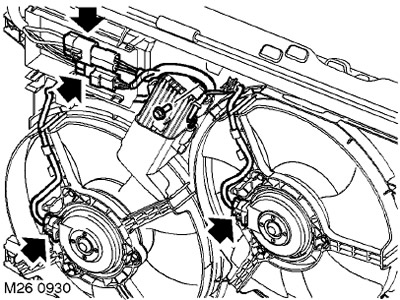
3. Disconnect the two electrical connectors from the fan controller.
4. Release the upper controller connector from the latch on the fan shroud.
5. Disconnect the latch of the lower controller connector from the fan shroud and remove the latch from the connector.
6. Disconnect the connectors from the fan motors and release the wiring harnesses from the fasteners on the fan shroud.
7. Remove the controller mounting screw.
8. Remove the controller from the fan shroud.
Installation
1. Install the controller on the fan casing and secure it with screw.
2. Connect the connectors to the fan motors and secure the wire harnesses to the fasteners on the fan shroud.
3. Place the latch on the bottom connector of the controller and insert the latch into the fan shroud.
4. Insert the top connector of the controller into the latch on the fan shroud.
5. Connect the main harness connectors to the fan controller and secure the connectors.
6. Install the fuel cooling radiator on the upper cross member of the radiator frame and tighten its mounting nuts to a torque of 10 Nm.
7. Connect the negative terminal to the battery.
Comments on this article