


Contents: Operating procedure ⇩ Filling ⇩
Operating procedure
1. Inspect the engine and cooling system components to ensure there are no leaks.
CAUTION: Do not remove the cap while the engine is hot to avoid being burned by steam or coolant.
2. Check the hoses for cracks, deformation and reliability of the connecting parts.
3. Remove the lower engine guard.
EXTERIOR PARTS, REPAIR WORK, Lower engine protection shield.
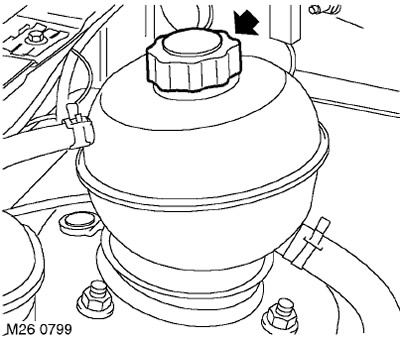
4. Remove the filler cap of the expansion tank.
5. Install a container to collect the leaking coolant.
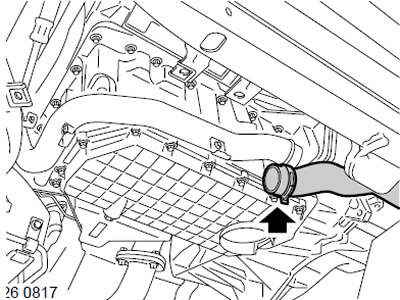
6. Loosen the clamp and remove the hose from the lower pipe to drain the coolant from the cooling system.
Filling
1. Flush the system with low pressure water.
CAUTION: Do not apply high pressure water to the system as this may damage the radiator.
2. Connect the hoses to the lower pipe of the cooling system and secure them with a clamp.
3. Prepare the coolant of the required concentration.
FILLING TANKS, LIQUIDS AND OILS, Working fluids.
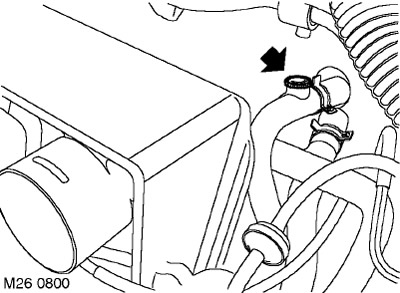
4. Remove the screw from the air bleed hole located in the cooling system hose.
5. Set the interior heating control to the maximum heating position.
6. Slowly pour coolant into the expansion tank until a continuous stream of coolant comes out of the air bleed hole.
7. Carefully, using hand force, screw the screw into the air bleed hole.
8. Replace the expansion tank filler cap.
9. Start the engine and warm it up to operating temperature.
CAUTION: DO NOT turn on the air conditioning system.
10. Make sure that warm air is coming out of the heating system nozzles.
NOTE: The absence of warm air at the nozzle outlet may indicate the presence of an air lock in the heater radiator. If necessary, cool the engine, unscrew the expansion tank cap and repeat the cooling system bleeding procedure using the air bleed hole.
11. Turn off the engine and let it cool.
12. Make sure there are no leaks and add fluid to the tank up to the "MAX" mark.
13. Reinstall the lower engine guard.
EXTERIOR PARTS, REPAIR WORK, Lower engine protection shield.
Comments on this article