Contents: Dismantling ⇩ Installation ⇩
Dismantling
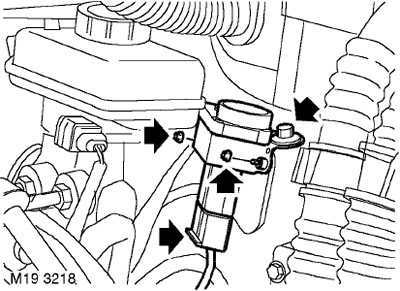
1. Disconnect the connector from the inertia switch.
2. Unscrew the bolt securing the inertia switch bracket to the front panel.
3. Remove the inertia switch from the front panel.
4. Unscrew the 2 nuts securing the inertia switch to the bracket.
5. Remove the inertia switch from the bracket.
Installation
1. Install the inertia switch on the bracket.
2. Fit the 2 nuts securing the inertia switch to the bracket and tighten them to a torque of 2 Nm.
3. Install the inertia switch bracket to the front panel.
4. Screw in the bolt securing the inertia switch bracket to the front panel and tighten it.
5. Connect the connector to the inertia switch.
6. To cock the inertia switch (to bring it into working condition), you need to press on its upper part.
Comments on this article