Dismantling
1. Disconnect "negative" battery terminal.
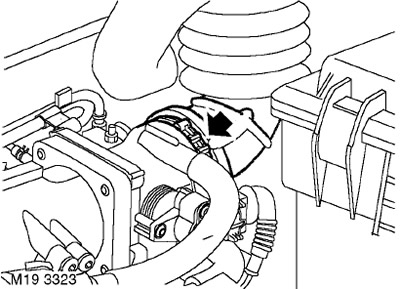
2. Turn away a collar and disconnect an air hose from a throttle branch pipe.
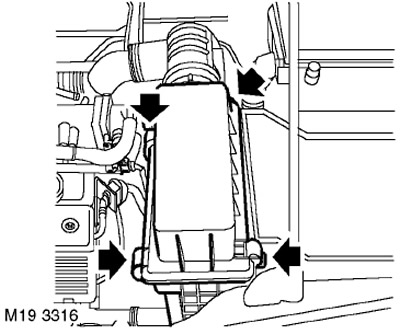
3. Unfasten the 4 latches and remove the air filter cover.
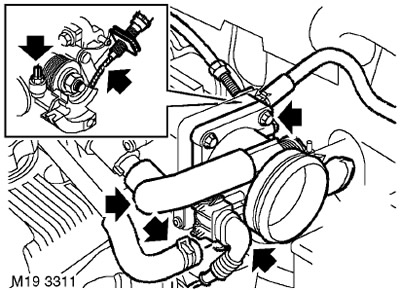
4. Disconnect the idle speed control hose from the throttle body.
5. Disconnect the connector from the throttle position sensor.
6. Turn away a collar and disconnect a hose of ventilation of a crankcase from a throttle branch pipe.
7. Remove the throttle cable adjusting nut from the bracket.
8. Remove the cable from the damper control sector.
9. Turn away 4 bolts of fastening of a throttle branch pipe to an inlet collector.
10. Remove the throttle tube.
11. Remove the O-ring from the orifice and discard.
Installation
1. Wipe the mating surfaces of the throttle tube and intake manifold.
2. Lubricate a new O-ring with silicone grease and slide it onto the orifice.
3. Install the throttle pipe to the intake manifold, install the wire harness bracket, screw in the bolts and tighten them with your fingers.
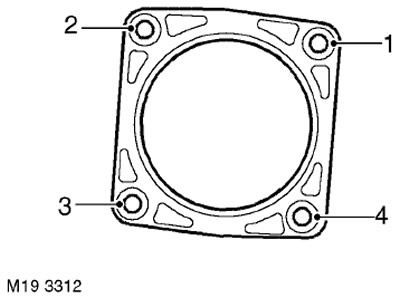
4. Tighten the bolts in the sequence shown.
- a Tighten the bolts. Tightening torque 4 Nm.
- b Loosen the screws.
- c Tighten the bolts. Tightening torque 9 Nm.
5. Attach the cable to the damper control sector.
6. Attach the throttle cable adjusting nut to the bracket.
7. Attach the crankcase ventilation hose to the throttle body and secure it with a clamp.
8. Connect the connector to the throttle position sensor.
9. Attach a hose of a regulator of idling and combine labels.
10. Install the cover on the air filter housing and fasten the latches.
11. Connect the air inlet hose to the throttle body and secure it with a clamp.
12. Attach "negative" battery terminal.
13. Use the Testbook to make adjustments.
Comments on this article