CAUTION: Position the wiring harnesses correctly.
NOTE: When replacing the headliner, be sure to install the washer hose and wiring harness in their original positions. Failure to follow these instructions may result in difficulty in operating the side curtain airbag module.
NOTE: Mark the position of the wiring harnesses to facilitate installation.
1. Remove both A-pillar trim panels. Refer to procedure: A-pillar Trim Panel (501-05 Interior Trim, Removal and Installation).
2. Remove the upper trim panels of both B-pillars. Refer to procedure: Upper Pillar Trim Panel (501-05 Interior Trim, Removal and Installation).
3. Remove both C-pillar trim panels. Refer to procedure: C-Pillar Trim Panel (501-05 Interior Trim, Removal and Installation).
4. Remove the upper trim panels from both D-pillars. Refer to procedure: D-Pillar Trim Panel (501-05 Interior Trim, Removal and Installation).
5. Remove the luggage compartment retaining ring.
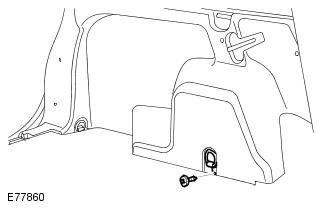
6. Remove the rear side trim panel.
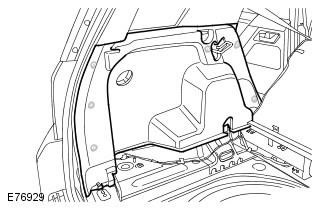
7. Remove the glove box. Refer to procedure: Glove Box (501-12 Instrument Panel and Console, Removal and Installation).
8. Passenger Side: Remove the door jamb trim panel. Refer to procedure: Front Door Jamb Trim Panel (501-05 Interior Trim, Removal and Installation).
9. Passenger side: Remove the speaker grille.
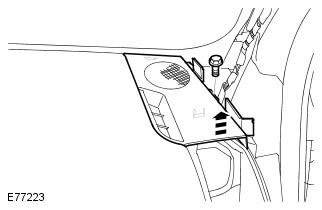
10.
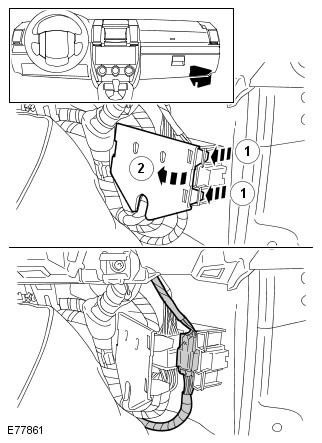
11.
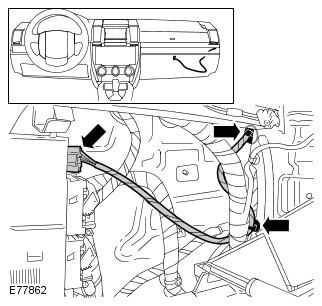
12.
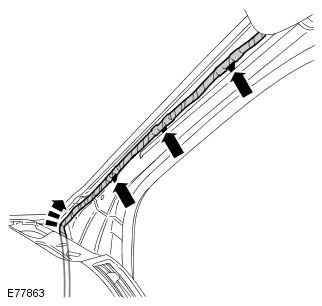
13. Remove the interior rearview mirror. Refer to procedure: Interior Rearview Mirror (501-09 Rearview Mirrors, Removal and Installation).
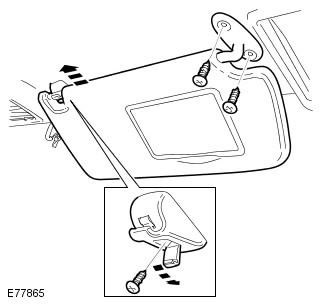
14. Remove both sun visors.
15. Remove the overhead console. Refer to procedure: Overhead Console (501-12 Instrument Panel and Console, Removal and Installation).
16. Remove both front interior lights.
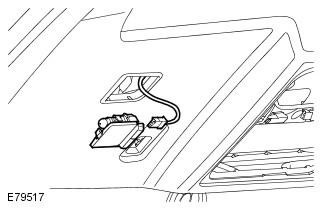
17. Remove the central interior light.
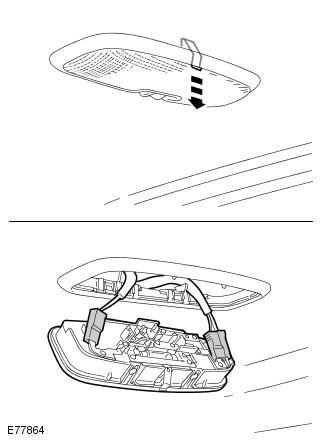
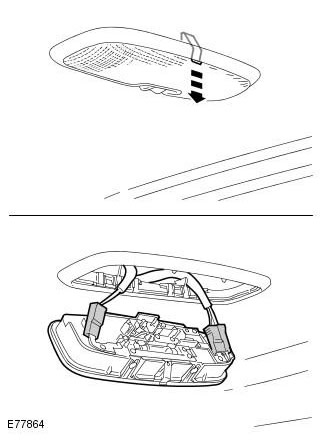
18. Remove the rear interior light.
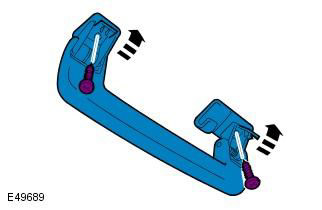
19. Remove 4 passenger handrails.
20. Adjust the front seats to the forwardmost position.
21. Set the rear seats to the forwardmost position.
22. Release the rear roof trim.
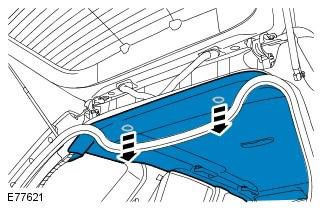
23. Disconnect the front door seals.
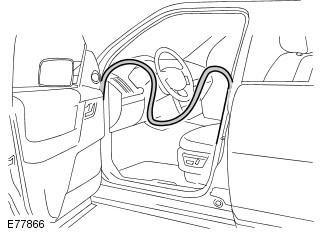
24. Disconnect the windshield washer hose.
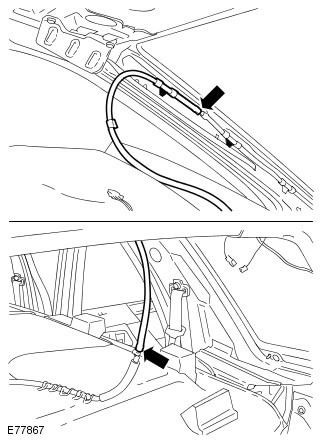
25. Remove the roof lining.
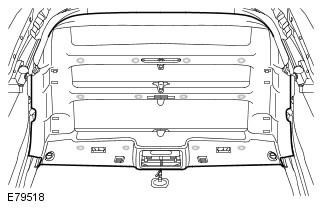
26. Disconnect the sunroof motor electrical connector.
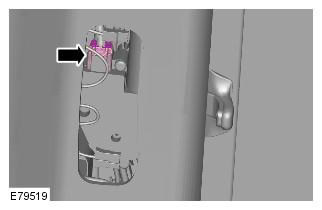
27. Remove the headlining.
NOTE: This step requires the assistance of a second mechanic.
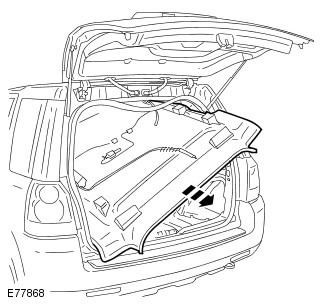
28. Remove the tire pressure monitoring system receiver.
NOTE: Do not perform further disassembly if the component is removed only for access.
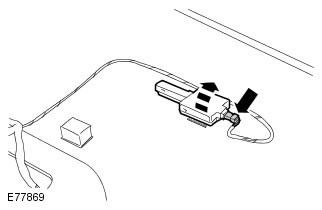
29. Remove the windshield washer hose.
NOTE: Install this item in the position noted during removal.
30. Remove 14 clamps.
31. Remove the wiring harness from the roof trim.
NOTE: Mark the position of the wiring harnesses to facilitate installation.
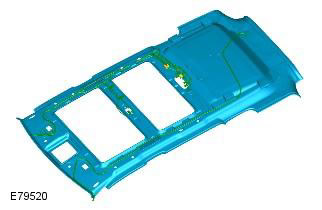
Installation
1. Align the yellow stripe on the wiring harness with the headliner.
(The original was published on the portal: «LRMAN.RU»)
CAUTION: Position the wiring harnesses correctly.
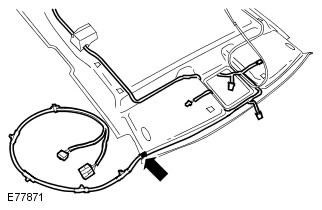
2. Install the clamps.
3. Install the windshield washer hose.
4. Install the tire pressure monitoring system receiver.
5. Install the headliner.
NOTE: This step requires the assistance of a second mechanic.
6. Connect the sunroof motor electrical connector.
7. Connect the windshield washer hose.
8. Install the front door seals.
9. Install the rear roof trim.
10. Return the rear seats to their original position.
11. Return the front seats to their original position.
12. Install passenger handrails.
13. Install the rear interior light.
14. Install the central interior light.
15. Install the front interior lights.
16. Install the overhead console. Refer to procedure: Overhead Console (501-12 Instrument Panel and Console, Removal and Installation).
17. Install sun visors.
18. Install the interior rearview mirror. Refer to procedure: Interior Rearview Mirror (501-09 Rearview Mirrors, Removal and Installation).
19. Connect the headliner wiring harness and secure with clamps.
20. Install the speaker grille.
21. Install the front door jamb trim panel. Refer to procedure: Front Door Jamb Trim Panel (501-05 Interior Trim, Removal and Installation).
22. Install the glove box. Refer to procedure: Glove Box (501-12 Instrument Panel and Console, Removal and Installation).
23. Install the rear side trim panel.
24. Install the luggage compartment retaining ring and tighten the Torx head screw. Tightening torque: 25 Nm
25. Install the D-pillar trim panels. Refer to procedure: D-Pillar Trim Panel (501-05 Interior Trim, Removal and Installation).
26. Install the C-pillar trim panels. Refer to procedure: C-Pillar Trim Panel (501-05 Interior Trim, Removal and Installation).
27. Install the B-pillar trim panels. Refer to procedure: Upper B-Pillar Trim Panel (501-05 Interior Trim, Removal and Installation).
28. Install the A-pillar trim panels. Refer to procedure: A-Pillar Trim Panel (501-05 Interior Trim, Removal and Installation).
Comments on this article