Contents: Removal ⇩ Installation ⇩
The reinforcement of the "B" pillar is made of BN300 steel (annealed steel). It should be welded with MIG electric rivets to the inside of the "B" pillar, the inside reinforcement of the lower trim panel and the reinforcement of the upper trim. Spot welding should not be used.
Ensure that all welded joints are properly sealed and protected against water penetration, particularly in areas where the adhesive bond/seal of the original panel cannot be replicated. Seal joints before installing exterior panels where necessary.
NOTE: The "B" pillar reinforcement is separated from the side panel reinforcement "ring frame" and is not serviceable separately.
NOTE: There is an NVH element located between the B-pillar reinforcement and the inner B-pillar.
Removal
1. In combination with the "B" pillar amplifier, the following is replaced:
- Front door
- Back door
- Roof lining
- External panel of the rack "B"
2. For additional information regarding this repair procedure, refer to: For additional information, refer to: Body and Frame (501-26 Body Repairs - Special Vehicle Information and Tolerance Checks, Description and Operation) / Standard Service Station Techniques (100-00 General Information, Description and Operation).
3. Remove the B-pillar outer panel. For more information, refer to: B-Pillar Outer Panel (501-29 Side Panel Sheet Metal Repairs, Removal and Installation).
4. Mill out the weld spots.
NOTE: The A-Post Top/Top Trim and Bottom Trim Panel areas will require the use of an HSS spot weld drill.
NOTE: Holes must be drilled through the B-pillar reinforcement and the B-pillar inner panel in the doorway area. This allows MIG rivets to be installed through the inner panel.
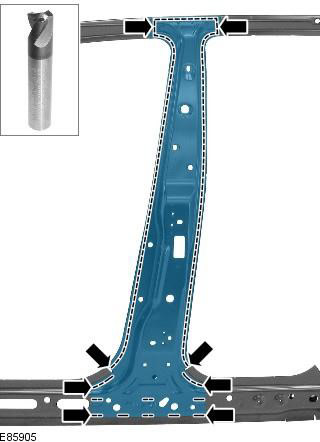
5. Separate the connections and remove the old panel, also disconnect the NVH element.
Installation
1. Remove the B-pillar reinforcement portion from the service panel ring frame. Rout the spot welds using an HSS spot weld drill.
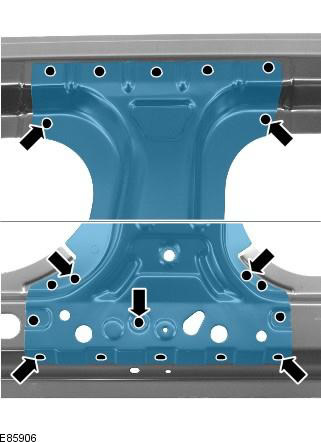
2. Prepare the connecting surfaces of the old and new panels.
3. Apply the new panel and fix it in place. Check the alignment, if correct, proceed to the next step, if not, correct and check again before proceeding to the next step.
4. Remove the new panel.
5. Replace the NVH element if necessary.
6. Apply sealing adhesive to the NVH element.
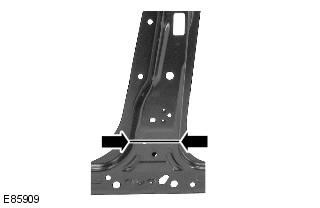
7. Place the new panel and secure it in place.
8. MIG welding.
NOTE: Holes for MIG rivets are made by removing the old panel and separating the panel being serviced.
NOTE: MIG rivets must be installed through the interior panel in the door opening area.
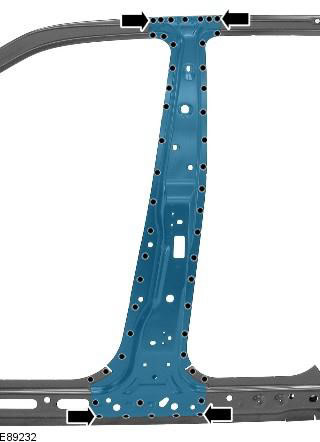
9. Clean all welded joints.
10. To install the relevant panels and mechanical components, perform the removal procedure in reverse order.
Comments on this article