Contents: Removal ⇩ Installation ⇩
Removal
NOTE: This procedure replaces the A-pillar reinforcement along with the A-pillar outer panel.
1. Disconnect both cables from the battery. For more information, refer to Specification.
2. Remove the B-pillar outer panel. For more information, refer to A-Pillar Outer Panel
3. Remove the instrument cluster. For more information, refer to Instrument Cluster - 2.7L Diesel (76.46.23/99)
4.
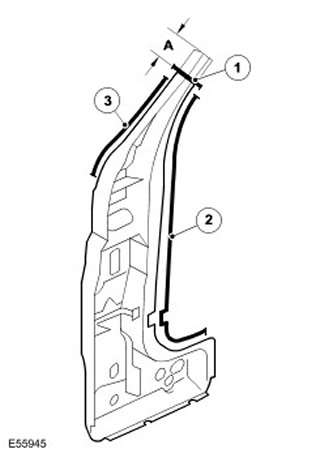
| Item name | Description |
| A | The cutting line runs at a distance of 80 mm (3.149 inches) from the edge of the front body pillar reinforcement. |
| 1 | Butt weld. |
| 2 | 30 spot welds. |
| 3 | 17 spot welds. |
5.
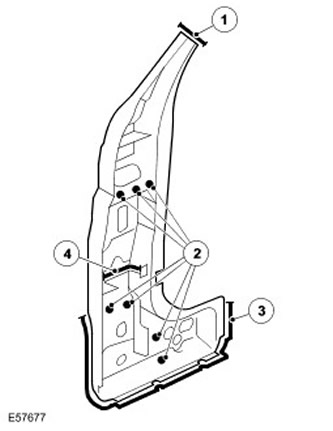
| Item name | Description |
| 1 | Butt weld. |
| 2 | 7 plug welds. |
| 3 | 16 plug welds. |
| 4 | Soundproofing. |
6. Additional information:
- Weld. For more information, see Body Repairs.
- Anti-corrosion protection. For more information, see Anti-corrosion protection.
- Tolerances: For more information, see Body and Frame.
[The original article can be found here: www.LRman.ru]
Installation
1. Installation should be carried out in the reverse order of dismantling.
Comments on this article