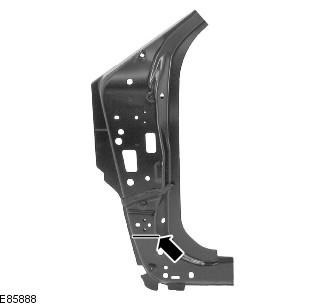
Rack Amplifier "A" made of DP600 steel (duplex steel) and must be welded to the inside of the post using MIG electric rivets. Spot welding should not be used.
Make sure all welded joints are properly sealed and protected from water penetration, especially in areas where the adhesive/seal of the original panel cannot be replicated. Seal joints before installing exterior panels where necessary.
NOTE: Rack Reinforcement "A" rips off "ring frame" side panel amplifier, it is not serviceable separately.
NOTE: NVH elements are attached inside this panel, they are not serviceable on the new panel. If damaged, a new item will be required (s).
Removing
1. Combined with rack reinforcement "A" is replaced by:
- front bumper cover
- Front fender
- Front door
- Dashboard
- Windshield
- Rack outer panel "A"
2. For more information regarding this repair procedure, see: For more information, refer to the chapter: Body and frame (501-26 Body Repairs - Vehicle Special Information and Approval Checks, Description and Operation) / Standard techniques used at the service station (100-00 General information, Description and principle of operation).
3. Remove rack outer panel "A". For more information, see chapter: 'A' Pillar Outer Panel (501-29 Side panel sheet metal repairs, Removal and installation).
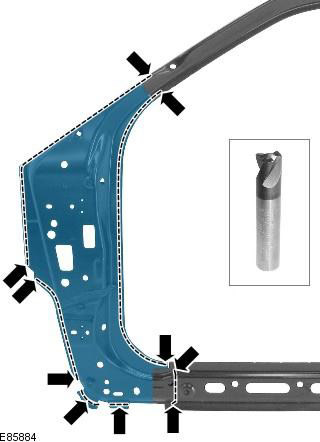
4. Drill out the spot welds, this will require the use of an HSS spot weld drill.
NOTE: Where possible, drill holes in the rack reinforcement "A" and inner rack panel "A" (be aware that the booster is made of DP600 dual phase steel and will require a HSS drill to work with it). This allows, where possible, the installation of MIG electric rivets through the inner panel.
5. Separate the connections and remove the old panel, also disconnect the NVH element.
Installation
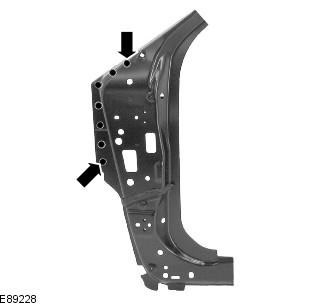
1. Remove the rack reinforcement part "A" from the annular frame of the serviced panel. Drill out the spot welds using the HSS spot weld drill.
2. Drill holes not made during removal for welding with MIG electric rivets.
3. Prepare the connecting surfaces of the old and new panels.
4. Attach the new panel and lock it in place. Check the reconciliation, if correct, go to the next step, if not, correct and check again before proceeding to the next step.
5. Remove the new panel.
6. If necessary, replace the NVH element.
7. Apply sealing adhesive to the NVH element.
8. Attach the new panel and lock it in place.
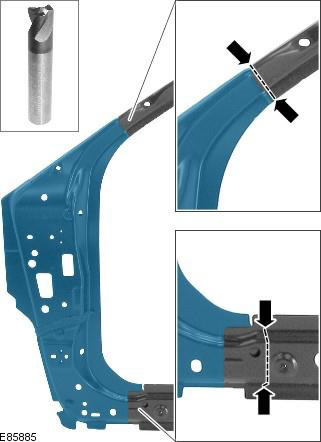
9. Welding with electric MIG rivets.
NOTE: MIG electric rivets should be installed in place of the original spot welds and, where possible, they should extend through the inside of the stud "A".

10. Clean all welds.
11. Reverse the removal procedure to install the appropriate panels and mechanicals.
Comments on this article