Contents: Removal ⇩ Installation ⇩
Removal
Ensure that the SWL Spring Compressor is rated to meet or exceed the spring rate listed in the Specifications section.
Always follow the spring compressor manufacturer's operating instructions.
1. Raise and support the vehicle.
WARNING: Never work on a vehicle supported only by a jack. Always support the vehicle securely.
2. Remove the wheel. Refer to the procedure: Wheel and Tire (204-04 Wheels and Tires, Removal and Installation).
3. Remove the spring element and the shock absorber assembly. Refer to the procedure: Shock Absorber Assembly with Spring (204-01 Front Suspension, Removal and Installation).
4. Install the spring compressor in the vice.
5. Install the shock absorber assembly with the elastic element into the spring compressor.
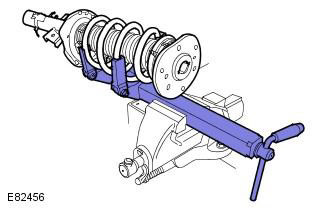
6.
WARNING: Use a new nut.
7. Remove the old spring from the spring compressor.
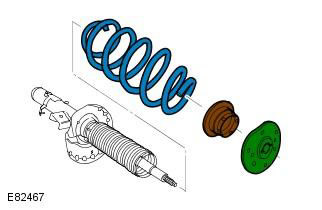
Installation
1. Install a new spring into the compressor and compress it sufficiently.
2. Tightening torque: 80 Nm
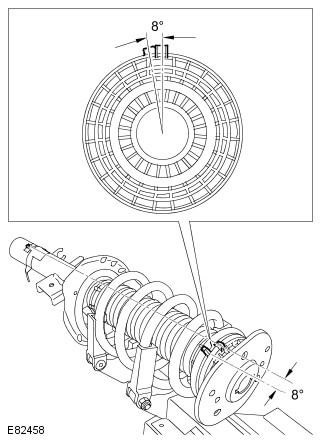
Use a new nut. Be sure to align the timing marks as shown in the illustration.
3. Loosen the compression of the elastic element and shock absorber assembly and remove them from the special tool.
4. Remove the spring compressor from the vice.
5. Install the spring and damper assembly. Refer to the procedure: Shock Absorber and Spring Assembly (204-01 Front Suspension, Removal and Installation).
6. Install the wheel. Refer to the procedure: Wheel and Tire (204-04 Wheels and Tires, Removal and Installation).
Comments on this article