Contents: Dismantling ⇩ Assembly ⇩
Before disconnecting the battery, make sure that all requirements and conditions contained in the section on disconnecting the battery are met.
GENERAL INFORMATION, Precautions when working with electrical equipment.
Dismantling
1. Place the vehicle on a lift.
2. Disconnect the negative battery terminal.
3. Drain the coolant from the engine.
COOLING SYSTEM: V8 engine, ADJUSTMENTS, Draining coolant, flushing the system and filling.
4. Remove the fan protective cover.
COOLING SYSTEM: V8 engine, REPAIR WORK, Viscous fan clutch.
5. Remove the charcoal canister purge solenoid valve.
EMISSION CONTROL SYSTEMS - V8, REPAIR WORK, Fuel vapor canister purge solenoid valve.
6. Release the camshaft position sensor harness from the clamp and remove the clamp from the timing belt cover.
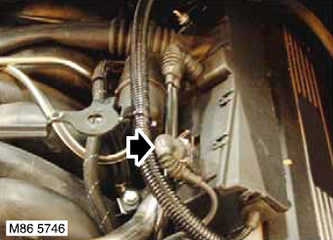
7. Disconnect the connector from the camshaft position sensor.
8. Release the fuel system ventilation hose from the bracket on the timing belt cover.
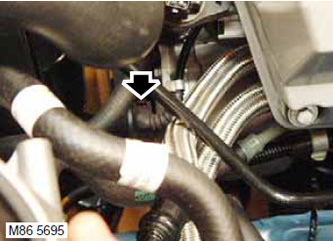
9. Disconnect the connector from the generator.
10. Release the generator harness from the 3 clamps.
11. Remove the valve cover of the left cylinder head.
V8 engine, REPAIR WORK, Left cylinder head valve cover gasket.
12. Remove the left camshaft timing solenoid valve.
V8 Engine, REPAIR WORK, Valve timing control solenoid (VCC). Left cylinder head.
13. Loosen the clamp and disconnect the cooling system hose from the generator.
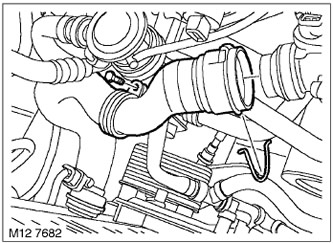
14. Remove the clamp, disconnect the lower radiator hose from the thermostat housing, and unscrew the clamp bolt.
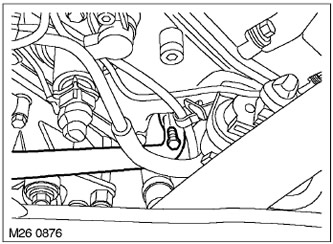
15. Unscrew the bolt securing the afterburner hose to the left cylinder head.
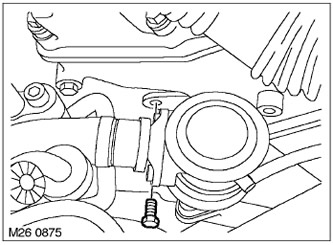
16. Unscrew the bolt securing the afterburner hose to the right cylinder head.
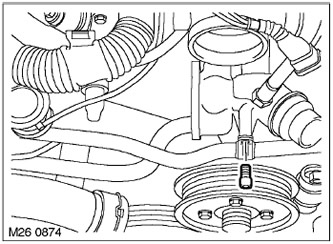
17. Unscrew the bolt securing the clamp that holds the afterburner hose from the cooling system pump.
18. Remove the afterburner hoses from the cylinder heads and set them aside. Discard the sealing rings.
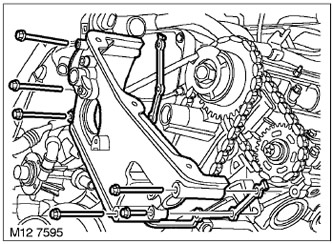
19. Unscrew the 6 bolts securing the timing belt cover to the cylinder head and remove the cover.
20. Discard the timing belt cover gasket.
NOTE: If disassembly was performed only to provide access to other system components, no further disassembly operations should be performed.
21. Unscrew the 2 bolts securing the two brackets on the upper front timing belt cover and remove the brackets.
22. Loosen the camshaft position sensor mounting bolt and remove the sensor.
23. Discard the sealing ring.
Assembly
1. Wipe the camshaft position sensor and mating surfaces.
2. Install a new O-ring onto the camshaft position sensor.
3. Install the camshaft position sensor, screw in the bolt and tighten it to a torque of 10 Nm.
4. Install 2 brackets on the timing belt cover, screw in the bolts and tighten them.
5. Wipe the timing cover and mating surface, pins and pin seats.
6. Install a new timing cover gasket.
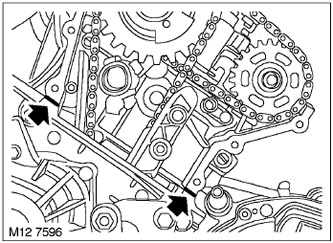
7. Apply STC 50550 sealant to the areas shown in the figure.
8. Insert the lower bolt into the right timing cover and install the cover onto the cylinder head.
NOTE: It will not be possible to insert the lower bolt into the right timing cover after installing the left one.
9. Install the remaining 5 bolts and hand tighten all 6 upper timing belt cover mounting bolts.
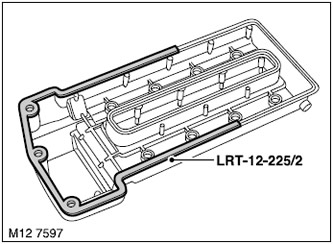
10. Place the LRT-12-225/2 tool on the valve cover of the left cylinder head.
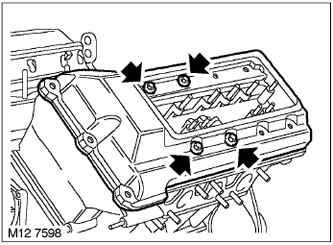
11. Install the valve cover with the mandrel, screw in the 4 bolts and tighten them to a torque of 10 N·m.
12. Tighten the timing belt cover mounting bolts to 15 Nm.
13. Unscrew the 4 valve cover mounting bolts, remove the valve cover with the LRT-12-225/2 mandrel.
14. Install 2 new O-rings on the afterburner hose and position the hose on the engine. Install and tighten the 3 bolts securing the afterburner hose to the engine.
15. Screw the lower radiator hose mounting bolt to the bracket and tighten it.
16. Connect the cooling system hose to the generator and secure it with a clamp.
17. Install the left camshaft timing solenoid valve.
V8 Engine, REPAIR WORK, Valve timing control solenoid (VCC). Left cylinder head.
18. Install the left cylinder head valve cover.
V8 engine, REPAIR WORK, Left cylinder head valve cover gasket.
19. Connect the connector to the generator and secure the generator harness in three clamps.
20. Secure the fuel system ventilation hose to the bracket on the timing belt cover.
21. Connect the connector to the camshaft position sensor.
22. Secure the camshaft position sensor harness to the clamp and secure the clamp to the timing belt cover.
23. Install the fan guard.
COOLING SYSTEM: V8 engine, REPAIR WORK, Viscous fan clutch.
24. Fill the cooling system with coolant.
COOLING SYSTEM: V8 engine, ADJUSTMENTS, Draining coolant, flushing the system and filling.
25. Connect the negative battery terminal.
Comments on this article