Disassembly
1. Remove the torque converter drive plate.
V8 engine, REPAIR WORK, Torque converter drive.
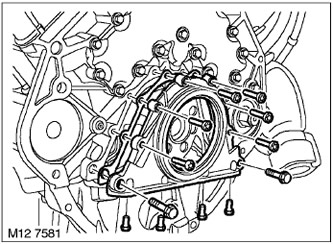
2. Remove 6 bolts (with Torx head) rear oil seal housing and discard the sealing washers.
3. Turn away the remained 6 bolts of fastening of the case of a back epiploon.
4. Carefully separate the rear oil seal housing and remove it.
5. Dispose of the crankshaft rear oil seal housing gasket.
6. Take out a back epiploon of a cranked shaft from the case.
Assembly
1. Wipe the rear seal housing, dowel pins and pin sockets.
2. Wipe the seal seat in the housing and the sealing surface of the crankshaft journal.
3. Wipe the mating surface on the surface of the cylinder block and remove the remnants of the old sealant from the oil pan.
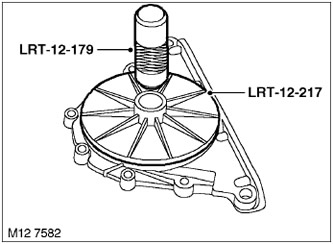
4. Using drifts LRT-12-217 and LRT-12-179, install a new rear oil seal into the oil seal housing.
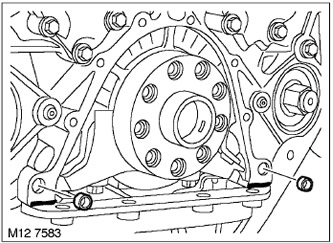
5. Check up position of adjusting shiftt in the block of cylinders.
6. Install a new gasket on the rear oil seal housing.
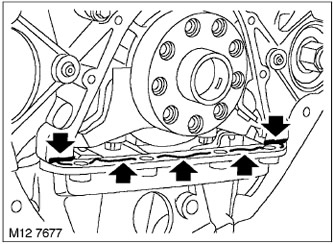
7. Apply sealant to mating surfaces as shown.
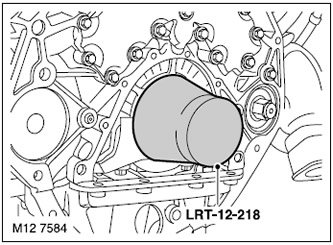
8. Install the LRT-12-218 mandrel on the crankshaft, lubricate the oil seal lip of the rear oil seal with a thin layer of oil, put the oil seal housing over the LRT-12-218 mandrel and remove the LRT-12-218 mandrel.
9. Install on 6 cap screws "Torx" new washers, screw these bolts and 6 bolts of fastening of the case of a back epiploon to the block of cylinders. Tighten the bolts to 12 Nm.
10. Install the torque converter drive plate.
V8 engine, REPAIR WORK, Torque converter drive.
Comments on this article