Removing
1. Remove the rear window motor and regulator assembly. For more information, refer to Power Window Regulator and Rear Door Window Motor (86.25.05)
2.
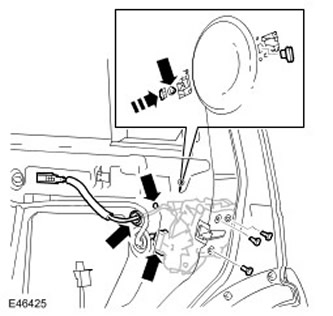
CAUTION: Release the outside door handle and the screw cover clips inside the door.
Remove the outer rear door handle. For more information refer to Tailgate Exterior Handle (76.58.02)
3. Release the door lock control cable. Release the sealing sleeve.
4. Release the outside door handle mechanism.
- Remove 2 Torx head screws.
- Remove lock pin.
- Disconnect the electrical connector.
- Remove 3 Torx head screws.
6.
NOTE: Do not proceed with further disassembly if the part is being removed only for access.
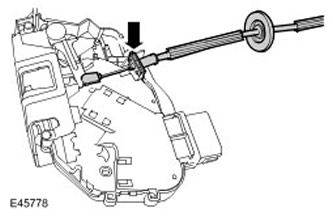
Remove the door lock cable.
- Disconnect the cable from the stop bracket.
- Remove cable from lever.
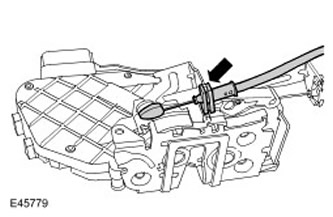
7. Disconnect the outer door handle mechanism cable from the door lock.
- Disconnect the cable from the stop bracket.
- Remove cable from lever.
Installation
1. Connect the outside door handle mechanism cable to the door lock.
- Attach the cable to the lever.
- Attach the cable to the stop bracket.
- Attach the cable to the lever.
- Attach the cable to the stop bracket.
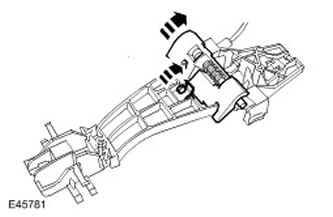
- Turn the lever.
- Engage the shank.
4. Install the front door lock assembly.
- Tighten Torx Head Screws (tightening torque 10 Nm).
- Connect the electrical connector.
- Place the mechanism in the door.
- Insert lock pin.
- Insert and tighten Torx head screws.
7. Establish the external handle of a forward door. For more information refer to Tailgate Exterior Handle (76.58.02)
8. Install the rear window motor and regulator assembly. For more information, refer to Power Window Regulator and Rear Door Window Motor (86.25.05)
Comments on this article