Examination
1. Open the hood.
2. Disconnect "negative" battery terminal.
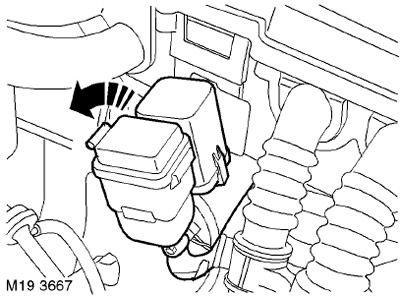
3. Remove the relay and fuse box from the mounting box and move them aside to provide access.
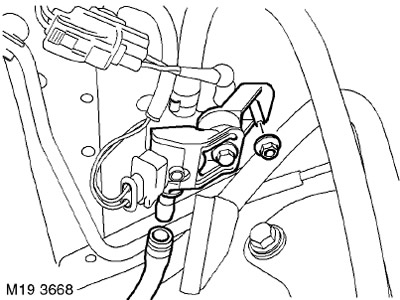
4. Prior to May 2004: Remove the nut securing the fuel pressure sensor to the body mudguard.
5. Wipe the fuel pressure sensor.
6. Lay out a rag to catch spilled fuel.
7. Disconnect the fuel tube from the pressure sensor.
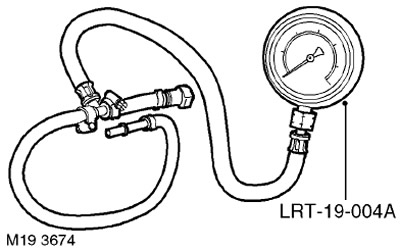
8. Assemble tool LRT-19-004A as shown.
NOTE: The main pressure measurement kit was issued under part number LRT-19-004. In addition to it, a set of devices LRT-19-004X was produced, corresponding to the changes made to the engine design. A completely redesigned fuel pressure test kit is currently being produced with part number LRT-19-004A.
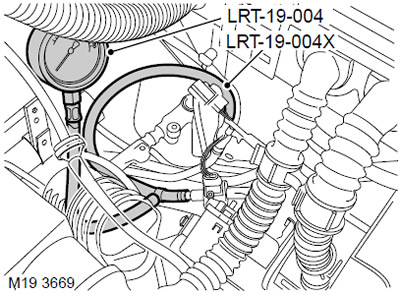
9. Attach tool LRT-19-004A to pressure sensor and fuel line.
10. Attach "negative" battery terminal.
11. Insert the key into the ignition switch and turn it to position II.
12. Keeping the key in position II, record the pressure gauge readings. If the fuel pressure is below the allowable value (2.5±0.1 bar, at 11.5±0.1 V, at 20°C±5°C), then replace the boost pump.
13. Turn off the ignition and remove the key from the lock.
14. Disconnect "negative" battery terminal.
15. Lay out a rag to collect escaping fuel.
16. When the pressure gauge needle approaches zero on the scale, you can disconnect the tool from the fuel pump.
17. Connect the fuel pipe to the pressure sensor.
18. Prior to May 2004: Install the fuel pressure sensor nut to the body mudguard.
19. Install the relay and fuse block on the bracket located on the mounting box.
20. Attach "negative" battery terminal.
Comments on this article