Dismantling
1. Disconnect "negative" battery terminal.
WARNING: Fuel vapors are highly flammable and in an enclosed area are also toxic and explosive. When working with fuel, it is necessary to have a foam type, carbon dioxide fire extinguisher at hand (CO2), gas or powder.
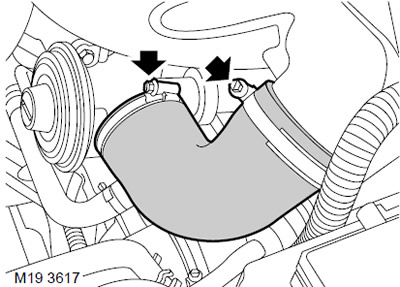
2. Loosen the 2 clamps and remove the air hose connecting the inlet to the EGR valve.
CAUTION: Always plug fittings and openings to keep dirt out of the system.
3. Lay a rag around the fuel pipes to catch any escaping fuel.
CAUTION: Fuel leakage is inevitable during this operation. Take safety precautions to prevent fire or explosion.
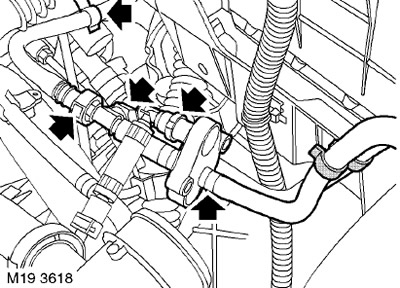
4. Release the inlet hose of the fuel cooling heat exchanger from the clamp.
5. Release the fuel drain hose to the tank from the clamp.
6. Disconnect 3 fuel hoses from the bimetallic valve.
CAUTION: Before disconnecting or removing system components, make sure that the surfaces adjacent to the connection points are free of dirt. Install plugs in fittings and piping to keep dirt out of the system.
7. Remove and dispose of the clamp that secures the fuel heat exchanger inlet hose to the bimetallic valve.
8. Disconnect the fuel heat exchanger hose from the bimetallic valve and remove the valve.
Installation
1. Wipe the bimetal valve and hose connections.
2. Attach the valve to the fuel heat exchanger hose and secure with a new clamp.
3. Attach 3 fuel hoses to the bimetal valve.
4. Secure the inlet hose of the fuel cooling heat exchanger to the support clamp.
5. Fasten the fuel drain hose to the tank in the support clamp.
6. Install the air hose to the recirculation valve and secure it with clamps.
7. Attach "negative" battery terminal.
Comments on this article