Contents: Removal ⇩ Installation ⇩
NOTE: The rear inner panel assembly is serviced as a separate weld-on panel.
NOTE: The panel is serviceable without its weld studs.
NOTE: This panel contains NVH components; they are not serviceable on a new panel. If damaged, new elements will be required.
NOTE: To gain access for removal and installation of the inner tailgate panel, the tailgate panel and both taillight support panels must be removed.
Removal
1. When replacing the rear inner panel assembly, the following elements are removed:
- Rear bumper trim
- Rear bumper mount
- Tail panel
- Support panels for both rear lights
2. For additional information on this repair procedure, refer to the following sources: For additional information, refer to: Body and Frame (501-26 Body Repairs - Vehicle Specific Information and Tolerance Checks, Description and Operation) / Standard Service Station Techniques (100-00 General Information, Description and Operation).
3. Remove the support panels for both rear lights. For more information, refer to the chapter: Rear Light Mounting Panel (501-30 Rear Sheet Metal Repairs, Removal and Installation).
4. Remove the rear panel. For more information, refer to the chapter: Back Panel Assembly (501-30, Removal and Installation).
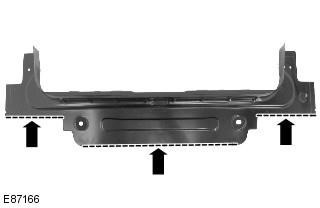
5. Cut away the old panel in the areas shown to allow easier access to the spot welds.
6. Mill out the contact welding areas.
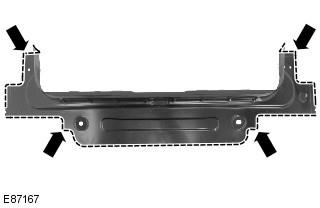
7. Disconnect the connections and remove the old panel, also releasing the NVH elements.
Installation
1. Prepare the mating surfaces of the old and new panels.
Information obtained from the website: www.lrman.ru
2. Position the new panel in the desired location and secure it in place. Check the alignment. If it is correct, proceed to the next step. If not, make the necessary adjustments and recheck before continuing.
3. Remove the new panel.
4. Apply glue to the areas shown.
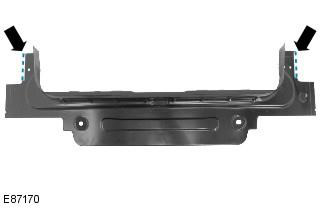
5. Replace NVH components if necessary.
6. Apply adhesive to NVH elements.
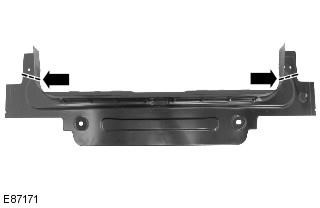
7. Place the new panel in the required location and secure it.
8. Perform spot welding.
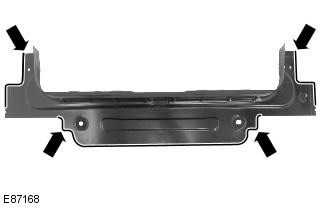
9. Perform electric rivet welding using MIG technology.
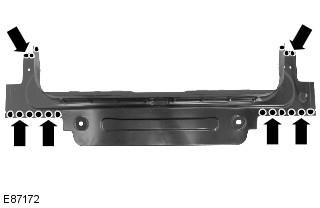
10. Install weld studs.
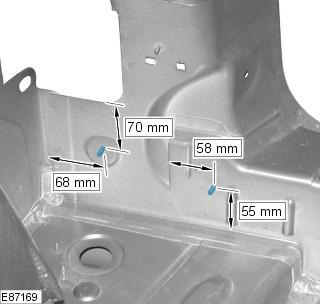
11. Clean all welds.
12. Installation of the relevant panels and mechanical elements is carried out in the reverse order of removal.
Comments on this article