Contents: Removal ⇩ Installation ⇩
To replace the windshield you will need:.
- Wire with handles for cutting seals.
- Glass replacement repair kit.
- Sealant injection gun.
- Vacuum glass remover.
Note: The adhesive sealant dries for 6-8 hours.
Attention: the glass installation procedure must be completed within 90 minutes, otherwise the seal will oxidize.
Attention: if there are traces of corrosion on the body opening, treat the body with an anti-corrosion solution and repaint the opening flanging. Glass installation is carried out no earlier than 8 hours after painting.
Note: Windshield heater connector (if installed) located behind the concave air intake panel.
Removal
1. Remove the wiper arms.
2. Remove the rearview mirror from the glass.
3. Remove the decorative trim from the A-pillar.
4. Put the protective cover on the front panel, seal the "A" pillar with adhesive tape.
5. Detach one edge of the lower decorative insert from the glass and pull out the insert.
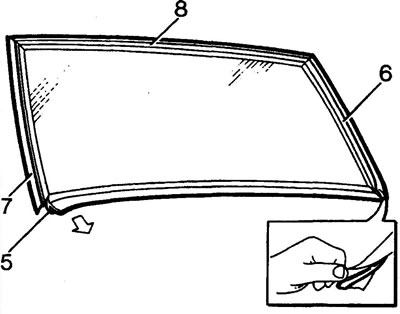
6. Similarly, remove the decorative insert of the left A-pillar.
7. Similarly, remove the decorative insert of the right A-pillar.
8. Remove the upper decorative insert in the same way.
9. To protect the paintwork, apply masking tape around the glass.
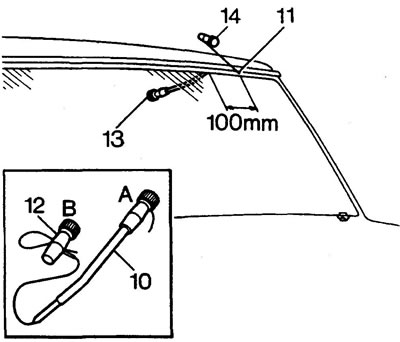
10. Secure the wire of the seal cut into the handle "A".
11. Pass the wire through the seal from the inside of the passenger compartment at a distance of approximately 100 mm from the top corner. If necessary, pierce the seal with an awl.
12. Connect the wire to handle "B".
13. With the help of an assistant inside the car: install the handle pipe "A" 100 mm from the puncture point of the seal (create a wire stop).
14. From the outside of the vehicle: cut off 100 mm of the seal by pulling handle "B". Repeat steps 13 and 14.
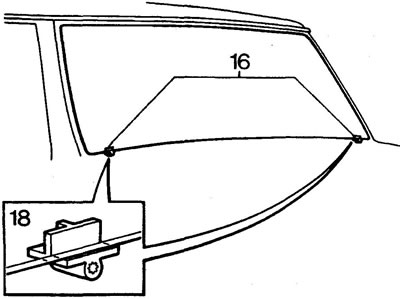
Caution: Work carefully in the corners of the glass, especially the lower ones, where the stops are installed, see point 18. Do not cut the stops.
15. Move the wire between the stops, cut off the seal at the bottom of the glass.
16. If the windshield has electrical heating: the wires are located on each side of the stop.
17. Install a vacuum puller on the glass and remove the glass. If necessary, trim the seal around the stops.
Caution: If glass is broken, wear safety glasses when removing the shards.
Installation
18. Check the condition of the glass stops, replace if necessary. The mounting pins must be positioned at right angles to the body flanging.
19. Carefully remove the remains of the old seal from the body flanging; the flanging thickness is 2 mm.
20. If old glass is installed, it should not have chips on the edges. Remove any remaining old sealant.
Caution: Place the glass on a soft surface, do not place it on the edge.
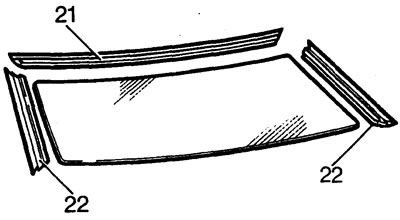
21. Install the upper decorative insert onto the glass, tap the insert with a wooden hammer to ensure a tight fit of the insert.
22. Install the side decorative inserts onto the glass, tap the inserts with a wooden hammer to ensure a tight fit of the inserts.
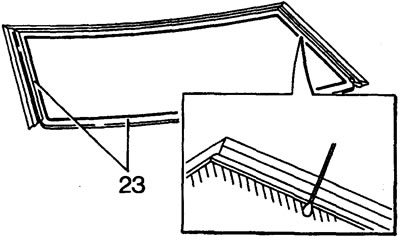
23. Use a cotton swab to degrease with the solvent from the repair kit (bottle with a yellow cap) glass surface with a 20 mm strip near the inserts and a 30 mm strip at the bottom edge. Immediately wipe the glass with a clean cloth.
Caution: Do not touch the degreased surface with your fingers.
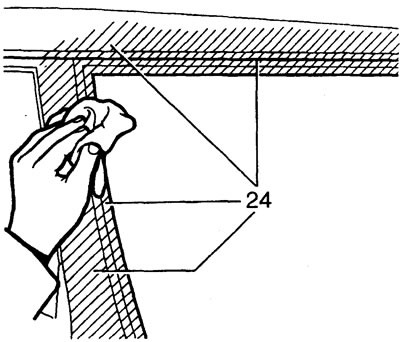
24. Clean the surfaces of the body flanging and decorative inserts.
The original text was published on the website (lrman.ru)
25. Shake the bottle with primer for at least 30 seconds.
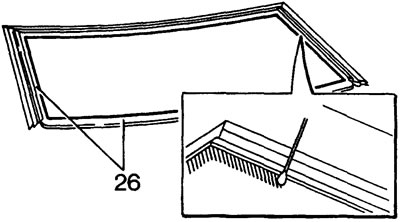
26. Apply primer with a cotton swab (bottle with a green cap) on the inner surface of the glass with a 20 mm strip around the inserts and a 30 mm strip along the bottom edge of the glass. Let dry before applying glue.
27. Remove the protective coverings and adhesive tape.
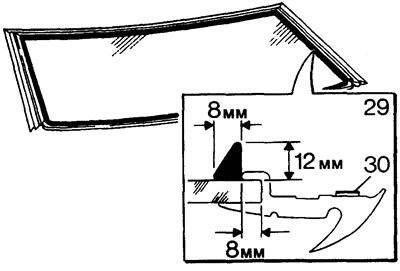
28. Prepare the tube of sealing glue for work, install it in the gun.
29. Apply the sealant in a continuous bead to the glass as shown in the figure.
30. Remove the protective coating from the sealing edge of the insert.
31. With the help of an assistant, install the guides on the glass. Align the guide indicators with the supports.
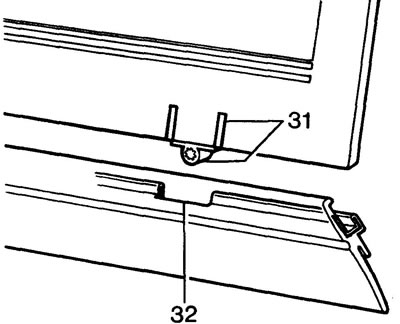
Note: Later models do not have the cutouts shown in the picture.
32. Align the cutouts with the supports and firmly place the insert on the glass. Tap the insert with a wooden mallet.
33. Install the A-pillar trim and rearview mirror.
34. Install the wiper blades.
Comments on this article