Removing
NOTE: If the cover on the hood latch panel is damaged or scratched, it must be repaired with the recommended compound. For more information refer to Specification.
1. Disconnect the wire "masses" battery. For more information refer to Specification.
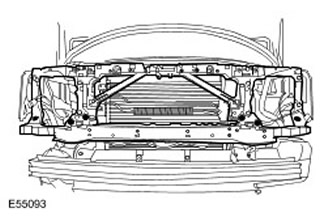
2. Remove the front bumper. For more information refer to Front Bumper (76.22.49)
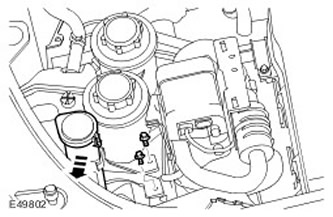
3. Loosen the power steering fluid reservoir and move the reservoir to the side.
- Release the clamp.

4. Release the washer reservoir filler neck from the clip on the coolant reservoir.
5. Turn out 2 bolts of fastening of a broad tank of a cooling liquid.
6. Remove a broad tank of a cooling liquid.
- Raise the coolant expansion tank vertically.
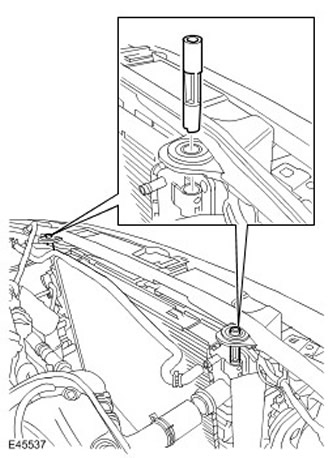
7. Remove the radiator mounting pins.
8. Disconnect the hood latch cable from the junction box.
9.
NOTE: Note the position in which the part is installed.
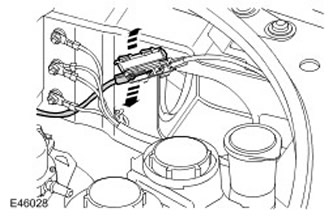
Release the wiring harness.
- Disconnect 3 electrical connectors.
- Release 9 clips.
- Release the sealing sleeve.
- Carefully move the wiring harness to the side and tie it.
10. Remove the top panel fastener.
- Remove 4 Torx head screws.
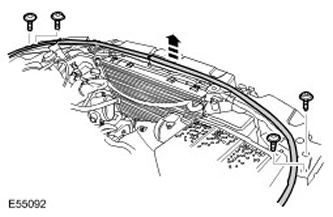
11. Remove the bottom fastener of the panel.
- Remove 6 Torx head screws.
12.
NOTE: Note the position in which the part is installed.
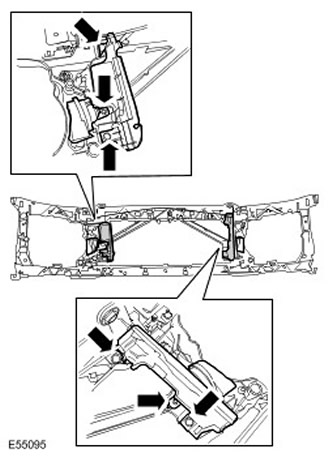
With assistance, remove the hood latch panel.
13. Remove the 6 spacers, noting their position.
- Remove 2 clips.

14.
NOTE: Do not proceed with further disassembly if the part is being removed only for access.
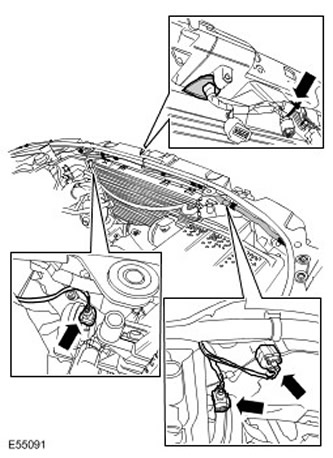
Remove 2 horn assemblies.
- Remove 2 air deflectors.
- Remove 2 Torx head screws.
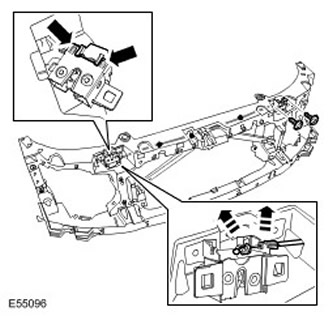
15. Remove the hood switch.
- Remove 2 Torx head screws.
- Release 2 clips.
- Release and remove the cable.
- Remove 2 Torx head screws.
Installation
1. Install the horn assembly.
- Install air deflectors.
- Screw in and tighten the bolts (tightening torque 10 Nm).
- Tighten Torx Head Bolts (tightening torque 10 Nm).
- Connect the hood release cable.
- Install the hood switch.
- Tighten Torx Head Bolts (tightening torque 10 Nm).
- Install clamps.
- NOTE: Align the parts according to their original position.
With assistance, install the hood latch panel.
6. Install the panel fasteners.
- Screw in and tighten the bolts (tightening torque 25 Nm).
NOTE: Align the parts according to their original position.
Install the wiring harness.
- Connect and fix the electrical connector.
- Fasten the clamps securely.
9. Establish pins of fastening of a radiator.
10. Install the coolant expansion tank.
- Install the coolant expansion tank in its original place, aligning the bushing and lug.
- Screw in and tighten the bolts (tightening torque 10 Nm).
- Engage clamp.
- Install the tank in place and secure it to the bracket.
14. Open and close the hood to check latch operation.
15. Adjust both hood latches.
- Loosen the 4 Torx bolts securing the hood latch.
- Lower the hood and check that it is in the correct position.
- Open the hood and tighten the Torx bolts (tightening torque 10 Nm).
- Check the operation of the hood safety lock.
- Repeat the adjustment procedure if necessary.
Comments on this article