Contents: Removal ⇩ Installation ⇩
Removal
1. Remove the brake booster. For more information, refer to Brake Booster (70.50.01)
2. Remove the headlight switch. For more information, refer to Headlight Switch (86.65.09)
3. Remove the decorative panel from the driver's side.
- Release the clamp.
- Remove 2 screws.
- Disconnect the electrical connector.
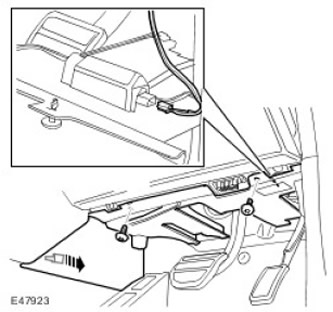
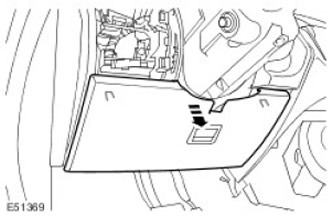
4. Remove the instrument panel access panel. Release the 2 clips.
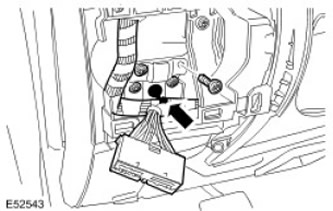
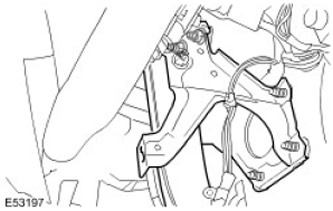
5. Remove the brake pedal bracket.
- Disconnect the wiring harness clamp.
- Remove 4 Torx bolts.
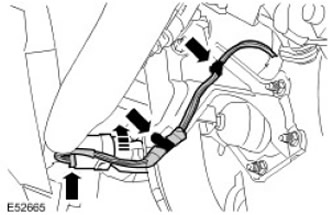
6. Disconnect the brake light wiring harness.
- Disconnect the electrical connector.
- Release the 2 clamps.
8. Remove the clutch pedal spring assist mechanism.
9. Remove the clutch master cylinder.
- Release the clutch master cylinder fork pin.
- Unscrew 2 nuts.
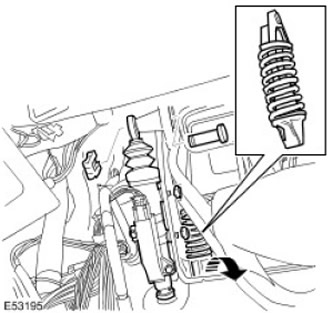
10. Remove the pedal assembly. Unscrew the 2 nuts.
11.
NOTE: Do not perform further disassembly if the part is removed only for access.
Remove the brake pedal cover.
12. Remove the clutch pedal cover.
13. Remove the pedals.
- Carefully release the spring tension.
- Remove the bolt and discard the nut.
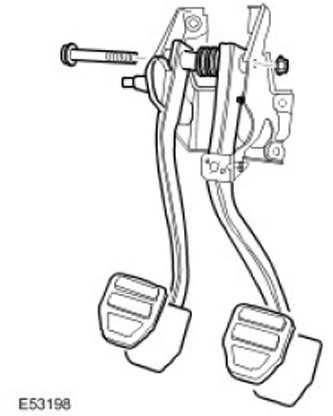
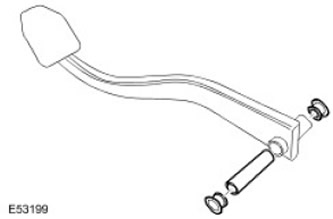
14. Remove the 3 pedal bushings.
Installation
1. Install the bushing.
- Clean the contact surfaces of the parts.
- Lubricate the parts.
- Install the tension spring.
- Tighten the nut and bolt to a torque of 45 Nm.
4. Install the brake pedal pad.
5. Install the brake light switch.
6. Install the pedal assembly. Tighten the nuts to a torque of 25 Nm.
7. Install the clutch master cylinder.
- Tighten the nuts to a torque of 10 Nm.
- Install the fork pin.
9. Secure the wiring harness.
- Secure the clamps.
- Connect the electrical connector.
- Tighten the Torx bolt to 10 Nm.
- Secure the wiring harness.
12. Install the decorative panel.
- Connect the electrical connector.
- Secure the clamp.
- Tighten the screws.
14. Install the brake booster. For more information, refer to Brake Booster.
Comments on this article