Contents: Removal ⇩ Installation ⇩
Removal
CAUTION: Do not carry or use a cellular telephone when working on or near any fuel related parts. Risk of ignition of flammable vapors. Failure to follow these instructions may result in personal injury.
CAUTION: Some fuel will inevitably spill during this operation. Make sure that all necessary precautions are taken to prevent fire and explosion.
1.
CAUTION: Never work on a vehicle supported solely by a jack. Always support the vehicle securely.
Place the car on a lift.
2. Disconnect the ground cable from the battery. For more information, refer to Specification.
3. Drain the fuel from the fuel tank. For more information, refer to Draining the Fuel Tank (19.55.02)
4. Remove the right rear wheel.
5. Remove the fender molding. For more information, refer to Rear Side Panel Molding (76.43.55)
6. Remove the wing splash guard.
- Remove 2 screws.
- Remove 6 fasteners.
- Disconnect the electrical connector.
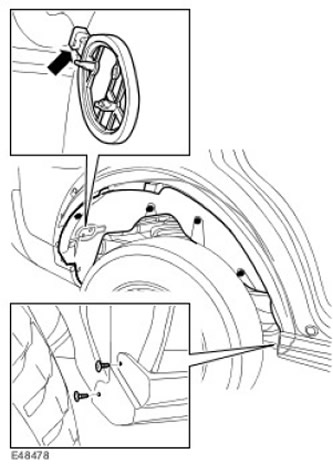
7. Remove the fuel filler cap. For more information, refer to Fuel Filler Cap Assembly (19.55.04)
[Data taken from the website: lrman.ru]
8. Remove the spare wheel.
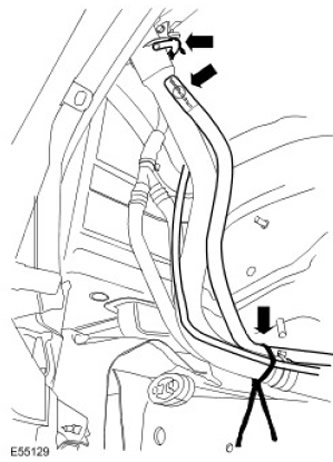
9. Disconnect the breather tubes.
- Remove the clamp.
- Release the 2 clamps.
- Remove and discard cable ties.
10.
CAUTION: Before disconnecting or removing any components, ensure that the area around mating surfaces and connections is clean. To avoid contamination of the system, cover all open connections.
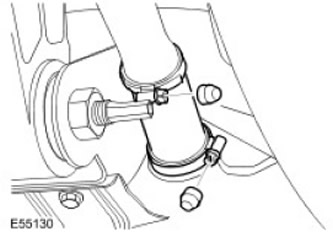
Disconnect the filler neck from the fuel tank.
- Remove the tamper-proof cover.
- Remove and discard the hose clamp.
- Remove the tamper-proof cover.
- Remove and discard the hose clamp.
12.
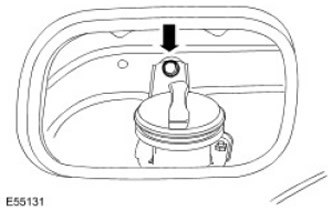
NOTE: Mark the installation position.
Remove the fuel tank filler neck. Unscrew the bolt.
Installation
1. Install the filler neck connecting hose. Install a new tamper-proof clamp.
2.
NOTE: Align the parts in the positions marked during removal.
Install the fuel tank filler neck. Insert and tighten the bolt. (tightening torque 10 Nm).
3.
CAUTION: Tighten the new burglar-proof clamp until the hex head shears off.
Connect the fuel tank filler neck. Install a new clamp.
4. Connect the breather tubes. Secure the clamps.
5. Install the fuel filler cap. For more information, refer to Fuel Filler Cap Assembly (19.55.04)
6. Install the wing splash guard.
7. Install the fender molding. For more information, refer to Rear Side Panel Molding (76.43.55)
8. Install the wheel.
9. Install the spare tire.
10. Fill the fuel tank with fuel.
11. Connect the ground cable to the battery. For more information, refer to Specification.
Comments on this article