Contents: Sealing of welded seams of the lower…⇩ Sealing the joints of the rear wheel…⇩ Sealing of joints on the hood and…⇩ Sealing the joints of the door seal…⇩ Fuel filler neck and roof joint seal…⇩ Fuel filler neck and roof joint seal…⇩ Sealing the joints of the front…⇩ Sealing of the joints of the car…⇩ Sealing of the joints of the car…⇩
During factory body assembly, a PVC-based sealant is applied to some weld areas while still hot. This material is not intended for use in body repairs and should be replaced with a suitable sealant for load-bearing body elements.
The weld areas where the sealant coating is applied during factory assembly are detailed in the following figures.
The joint sealant is applied after the primer layer, but before the surface treatment and the top coat of paint. The joint sealant should form a continuous bead, the profile of which depends on the type of joint. If the sealant material is applied with a brush, be especially careful that the entire surface of the joint is treated.
If you need to shape the coating layer, use a cloth dampened with a solvent such as white spirit or Shell SBP3.
Ensure that ALL accessible repair welds are sealed during repair. When body damage occurs, the components located far from the impact point are often subject to deformation. As a result, the sealant coating in these areas can be damaged during the repair and repair process. Inspect all welds in areas adjacent to the components being repaired for damage to the coating, then remove any damaged or cracked coating and apply fresh coating according to the following procedure:
- Clean the damaged area of the coating and etch the cleaned metal surface with a suitable phosphate primer.
- Treat the damaged surface with an acid primer.
- Apply a suitable layer of sealant.
- Apply a suitable paint coat and a coat of underbody sealant.
If the seams are located in a hard-to-reach place, then during the assembly or installation of the parts, treat the joints with a paste sealant. Some seam areas become inaccessible after the repair is completed. In such cases, apply the seam sealant and paint coating before completing the assembly.
If access permits, apply sealant to both sides of the repair weld. If the weld is accessible only from one side (as in box section welding), treat the closed cavity with a sealant for closed cavities.
Sealing of welded seams of the lower part of the car
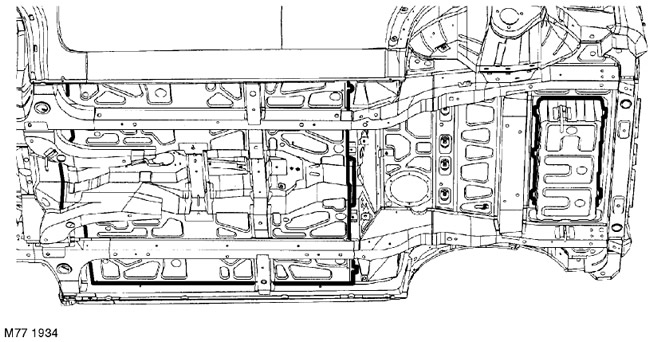
The joints of the parts located symmetrically to those shown in the figure are also subject to processing.
Sealing the joints of the rear wheel arch
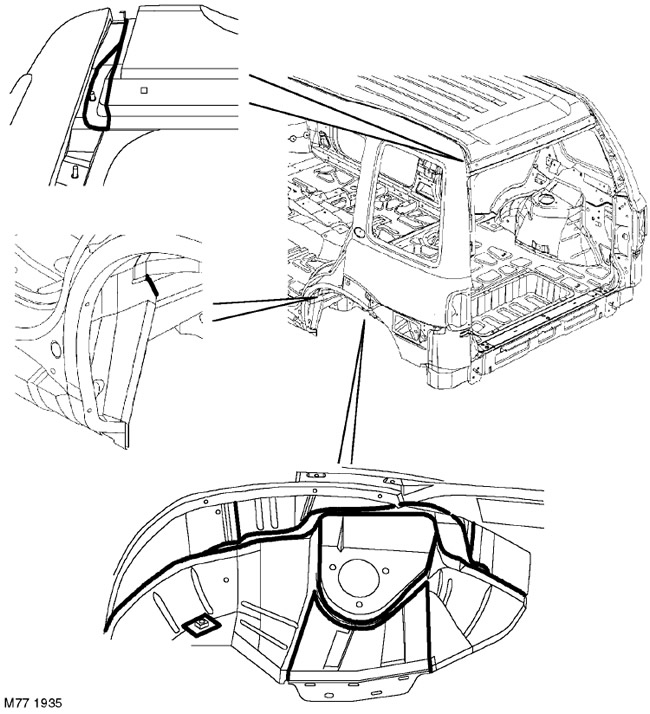
The joints of the parts located symmetrically to those shown in the figure are also subject to processing.
Sealing of joints on the hood and doors
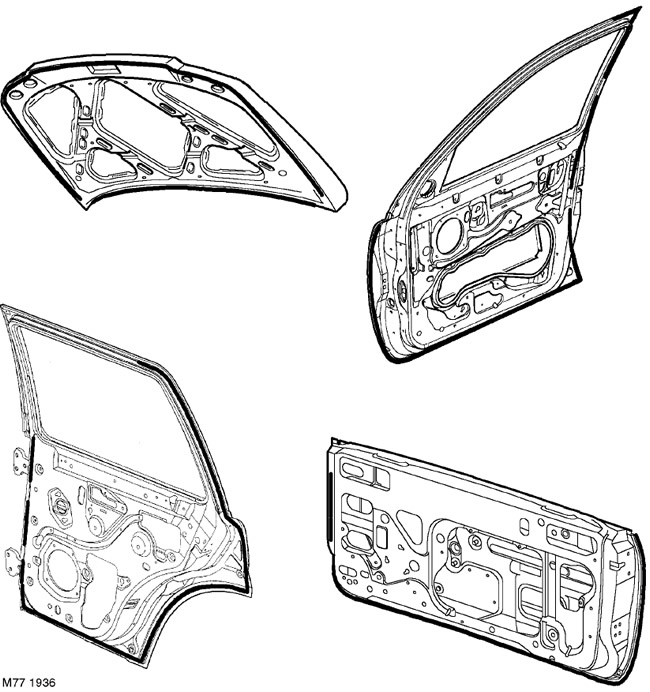
Joints of parts located symmetrically to those shown in the figure are also subject to treatment. The figure shows the front door of the 5-door version of the body, the front door of the 3-door version is identical. The drainage holes at the bottom of the doors must not be blocked by sealing material.
Sealing the joints of the door seal grooves
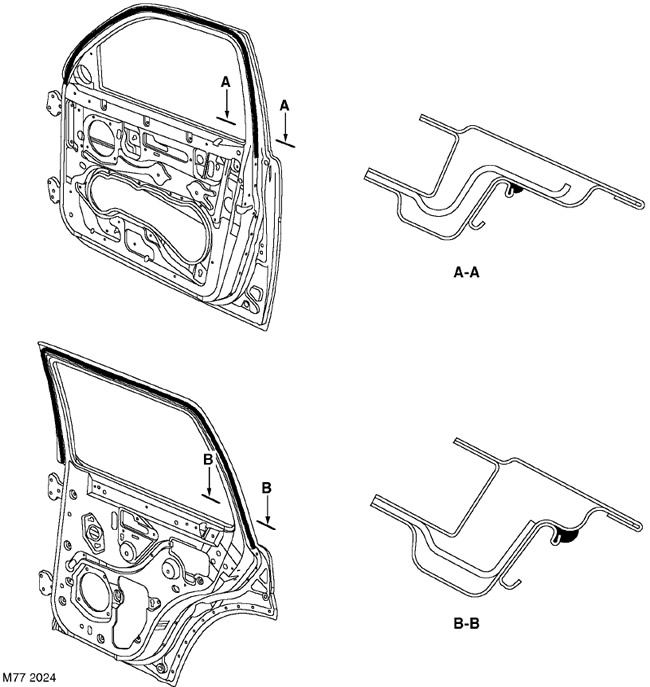
The joints of the parts located symmetrically to those shown in the figure are also subject to processing.
Fuel filler neck and roof joint seal - 3-door version
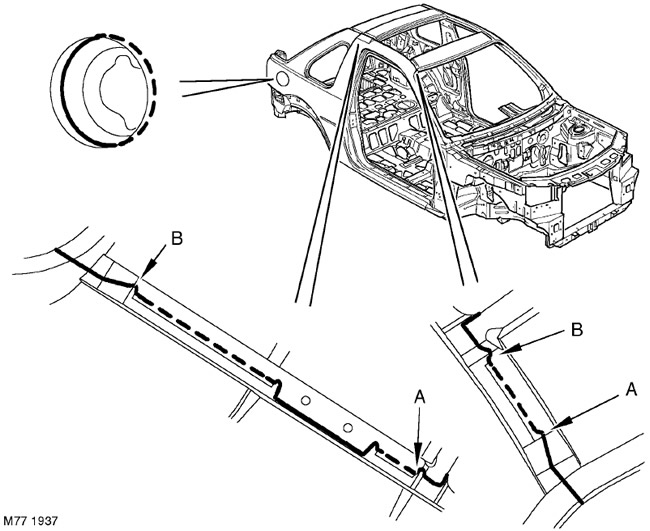
Joints of parts located symmetrically to those shown in the figure are also subject to treatment. At roof joints, the sealant must be leveled flush with the surface in front of points "A" and behind points "B".
Fuel filler neck and roof joint seal - 5-door version
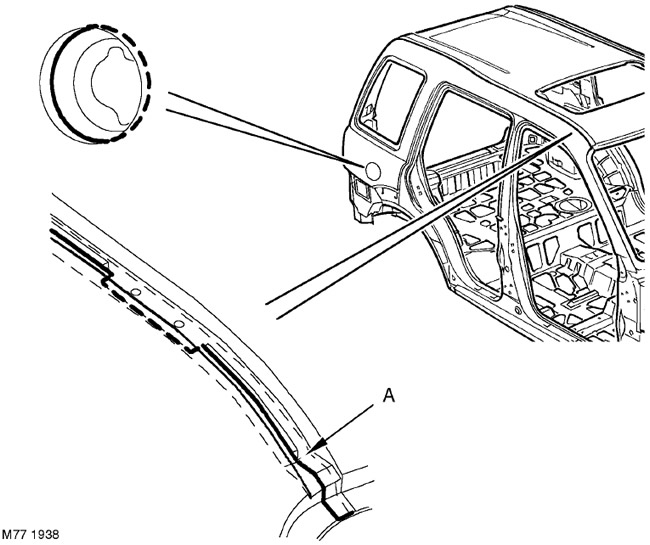
Joints of parts located symmetrically to those shown in the figure are also subject to treatment. At roof joints, the sealant must be leveled flush with the surface in front of point "A".
Sealing the joints of the front wheel arch, engine compartment and windshield opening cross member
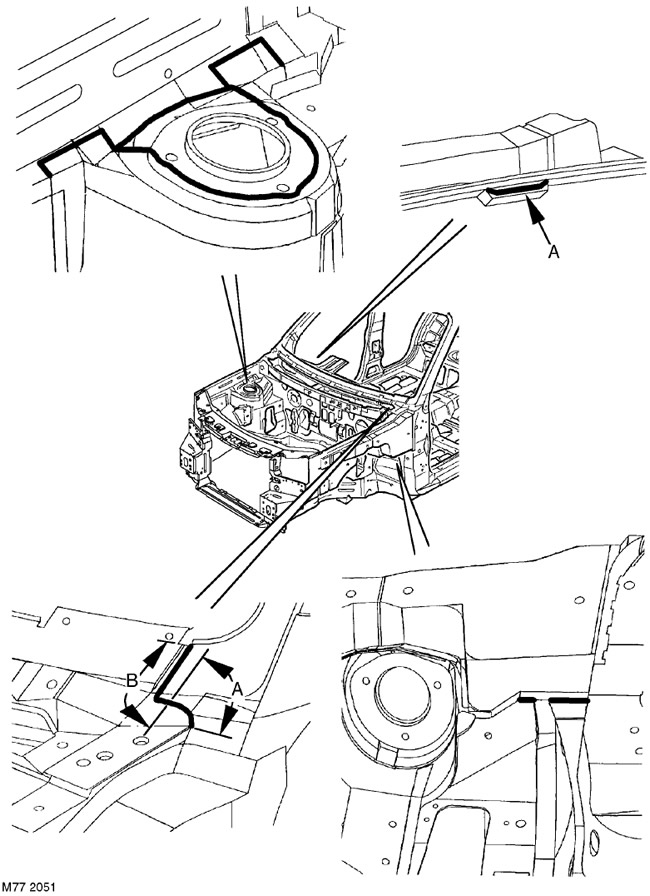
The joints of the parts located symmetrically to those shown in the figure are also subject to processing. Apply putty to the joints marked "A". On the cross member of the windshield opening, the sealant must be flush with the adjacent surfaces along the length "B". When processing the columns of the front suspension struts, the mounting holes for fastening the shock absorber strut must remain open.
Sealing of the joints of the car interior and the rear part of the body - 3-door version
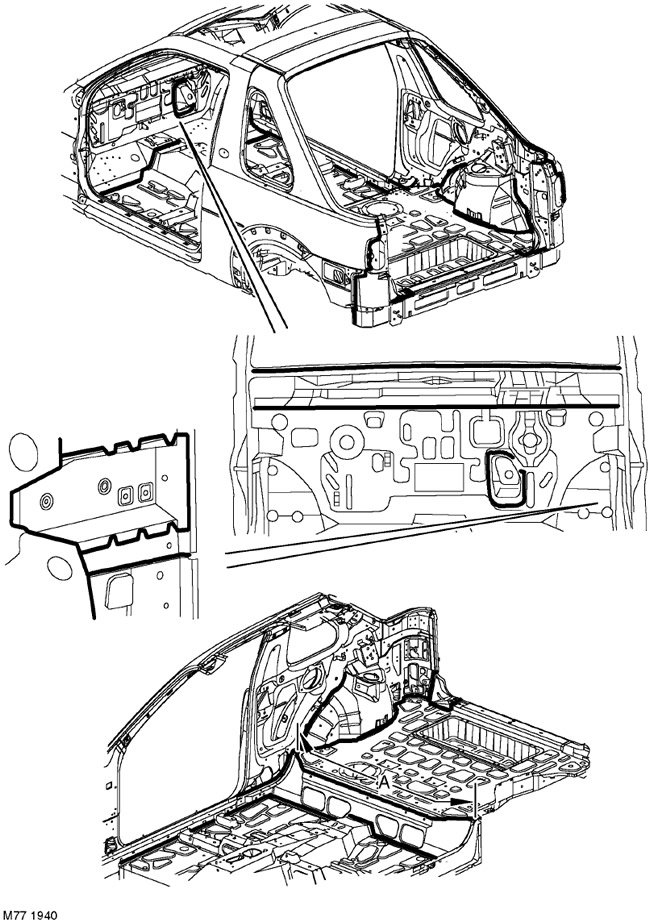
The joints of the parts located symmetrically to those shown in the figure are also subject to treatment. On the length "A" the sealing compound must be smoothed out (at the junction of the luggage compartment floor with the rear cross member of the subframe).
Sealing of the joints of the car interior and the rear part of the body - 5-door version
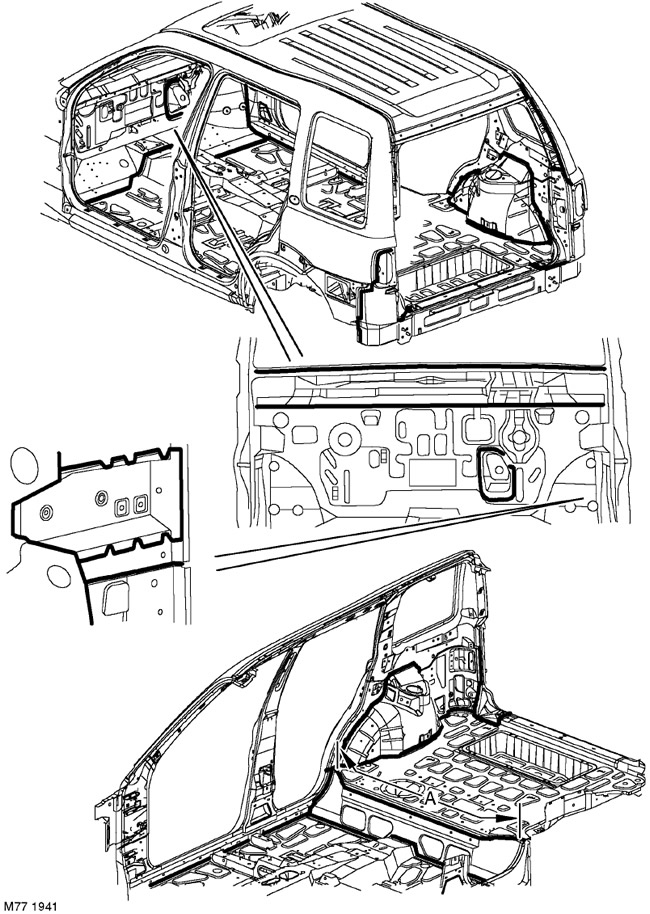
The joints of the parts located symmetrically to those shown in the figure are also subject to treatment. On the length "A" the sealing compound must be smoothed out (at the junction of the luggage compartment floor with the rear cross member of the subframe).
Comments on this article