Contents: Removal ⇩ Installation ⇩
NOTE: The rear panel is serviced as a separate weld-on panel and includes the bumper mounting bracket.
NOTE: It is necessary to remove sections of both tail light mounting panels to allow removal and installation of the rear panel (if the rear panel is not removed with the tail light mounting panel).
Removal
1. In combination with the rear panel, replaces:
- Rear bumper trim
- Rear bumper
2. For additional information regarding this repair procedure, refer to: For additional information, refer to: Body and Frame (501-26 Body Repairs - Special Vehicle Information and Tolerance Checks, Description and Operation) / Standard Service Station Techniques (100-00 General Information, Description and Operation).
3. Remove the rear bumper. For more information, refer to the chapter: Rear Bumper (501-19 Bumpers, Removal and Installation).
4. Remove the left and right bumper holder guides.
5. Remove the tailgate opening seal.
6. Remove the rear panel trim.
7. Remove the right and left rear quarter panel interior trim. For more information, refer to the chapter: Rear Quarter Body Trim Panel (501-05 Interior Trim, Removal and Installation).
8. Remove the left and right exhaust grilles.
9. Remove the spare wheel.
10. Remove the subwoofer amplifier. For more information, refer to the chapter: Subwoofer amplifier (415-01 Infotainment system, Removal and installation).
11. Remove the exhaust system. For additional information, refer to the chapter: Exhaust System (309-00A Exhaust System - 3.2L NA - I6, Removal and Installation).
12. Remove the floor panel exhaust system heat shield.
13. Remove the left and right wheels. For more information, refer to the chapter: Wheel and tire (204-04 Wheels and tires, Removal and installation).
14. Release and place aside the insulating material from the rear panel.
15. Release and position aside the rear panel wiring harness.
16. Cut each rear mounting panel as shown.
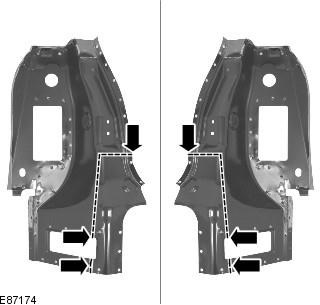
17. Mill out the weld spots.
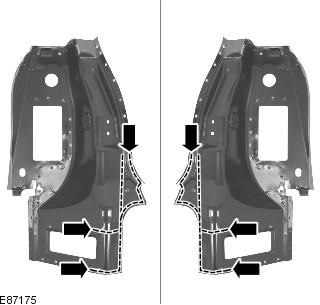
18. Separate the connections and remove the tail light mounting panel sections, save the sections for reinstallation.
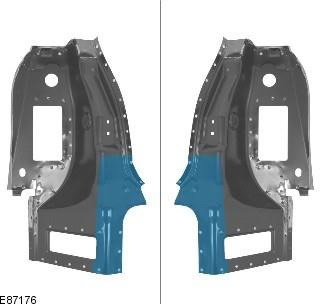
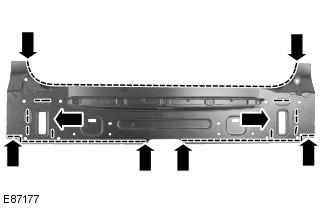
19. Mill out the weld spots.
Data taken from the website: www.LRman.ru
20. Separate the connections and remove the old panel.
Installation
1. Prepare the mating surfaces of the old and new panels, including the tail light mounting panel sections.
2. Drill holes in the new panel for MIG welding.
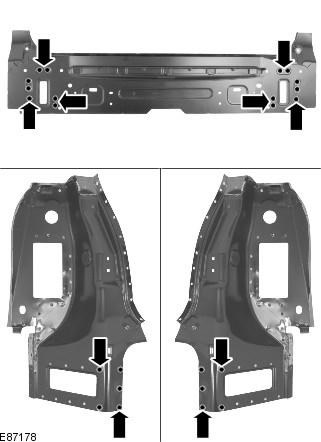
3. Apply the new panel and fix it in place. Check the alignment, if correct, proceed to the next step, if not, correct and check again before proceeding to the next step.
4. Perform spot welding.
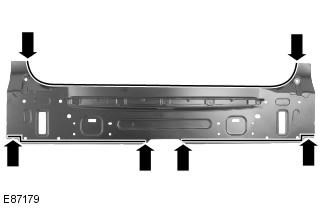
5. MIG welding.
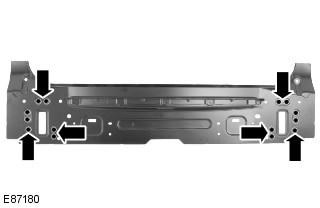
6. Apply adhesive to the tail light mounting panel sections at the points shown.
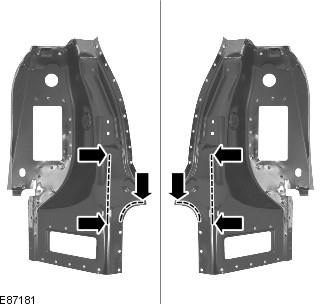
7. Attach the tail light mounting panel sections and snap them into place. Check the alignment, if correct, proceed to the next step, if not, correct and recheck before proceeding to the next step.
8. Tack the butt joints.
9. MIG welding.
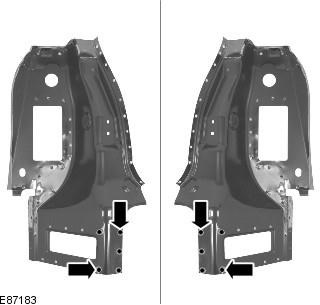
10. Clean the tack welds.
11. Perform butt welding using MIG technology.
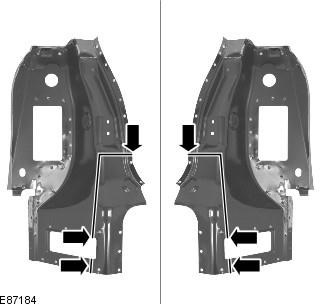
12. Clean all welded joints.
13. To install the relevant panels and mechanical components, perform the removal procedure in reverse order.
Comments on this article