Contents: Removal ⇩ Installation ⇩
Removal
1. Remove both upper A-pillar trim panels. For more information, refer to A-Pillar Trim Panel (76.13.26)
2. Remove both upper B-pillar trim panels. For more information, refer to Upper B-Pillar Trim Panel (76.13.28)
3. Remove both upper rear pillar trim panels. For more information, refer to Upper Pillar Trim Panel (76.13.35)
4. Remove both rear door upper pillar trim panels. For more information, refer to 'D' Pillar Trim Panel (76.13.30)
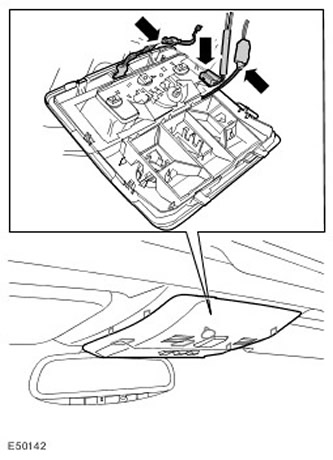
5. Remove the front upper console.
- Carefully release the 7 clamps.
- Disconnect 3 electrical connectors.
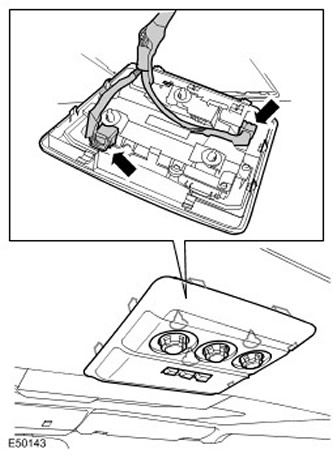
6. Remove the rear upper console.
- Carefully release the 9 clamps.
- Disconnect 2 electrical connectors.
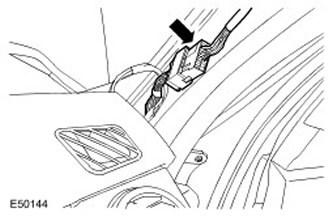
7. Disconnect the right front pillar electrical connector.
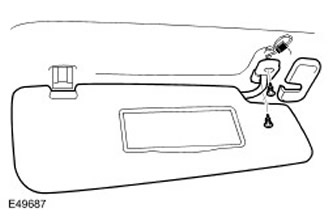
8. Remove the sun visor.
- Remove the cover.
- Remove 2 screws.
- Release the clamp.
- Disconnect the electrical connector.
- Repeat the above procedure on the other side.
9. Remove the sun visor retainer.
- Remove the screw cover.
- Remove the screw.
- Repeat the above procedure on the other side.
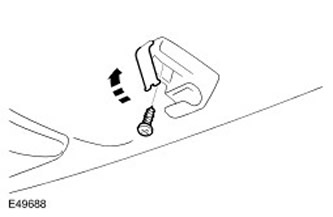
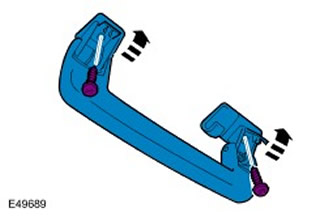
10. Remove the passenger handrail.
- Remove the 2 screw covers.
- Remove 2 screws.
- Repeat the above procedure for the remaining five handrails.
11. Adjust the front seats to the full forward position.
12. Set the rear seats to the forwardmost position.
13. Remove the rear roof trim panel.
- Release 7 clamps.
- Disconnect the electrical connector.
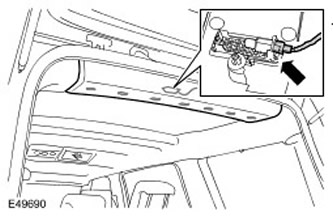
14. Disconnect the rear roof trim wiring harness electrical connector.
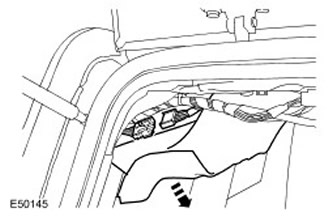
15. With assistance, carefully remove the headliner. Release the 14 clips.
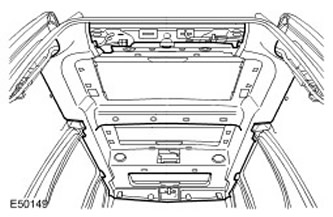
16.
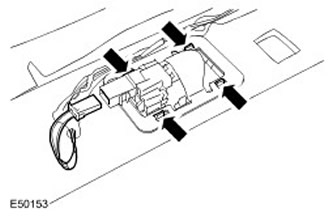
NOTE: Do not perform further disassembly if the part is removed only for access.
Remove the rear interior light bulb.
- Release the clamp.
- Disconnect the electrical connector.
- Repeat the above procedure on the other side.
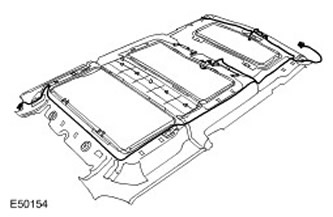
17. Remove the wiring harness from the headliner.
Original article on the web portal: www.LRman.ru
Installation
1. Install the wiring harness to the headliner. Secure the wiring harness to the headliner.
2. Install the interior light bulb.
- Engage the clamp.
- Connect the electrical connector.
- Repeat the above procedure on the other side.
4. Connect the rear roof trim wiring harness electrical connector.
5. Install the rear roof trim panel. Secure the clips.
6. Return the rear seats to their original position.
7. Return the front seats to their original position.
8. Install handrails for passengers.
- Screw in the screws.
- Install the screw covers.
- Install the clamps.
- Screw in the screws.
- Install the screw covers.
- Connect the electrical connectors.
11. Install the rear upper console.
- Connect the electrical connectors.
- Carefully secure the clamps.
- Connect the electrical connectors.
- Carefully secure the clamps.
14. Install both C-pillar upper trim panels. For more information, refer to C-pillar Upper Trim Panel (76.13.35)
15. Install both upper B-pillar trim panels. For more information, refer to Upper B-Pillar Trim Panel (76.13.28)
16. Install both upper A-pillar trim panels. For more information, refer to A-Pillar Trim Panel (76.13.26)
Comments on this article