Removing
WARNING: Make sure the ignition switch is in position 0.
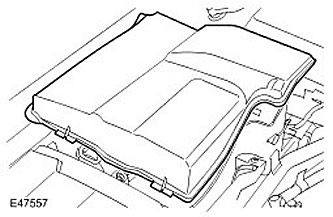
1. Remove the cover.
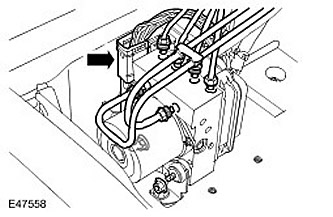
2. Disconnect the electrical connector.
3.
CAUTION: Brake fluid, if it comes into contact with the paintwork, may damage it. If you spill coolant, remove it immediately and flush the area with water.
CAUTION: Make sure the area around the contact surfaces is clean and dry before you start to disconnect or remove parts. Plug all open connections to avoid contamination of the system.
Disconnect 6 brake lines. Lay down an absorbent cloth to soak up spilled liquid
4. Remove the ABS unit from the support bracket. Loosen but do not completely remove the 2 nuts that secure the ABS control unit to the support bracket.
Installation
1.
NOTE: Before installing the ABS unit, make sure that the set ring is installed in the bracket correctly.
NOTE: Make sure the ABS unit locating pin is properly seated in the locating ring and that the 2 front insulators are fully seated in the bracket slots.
Install the ABS block.
- Tighten the 2 nuts securing the ABS unit (tightening torque 8 Nm).
- Remove the plugs from the holes.
- Tighten two M10 brake pipe connections and three M12 brake pipe connections (tightening torque 15 Nm).
- Tighten the M14 brake line connection (tightening torque 17 Nm). Connect the electrical connector.
- Remove the ABS unit from the support bracket.
2. Using T4, bleed the air from the brake system. For more information, refer to Bleeding the Pressurized Brake System (70.25.02)
3. Install the cover.
4. If a new ABS unit is installed, interrogate the ABS system using T4.
Comments on this article