


Contents: Removal ⇩ Installation ⇩
Removal
1.
CAUTION: Never work on a vehicle supported solely by a jack. Always support the vehicle securely.
Raise and support the vehicle.
2. Remove the wheel and tire assembly.
3.
CAUTION: The brake pad wear indicator sensor is very easy to damage. Do not use a lever to remove the sensor. The operation must be performed manually.
Right side only: Disconnect the brake pad wear indicator sensor.
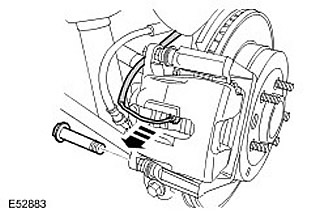
4. Remove the lower brake caliper bolt.
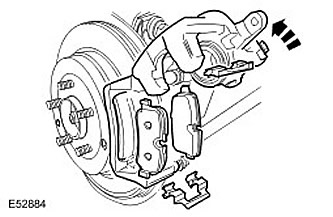
5. Remove the brake pads.
- Rotate the brake caliper upward.
- Remove the two clamps.
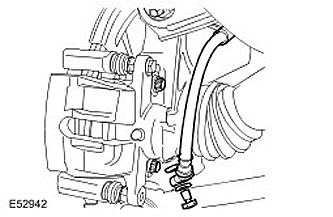
6. Disconnect the brake hose from the brake caliper.
- Remove the fitting.
- Remove and discard the two sealing washers.
- Insert plugs into the open holes.
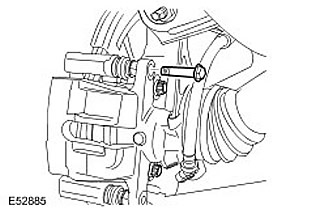
7. Remove the upper brake caliper bolt.
8. Remove the brake caliper housing.
Installation
1.
CAUTION: Do not use compressed air to clean brake components. Dust from friction materials is harmful if inhaled.
Clean the brake caliper body and backing plate with a special brake cleaning fluid.
2. Install the brake caliper.
3. Insert the upper brake caliper bolt. Tighten the bolt. (tightening torque 35 Nm).
4. Connect the brake hose to the brake caliper.
- Remove the plugs from the holes.
- Install new sealing washers.
- Tighten the brake hose nipple. (tightening torque 28 Nm).
5. Install the brake pads. Install two clamps.
6. Turn the brake caliper down. Tighten the bolt. (tightening torque 35 Nm).
7. Connect the brake pad wear indicator sensor.
8. Install the wheel and tire assembly. Tighten the wheel nuts. (tightening torque 140 Nm).
9. Bleed the brake system. For more information, refer to Bleeding the Brake System (70.25.02)
Comments on this article