Contents: Dismantling ⇩ Installation ⇩
Dismantling
1. Raise the rear of the vehicle.
CAUTION: Do not work under a vehicle supported only by a jack. Always support the vehicle with safety stands.
2. Remove the wheel.
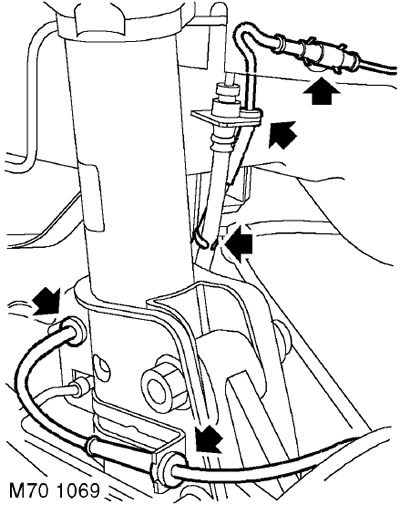
3. Release the sensor electrical connector from the clamp secured to the body and disconnect it.
4. Release the 3 rubber bushings of the wheel speed sensor electrical cable from the shock absorber brackets and the body.
5. Release the electrical cable from the clamps securing it to the brake hose.
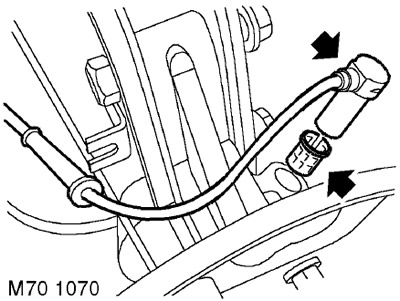
6. Remove the bolt securing the wheel speed sensor to the hub, if present.
7. Release the sensor from the hub mount and remove the sensor and electrical cable.
8. Remove the bushing from the rear wheel hub.
Installation
1. Wipe the sensor and its mounting surfaces on the rear wheel hub.
2. Insert the new bushing into the rear wheel hub.
3. Apply anti-seize lubricant to the sensor.
[See the source on the website: lrman.ru]
4. Install the sensor onto the hub, making sure it is fully seated in its mounting location.
CAUTION: Make sure the wheel speed sensor is fully inserted into the hub, i.e. touching the ring gear.
5. Tighten the wheel speed sensor mounting bolt to the hub, if equipped.
6. Make sure the sealing sleeve is in place. Connect the electrical connector to the sensor.
7. Secure the connector with a clamp.
8. Secure the electrical cable bushings to the brackets.
9. Secure the electrical cable to the brake hose with clamps.
10. Reinstall the wheel(s) and tighten the nuts to 115 Nm.
11. Remove the supports and lower the vehicle.
12. To ensure that the ABS is working properly, it is NECESSARY to perform diagnostics using the TestBook/T4 device.
Comments on this article