Dismantling
1. Remove both drive shafts.
DRIVE SHAFTS, REPAIR WORKS, Left shaft with external and internal joints.
DRIVE SHAFTS, REPAIR WORKS, Right shaft with external and internal hinges.
2. Mark the cardan shaft with the relative position to facilitate subsequent assembly.
3. Install a container to collect the escaping oil.
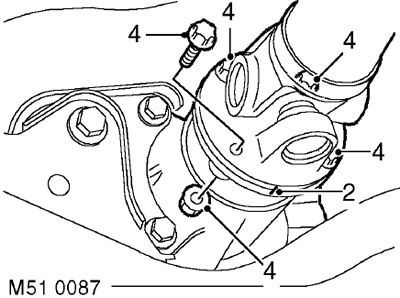
4. Turn away 4 nuts with bolts of fastening of a cardan shaft to differential. Disconnect the propeller shaft and secure it to the side.
5. Install the jack, resting it on the final drive housing.
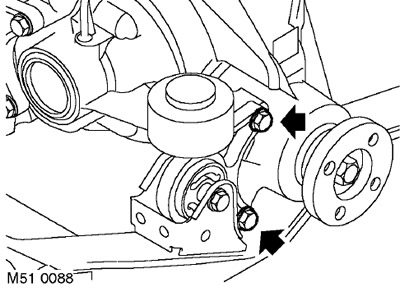
6. Turn out 2 bolts of fastening of differential to a forward support.
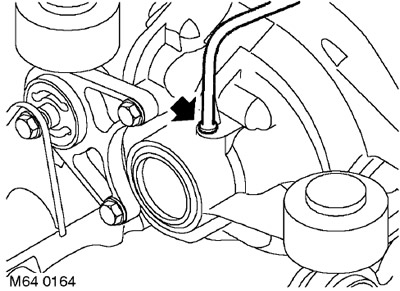
7. Press the red shoulders and disconnect the breather hose from the differential case.
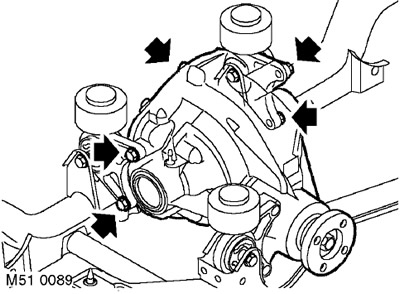
8. Turn out 4 bolts of fastening of differential to a back support.
9. With the help of a partner, turn the differential 90 degrees and remove it from the subframe.
Installation
1. With the help of a partner, install the differential on the subframe and place on the supports. Screw in the bolts, but do not tighten them at this stage.
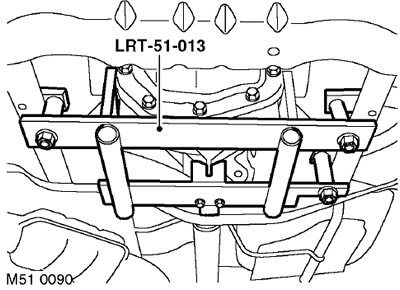
2. Install centering tool LRT-51-013 to set differential position.
3. Tighten the front bolts to 65 Nm.
4. Tighten the rear bolts to 65 Nm.
5. Remove the LRT-51-013 snap.
6. Connect the breather hose.
7. Install the cardan shaft on the rear axle and align the relative position marks.
8. Install the bolts with nuts securing the rear flange of the cardan shaft and tighten them to a torque of 65 Nm.
9. Reinstall the drive shafts.
DRIVE SHAFTS, REPAIR WORKS, Left shaft with external and internal joints.
DRIVE SHAFTS, REPAIR WORKS, Right shaft with external and internal hinges.
10. Check the oil level in the differential.
MAINTENANCE, MAINTENANCE, Rear Axle.
Comments on this article