Dismantling
1. Raise the rear of the vehicle.
WARNING: Do not work under a vehicle that is only supported by a jack. Always install safety props.
2. Remove the front wheel.
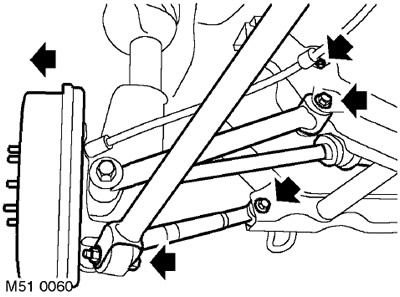
3. Turn out a bolt of fastening of a cable of a lay brake to a subframe.
4. Remove the nut and bolt securing the longitudinal link to the rear hub, and keep the spacer bushing on the head of the bolt.
5. Turn away a bolt and a nut of fastening of cross-section draft to a stretcher. Remove shock absorber.
6. Turn away a bolt and a nut of fastening of cross adjusting draft to a subframe.
7. Install a container to collect the oil.
8. With the help of a partner, slide the hub out.
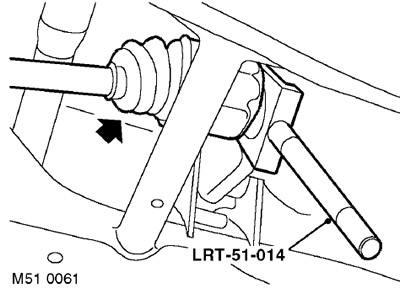
9. Being careful not to damage the oil flinger, disconnect the drive shaft from the differential using tool LRT-51-014 and secure it out of the way.
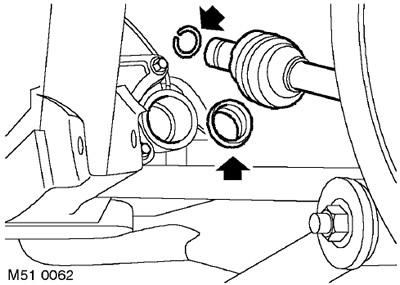
10. Remove and discard the drive shaft retaining ring.
11. Remove the differential seal.
Installation
1. Wipe the oil seal seat in the rear axle housing.
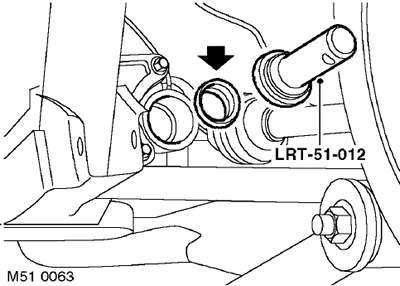
2. Install a new oil seal using tool LRT-51-012.
3. Wipe the end of the drive shaft and the place of its installation in the differential case.
4. Check the condition of the flinger ring and replace it if it is damaged.
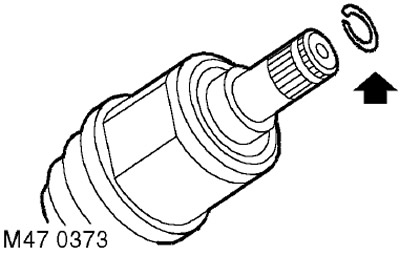
5. Install a new circlip on the end of the drive shaft.
6. With the help of a partner, insert the drive shaft into the differential case, fully push it in so that the retaining ring is in place.
7. Install a bolt with a nut on the transverse link, tighten them with a torque of 120 Nm.
CAUTION: Nuts and bolts must be tightened when the weight of the vehicle is supported by the suspension.
8. Install the shock absorber and bolt with nut on the adjusting cross rod, tighten them to a torque of 120 Nm.
9. Install the distance sleeve, bolt and nut on the longitudinal link, tighten them to 120 Nm.
10. Establish fastening of a cable of a lay brake and tighten a bolt the moment of 22 Nanometers.
11. Replace the wheel (wheels) and tighten the nuts to a torque of 115 Nm.
12. Check the oil level in the differential.
MAINTENANCE, MAINTENANCE, Rear Axle.
13. Remove props and lower the car.
Comments on this article