- Before installation, carefully inspect the seal to ensure that it is intact and free of foreign particles.
- The surface on which the working edge of the seal will operate must be smooth, without scratches or burrs. The part mating with the seal (shaft) must be replaced if the surface on which the sealing occurs cannot be completely restored.
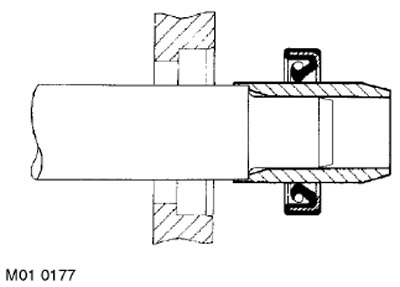
- During installation, protect the cuff from damage by sharp edges. Insulate the surface that may damage the cuff during installation using a process sleeve or wrap it with tape.
- Some seals are coated with a protective paste that must be removed before installing the seal unless otherwise specified. If the seal must be lubricated before installation, lubricate the seal lips to prevent damage during the initial period of operation. If the lips have two working lips, fill the space between them with grease.
- If the cuff has a spring, make sure it is installed correctly.
- Install the cuff so that its working edge is directed towards the liquid being sealed. Then carefully move it on the shaft towards the working journal. Use technological bushings to protect the working edge of the cuff from damage by sharp edges, threads or splines. If there is no technological bushing, use insulating tape to protect the edge of the cuff from damage.
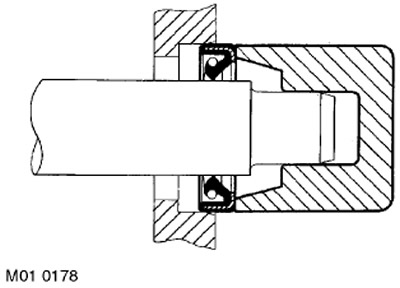
- Lubricate the outer diameter of the seal with grease, direct the end of the seal into the housing bore and press the seal into its seat. Use a suitable mandrel to press it in to prevent the seal from skewing. Do not allow the weight of the shaft to be supported by the seal.
- Use the recommended tool and accessories to install the cuffs. If you do not have the recommended accessory, you can use a section of a suitable pipe, its outer diameter should be approximately 0.4 mm smaller than the outer diameter of the cuff. If you do not have a suitable press for pressing the cuff and use a hammer, work with it ESPECIALLY CAREFULLY.
- Press the cuff to its full depth until it stops against the ledge of the housing; if the bore for the cuff is made without a ledge, then press the cuff flush with the housing. When pressing the cuff, make sure that it is not skewed.
Comments on this article