Dismantling
1. Place the vehicle on a four post lift.
2. Disconnect "negative" battery terminal.
3. Remove a noise-insulating casing of the engine.
KV6 ENGINE - MODIFICATION K, Camshafts of the left cylinder head, Noise-insulating casing of the engine.
4. Remove the lower engine protection.
EXTERIOR PARTS, REPAIR WORKS, Engine lower shield.
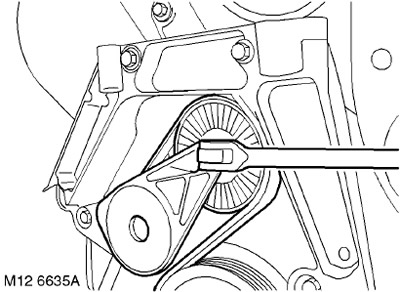
5. Ratchet on 3/8" remove the tensioner and remove the belt from the pulleys of the generator and the power steering pump.
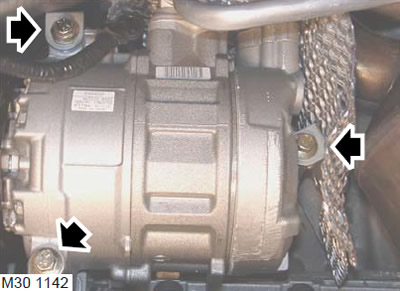
6. Turn away 3 bolts of fastening of the compressor of the central air to an arm, take away the compressor aside and fix it.
7. Remove the compressor heat shield.
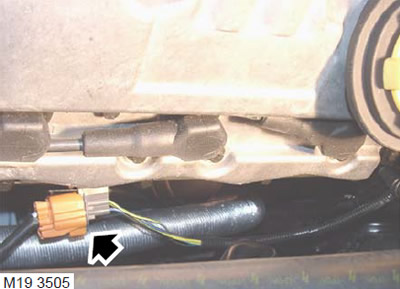
8. Loosen and disconnect the oxygen sensor connector.
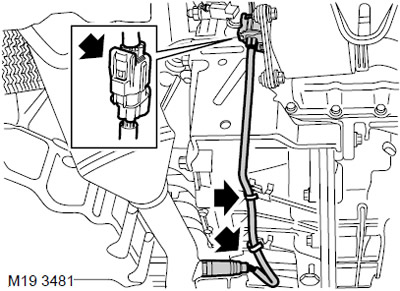
9. Disconnect the heated oxygen sensor harness from the clamp.
10. Release and disconnect a socket of the back oxygen sensor.
11. Disconnect the heated oxygen sensor harness from the mounting brackets.
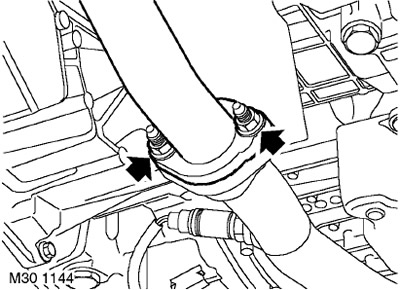
12. Turn away two nuts of fastening of a reception pipe to a final collector.
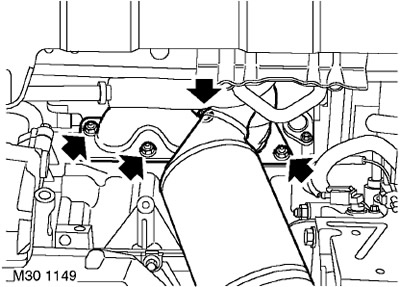
13. Turn away 4 nuts of fastening of a final collector and remove a final collector.
14. Remove and discard manifold gasket and lower flange.
Installation
1. Wipe down the exhaust manifold and mating surface.
2. Using new gaskets, install the exhaust manifold, tighten the nuts securing the manifold to the cylinder head to a torque of 45 Nm and the nuts securing the manifold to the exhaust pipe to a torque of 50 Nm.
3. Connect the oxygen sensor connector, fix the connector in the bracket and the harness in the clamps.
4. Clean the mating surfaces of the compressor and bracket.
5. Install the compressor heat shield.
6. Mount the compressor on the bracket and install the heat shield on it. Screw in the bolts and tighten them to 25 Nm.
7. Ratchet on 3/8" remove the tensioner and put the belt on the pulleys of the mounted units.
8. Reinstall the lower engine guard.
EXTERIOR PARTS, REPAIR WORKS, Engine lower shield.
9. Replace the engine soundproof cover.
KV6 ENGINE - MODIFICATION K, Camshafts of the left cylinder head, Noise-insulating casing of the engine.
10. Attach "negative" battery terminal.
Comments on this article