Dismantling
1. Remove the automatic transmission.
AUTOMATIC GEARBOX: JATCO, REPAIR WORK, Gearbox with KV6 engine (removed engine and gearbox).
2. Assemble tools LRT-12-161 and LRT-12-199 together by bolting them together.
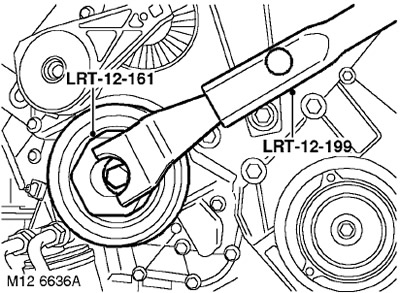
3. Using tools LRT-12-161 and LRT-12-199 installed on the pulley, fix the crankshaft.
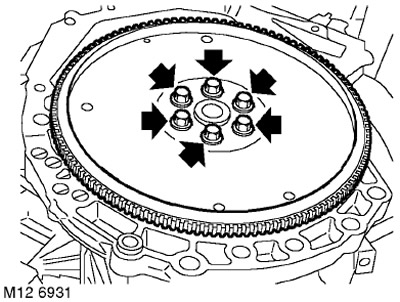
4. With the help of a partner, unscrew and dispose of the 6 bolts securing the drive disc to the crankshaft.
5. Remove the drive disc from the crankshaft.
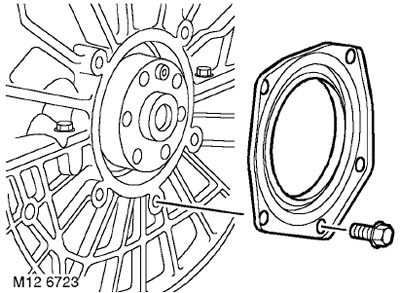
6. Turn away and utilize 5 bolts of fastening of the case of a back epiploon of a cranked shaft to the block of cylinders.
7. Take out a back epiploon of a cranked shaft.
Installation
1. Wipe the surface of the cylinder block and the crankshaft journal to be sealed, check that the threaded sockets are clean and dry.
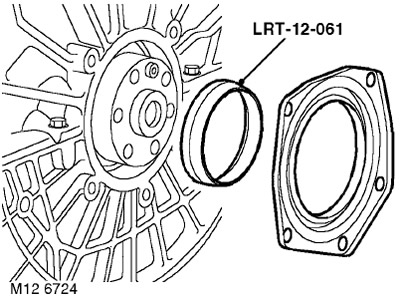
2. Put on the protective cover LRT-12-061 on the crankshaft.
3. Put an epiploon on a neck of a cranked shaft.
CAUTION: The seals must be installed dry.
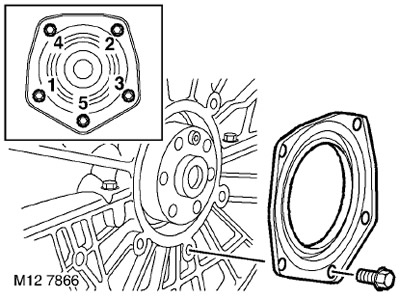
4. Screw in new bolts of fastening of an epiploon to the block of cylinders and, in the sequence specified in drawing, tighten them the moment of 8 Nm.
5. Remove the protective cover LRT-12-061 from the crankshaft.
6. Using the old drive plate mounting bolt, in which two cuts were made at an angle of 45°, clean the threaded sockets in the crankshaft flange from the remnants of the thread locker.
7. Wipe the drive disc and mating surface of the crankshaft.
8. Establish a driving disk on a cranked shaft and screw, without tightening up to the end, new bolts of fastening.
9. Using tools LRT-12-161 and LRT-12-199 installed on the pulley, fix the crankshaft.
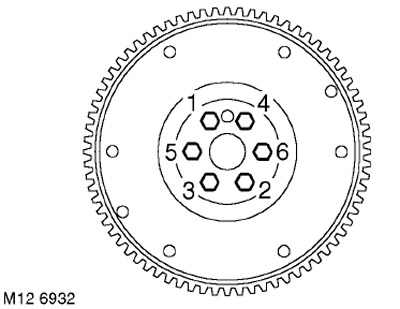
10. In the sequence shown in the figure, tighten the bolts:
- Stage 1: 25 Nm
- Stage 2: 100 Nm
11. Remove the LRT-12-161 and LRT-12-199 tools from the crankshaft and disassemble them.
12. Install automatic transmission
AUTOMATIC TRANSMISSION: JATCO, REPAIR WORK, Transmission with KV6 engine (removed engine and gearbox).
Comments on this article