Removing
All cars
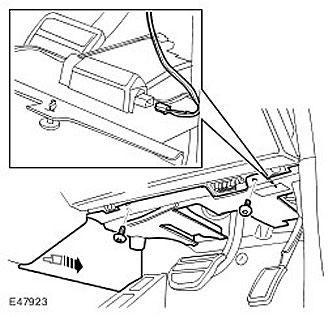
1. Remove the decorative panel from the driver's side. Release the clamp.
- Remove 2 screws.
- Disconnect the electrical connector.
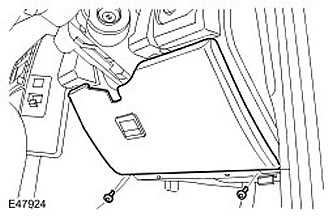
2. Remove the instrument panel access panel. Remove 2 screws.
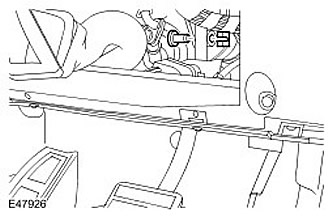
3. Remove the brake pedal buffer.
- Remove 4 Torx screws.
- Disconnect the wire harness clamp.
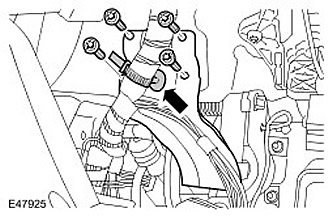
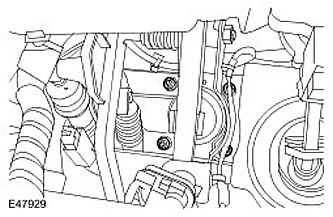
4. Remove the brake booster yoke pin. Remove the clamp.
5. Remove the base of the inner chamber. For more information, refer to Additional Battery Shelf (76.10.31)
6.
CAUTION: Brake fluid, if it comes into contact with the paintwork, may damage it. If liquid is spilled, remove it immediately and flush the area with water.
Place an absorbent cloth to collect spilled liquid.
7.
CAUTION: Before disconnecting or removing any parts, make sure that the area around the contact surfaces and connections is clean. Close all open connections to avoid contamination of the system.
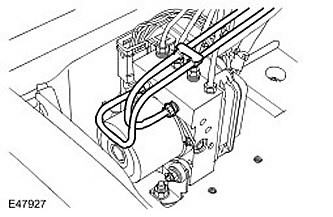
Disconnect the 2 brake lines from the ABS module.
Vehicles with manual transmission
8. Disconnect the clutch master cylinder pipe.
All cars
9. Disconnect the 2 brake lines from the master cylinder.

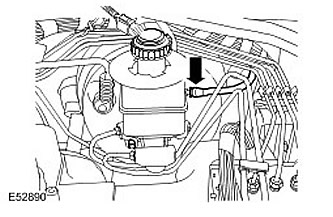
10. Disconnect the low brake fluid indicator switch electrical connector.
11. Disconnect the brake booster vacuum hose from the brake booster.
12. Remove the master brake cylinder. Loosen 2 nuts.
13. Remove the brake booster. Loosen 4 nuts.
Installation
All cars
1. Install the brake booster. Tighten nuts (tightening torque 23 Nm).
2. Install the brake master cylinder. Tighten nuts (tightening torque 26 Nm).
3. Connect the brake booster vacuum hose.
Vehicles with manual transmission
4. Connect the clutch master cylinder pipe.
All cars
5. Connect the low brake fluid indicator switch electrical connector.
6. Install the brake lines.
- Tighten M12 brake line fittings (tightening torque 16 Nm).
- Tighten M14 brake line fittings (tightening torque 18 Nm).
7. Install the inner chamber base. For more information, refer to Additional Battery Shelf (76.10.31)
8. Install the brake booster yoke pin. Install a new clip.
9. Install the brake pedal buffer.
- Tighten the bolts with a torque of 10 Nm.
- Fasten the wire harness clamp.
10. Install the instrument panel access panel. Tighten 2 screws.
11. Bleed the brake system with T4. For more information, refer to Bleeding the Pressurized Brake System (70.25.02)
12. Install the decorative panel.
- Connect the electrical connector.
- Fasten the clamp.
- Tighten the screws.
Vehicles with manual transmission
13. Bleed the air from the clutch system. For more information, refer to Bleeding the Clutch System
Comments on this article