Seams that require structural body sealant are shown in the following illustrations. The illustrations show only the seams resulting from the replacement of damaged panels. Apply Structural Sealant to the locations shown in the illustration or to all mating surfaces of parts.
Attention: When separating parts connected to each other by an adhesive material connecting the parts, it is important not to cause deformation of the junction. Gradually heat up the joint until the sealant softens enough to allow easy separation of the glued panels.
NOTE: If spot welding is performed at the junction of parts connected with such an adhesive sealant, the transformer must be carefully dimensioned to obtain a reliable weld.
Adhesive materials on the front of the body
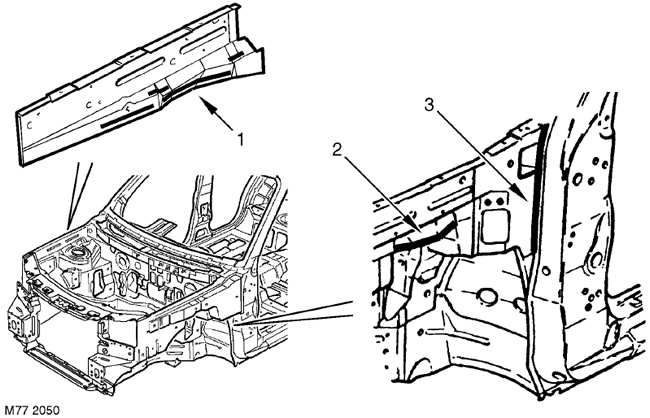
- 1 - Apply a bead of material with a diameter of 3 mm
- 2 - Apply the material with a brush
- 3 - Apply the material with a brush
Connections of parts located symmetrically as shown in the figure are also subject to processing.
Adhesive materials on the stand "A", sill and rear sidewall - 3-door version.
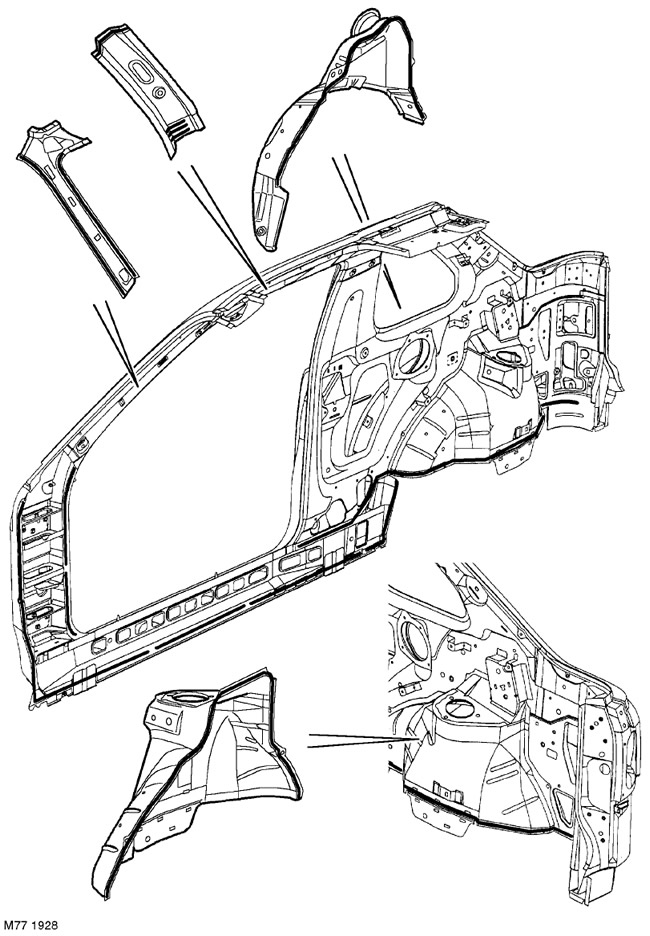
Joints of parts located symmetrically to those shown in the figure must also be processed. Apply a bead of mastic with a diameter of 3 mm to all marked panel joints. Do not block the drain holes in the threshold with mastic.
Adhesive materials on the stand "A", sill and rear sidewall - 5-door version.
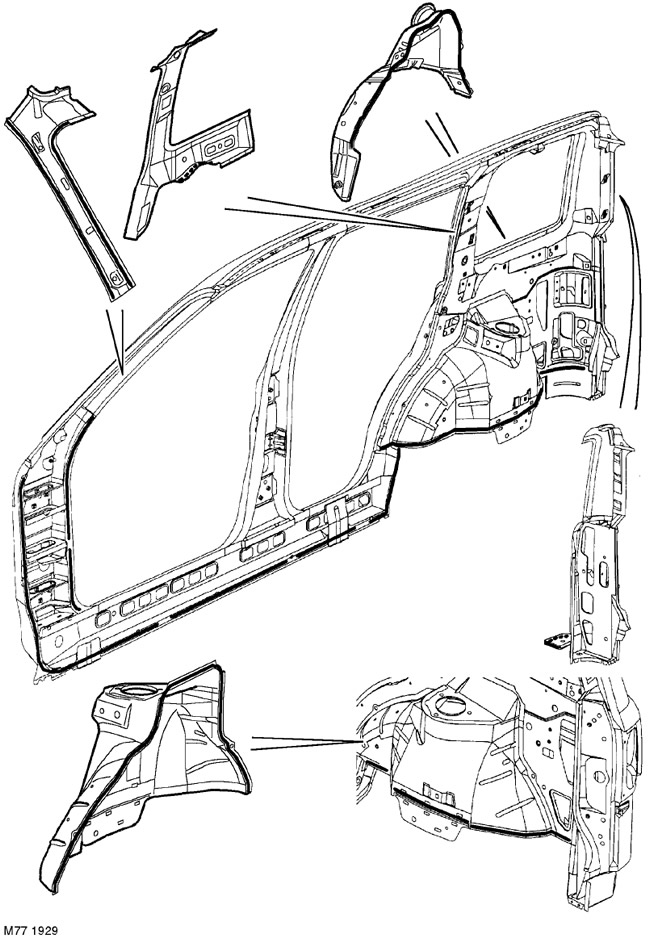
Joints of parts located symmetrically to those shown in the figure must also be processed. Apply a bead of mastic with a diameter of 3 mm to all marked panel joints. Do not block the drain holes in the threshold with mastic.
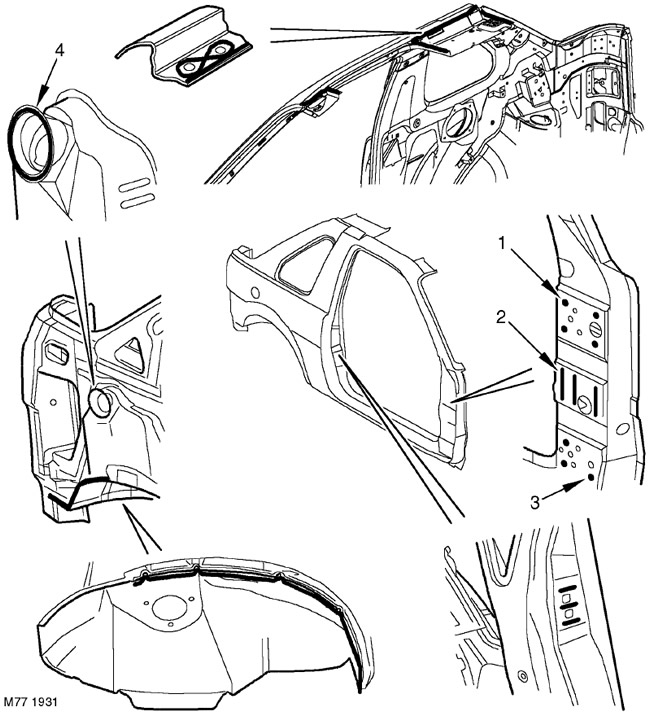
Adhesive materials on the rear wheel arch reinforcement panel - 3-door version.

Joints of parts located symmetrically to those shown in the figure must also be processed. Apply a bead of mastic with a diameter of 3 mm to all marked panel joints.
Adhesive materials on the side of the body and on the roof - 3-door version.
Connections of parts located symmetrically as shown in the figure must also be processed Apply a bead of mastic with a diameter of 3 mm, except in places indicated otherwise (see below).
- 1 - Apply 4 dots with a diameter of 10 mm
- 2 - Apply 3 bead sections with a diameter of 4 mm
- 3 - Apply 3 dots with a diameter of 10 mm
- 4 - Apply a roller with a diameter of 6 mm (fuel resistant joint sealant)
Body side adhesive materials - 5-door version.
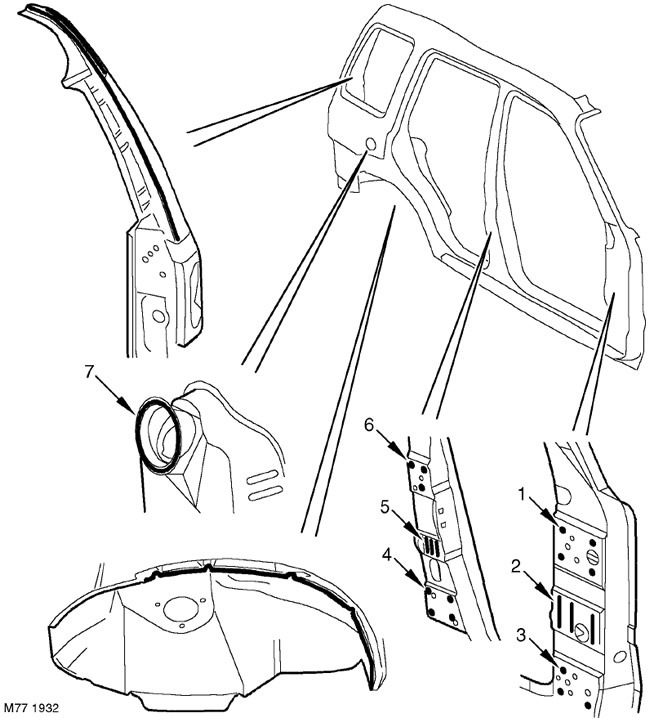
Connections of parts located symmetrically as shown in the figure must also be processed Apply a bead of mastic with a diameter of 3 mm, except in places indicated otherwise (see below).
- 1 - Apply 4 dots with a diameter of 10 mm
- 2 - Apply 3 bead sections with a diameter of 4 mm
- 3 - Apply 3 dots with a diameter of 10 mm
- 4 - Apply 4 dots with a diameter of 10 mm
- 5 - Apply 3 bead sections with a diameter of 4 mm
- 6 - Apply 3 dots with a diameter of 10 mm
- 7 - Apply a roller with a diameter of 6 mm (fuel resistant joint sealant)
Adhesive materials on the roof - 5-door version.
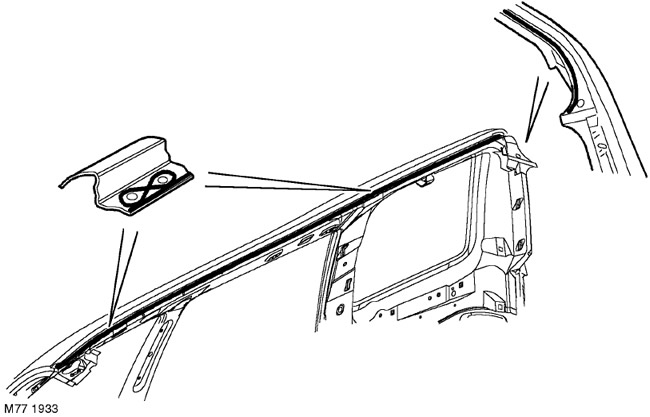
Joints of parts located symmetrically to those shown in the figure must also be processed. Apply a bead of mastic with a diameter of 3 mm to all marked panel joints.
Comments on this article