Contents: Removal ⇩ Installation ⇩
Removal
1. Apply strips of masking tape to the leading edge of the fixed rear window to prevent damage when the window is raised.
NOTE: Left side shown, same for right side.
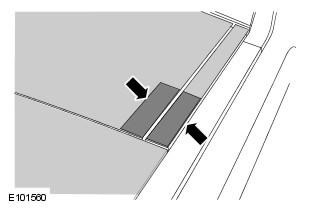
2
- Disable the one-touch mode.
- Open the hatch and while the hatch cover is moving, remove fuse F10.
- Replace fuse F10 and check that the sunroof drive operates without the one-touch mode.
NOTE: This step requires the assistance of a second mechanic.
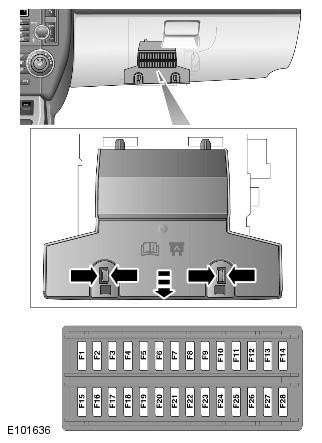
3. Open the opening roof panel curtain.
4. Open the sunroof glass panel completely.
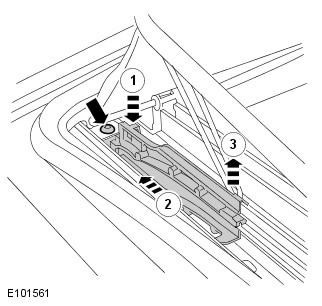
5.
- Remove the sunroof glass panel guide mounting elements.
- Remove the Torx screw (TX15).
- Press down(1) and slide forward(2) and then remove the guide installation piece(3).
- Repeat the operation on the other side.
NOTE: Left side shown, same for right side.
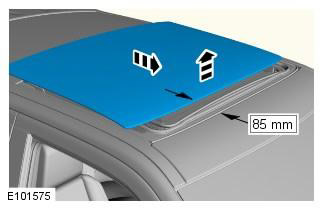
6. Close the sunroof glass panel 85mm and pull up to release the front section of the glass.
CAUTION: Due to possible damage, do not raise the front edge of the sunroof glass panel more than 100 mm with the rear edge in place.
NOTE: This will release the front portion of the glass panel.
7. Move the connecting rods forward by 20 mm.
NOTE: Left side shown, same for right side.

8. Remove the sunroof glass.
NOTE: This step requires the assistance of a second mechanic.
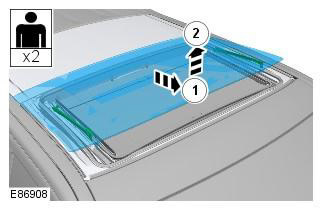
9. Remove the sunroof glass panel connecting rods.
NOTE: Do not continue disassembly if the component is removed only for access.
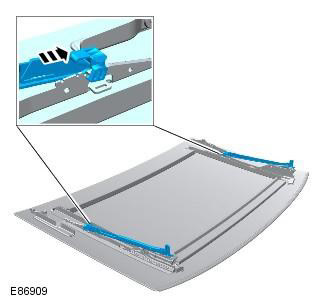
Installation
1. Using a non-permanent marker, mark the seal to indicate the position of the sunroof glass panel guide slider.
CAUTION: Do not operate the sunroof motor until instructed to do so.
NOTE: Left side shown, same for right side.
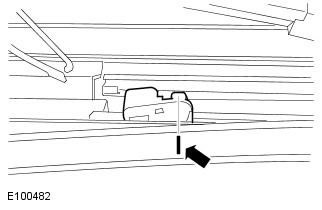
2. Install the rear tie rod guide.
NOTE: The steps in this item only need to be performed if prior removal has been performed.
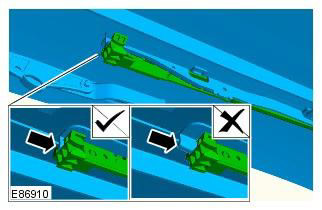
3. Install the front tie rod guide.
NOTE: The steps in this item only need to be performed if prior removal has been performed.
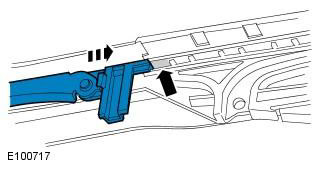
4. Move the connecting rods forward by 20 mm.
NOTE: Left side shown, same for right side. This step only needs to be performed if previously removed.
5.
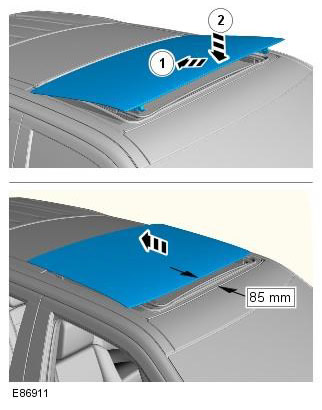
- Align the rear rollers with the sunroof glass panel grooves.
- Carefully slide the sunroof glass panel back to create an 85mm opening.
CAUTION: Due to possible damage, do not raise the front edge of the sunroof glass panel more than 100 mm with the rear edge in place.
NOTE: This step requires the assistance of a second mechanic.
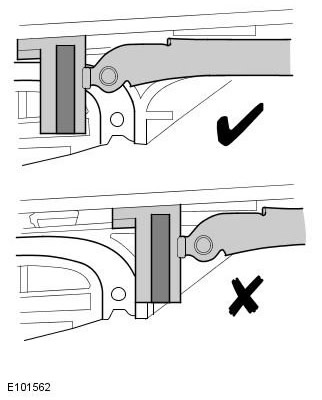
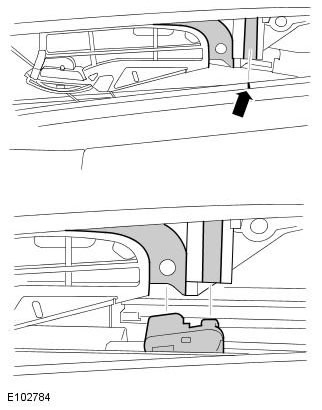
6. Align the connecting rod with the hatch cover guide.
NOTE: Left side shown, same for right side.
7.
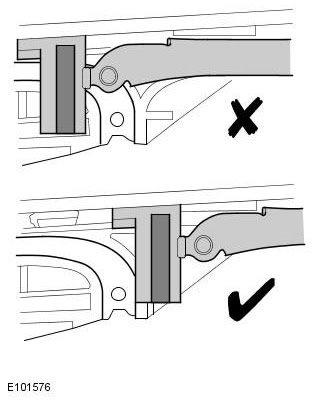
- Carefully align and position the sunroof glass panel relative to the drive slide.
- If resistance is felt, adjust the alignment of the sunroof glass panel relative to the slider.
CAUTION: Incorrect adjustment of the sunroof glass panel will result in damage to the panel.
NOTE: This step requires the assistance of a second mechanic. Left side shown, same for right side.
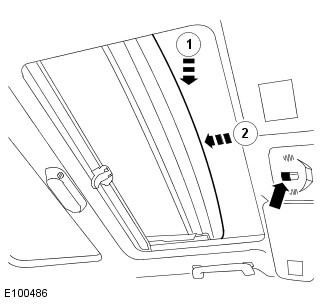
8.
- Carefully pull the glass panel of the sunroof back 50 mm to position it correctly in the guides.
- If the sunroof glass panel is positioned correctly, open the sunroof fully.
CAUTION: Do not apply downward pressure when operating the sunroof actuator.
NOTE: A slight noise may be heard when the sunroof panel is first operated.
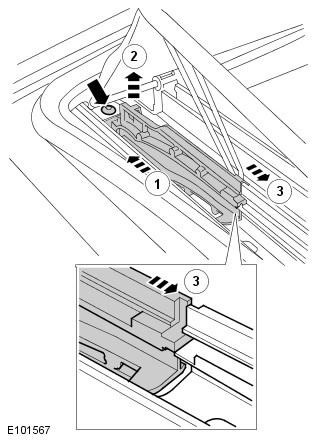
9.
- Install the glass panel guide fitting.
- Position the front end of the guide mounting element (1) and lift it up (2), then install it on the guide and slide it forward (3).
- Tighten the Torx screw to 2.5 Nm.
- Repeat the procedure on the other side.
10. Close the sunroof glass panel.
CAUTION: Make sure that the mesh deflector folds are facing rearward when closing the sunroof glass panel. If the mesh deflector folds forward, water may leak through the sunroof panel.
The original text can be found at [LRMAN.ru]
10. Remove the protective tape.
11. Manually initialize the sunroof panel motor.
12. Turn on the ignition.
13. Press the front half of the sunroof panel switch and move the sunroof panel to the fully tilted position.
14. Release the switch.
15. Press and hold the front half of the switch.
16. After 20 seconds, the sunroof panel will perform the following actions: sticking in a slightly open position, causing noise, cycling fully open and closed.
17. Do not release the switch until the hatch cover panel has completed the above operations.
18. Release the switch.
19. The sunroof panel will now operate in one-touch open mode (tilt and fully open) and one-touch close mode (from fully open).
20. One-touch closing is not possible from an inclined position.
21. Close the sunroof glass panel.
22. Close the opening roof panel curtain.
Comments on this article