Contents: Removal ⇩ Installation ⇩
Removal
NOTE: Only the air spring being removed should be bled.
1.
CAUTION: Do not work on or under a vehicle that is supported only by a jack. Always support the vehicle securely.
Raise and support the vehicle.
2. Remove the wheel.
3. Using the Land Rover approved diagnostic system, release the air suspension pressure. For more information, refer to Releasing and Raising Air Suspension Pressure (60.50.38)
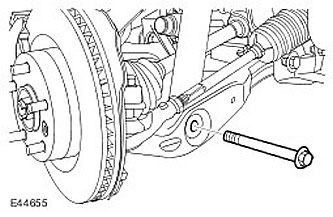
4. Disconnect the shock absorber with the air element assembly from the lower arm. Unscrew the nut and remove the bolt.
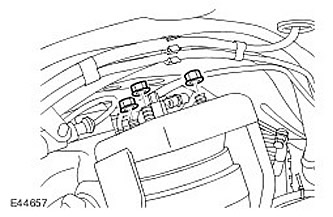
5. Release the shock absorber with the pneumatic element assembly. Unscrew the three nuts.
6.
CAUTION: To avoid contamination of the system, always plug all open connections.
Move the shock absorber assembly with the air spring. Disconnect the air line.
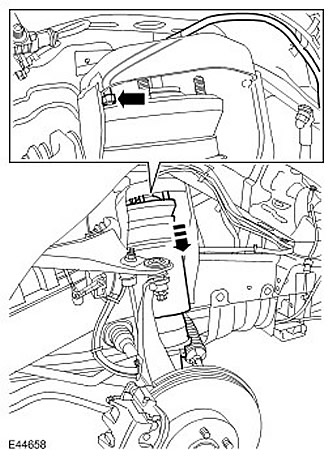
7. Remove the shock absorber with the air element assembly.
8. Remove the Voss type fitting from the air line. Remove and discard the cone bushing and coupling.
Installation
1.
CAUTION: Make sure the new Voss type fitting is installed and fully tightened with the corrector plug installed.
Install a new Voss type nipple onto the pneumatic element. Tighten to 3.5 Nm.
2.
NOTE: Remove and discard plugs.
NOTE: Clean the mating surfaces of the components.
Install the shock absorber with the air element assembly.
- Connect the air line to the Voss type fitting.
- Pull on each air line to ensure it is securely seated in the Voss type fitting.
- Screw on the nuts and tighten them to 63 Nm.
3. Attach the shock absorber with the air element assembly to the lower arm. Tighten the nut and bolt to 300 Nm.
4. Using the Land Rover approved diagnostic system, pressurise the air suspension. For further information, refer to Releasing and Raising Air Suspension System Pressure (60.50.38)
5. Install the wheel. Tighten the wheel nuts to 140 Nm.
Comments on this article