Special tool
 205-053 Retainer, Drive Flange 205-053 Retainer, Drive Flange |
Removing
1. Raise and support the vehicle
WARNING: Place secure stands under the vehicle.
2. Remove the exhaust system. Refer to Procedure: Exhaust System (309-00A Exhaust system - 3.2L NA - I6, Removal and installation).
3. Discard bolts.
WARNING: Do not use a lever to disengage the driveshaft pivots from the transfer case or rear differential flanges.
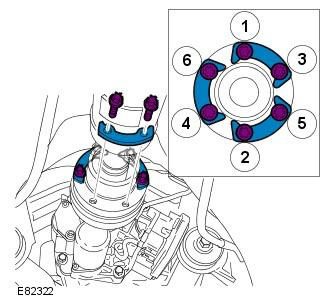
CAUTION: Mark the position of the elements to facilitate subsequent installation.
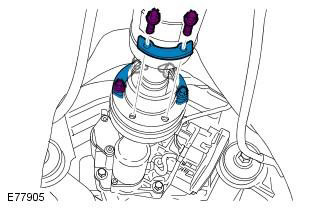
4.
CAUTION: Secure the driveshaft with suitable clamps.
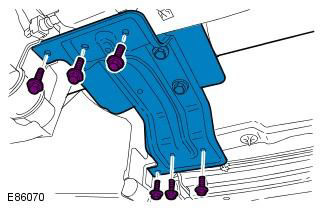
5.
- Place a container to collect escaping oil.
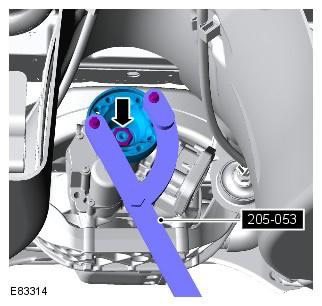
- Using the special tool, remove the drive flange. Special tool: 205-053
- Discard the nut.
Installation
1. Using the special tool, install the drive flange. Special tool: 205-053. Tightening torque: 130 Nm
WARNING: Use a new nut.
2. Connect the cardan shaft to the active coupling. Tightening torque: 40 Nm
CAUTION: Use new bolts.
NOTE: Ensure that these items are installed in the original position marked when removed.
3. Install the propshaft rear support bracket. Tightening torque: 35 Nm
4. Check the fluid level in the active clutch and top up if necessary. Refer to Procedure: Activated Friction Clutch Filler (205-02 Rear Drive Axle/Differential, General Procedures).
5. Install the exhaust system. Refer to Procedure: Exhaust System (309-00A Exhaust system - 3.2L NA - I6, Removal and installation).
Comments on this article