


Contents: Removal ⇩ Installation ⇩
Removal
1. Raise the car on a lift.
WARNING: Ensure that the vehicle is supported securely.
2. Remove the exhaust system. Refer to procedure: Exhaust System (309-00B Exhaust System - 2.2L Duratorq - Td4, Removal and Installation).
3. Discard the bolts.
WARNING: Do not use a pry bar to disconnect the driveshaft joints from the transfer case or rear differential flanges.
Mark the position of the elements to facilitate subsequent installation. Secure the cardan shaft with suitable clamps.
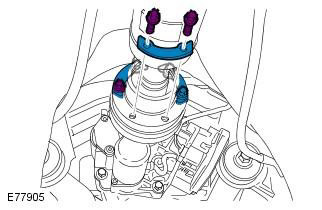
3.
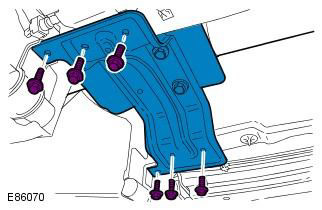
4.
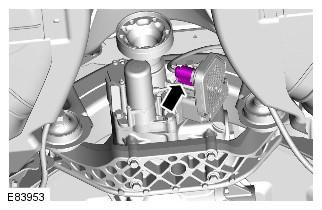
5. Place a container to collect the leaking oil. Discard the oil seal.
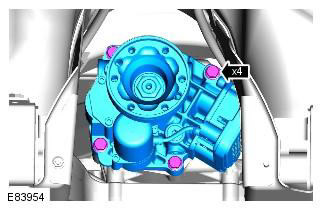
Installation
1. Lubricate and install a new O-ring. Refer to procedure: Specifications (205-02 Rear Drive Axle/Differential, Specifications).
2. Install the active clutch. Tightening torque: 24 Nm
CAUTION: Clean the area around the element and remove any foreign material.
3. Connect the electrical connector.
4. Attach the propeller shaft to the active clutch. Tightening torque: 40 Nm
CAUTION: Use new bolts.
NOTE: Install the element in the position marked during removal.
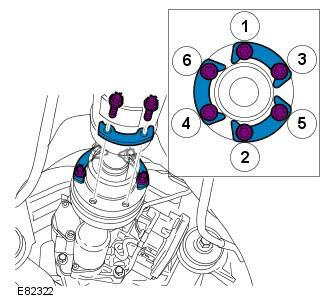
5. Install the rear propeller shaft support bracket. Tightening torque: 35 Nm
6. Check the active clutch fluid level and add fluid if necessary. Refer to procedure: Active Clutch Filler (205-02 Rear Drive Axle/Differential, General Procedures).
7. Install the exhaust system. Refer to procedure: Exhaust System (309-00B Exhaust System - 2.2L Duratorq - Td4, Removal and Installation).
Comments on this article