Contents: Cars from 2009 model year ⇩ Remote control FFBH ⇩ Receiver ⇩ Antenna and antenna matching unit ⇩
Cars from 2009 model year
The following items are added to FFBH remote controls installed on vehicles prior to 2009 model year:
- FFBH with updated software and calibration
- Remote control FFBH
- FFBH Remote Control Receiver
- Receiver power, data and antenna wiring harnesses
- Antenna matching unit wiring harness for connecting the receiver coaxial cable to an existing DAB antenna in the side window
Remote control FFBH
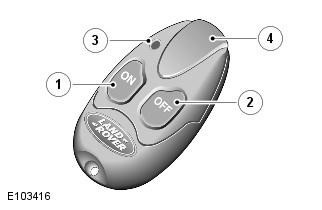
| Pos. | Spare part number | Name |
| 1 | - | Power button |
| 2 | - | Power button |
| 3 | - | LED work |
| 4 | - | Antenna |
The remote control allows the driver to remotely activate the FFBH without entering the vehicle. The remote control has a minimum range of 100 m in clear space, although this range may be reduced by the location of "obstacles" such as buildings. The remote control is powered by a replaceable 3.3 V CR1/3N battery, accessible by removing the cover on the back of the remote control. The service life of the remote control is approximately 300 FFBH cycles. One cycle is a press of a button on the remote control, followed by a 30 minute period of illumination with a flashing feedback indicator.
To indicate the active state of the FFBH, there is a LED on the remote control. When the 'ON' button on the remote is pressed for more than 2 seconds, the LED will light for 2 seconds. After the 2 second period, the LED will turn on for 50ms every 2 seconds for a maximum of 30 minutes of FFBH operation. The LED will stop flashing when the 'OFF' button is pressed or when the 30 minute timer period has expired.
Operation of the indicator on the remote control
To alert the driver to the various states of the FFBH remote control system, the LED lights up in different modes:
- Lights up green for 2 seconds after pressing the power button to indicate that the receiver has successfully received the activation request from the remote control. Now the FFBH can start working, provided that the fuel level, battery voltage and coolant temperature are normal.
- Flashes green for 50ms every 2 seconds to indicate that FFBH may be active.
- It lights red for 2 seconds after pressing the power button to indicate that the receiver has successfully received the power off request from the remote control. At this point, the FFBH should start working.
- Flashes green or red for 2 seconds when the ON or OFF button is pressed to indicate that the signal was not received by the FFBH receiver.
- Glows orange before turning green or red to indicate low battery voltage in the remote control.
- Flashes orange for 5 seconds to indicate that the signal was not received by the FFBH and the battery in the remote control needs to be replaced.
Coordination of remote controls
Each remote control must be paired with the receiver to communicate. Each remote control has a unique remote number that is stored in the receiver. The receiver can store up to 3 remote control ID numbers. If a fourth remote control is paired with the receiver, the receiver will replace the first paired number in its memory with the number for the fourth remote control. As a result, the first paired remote control will no longer be paired and will not be recognized by the receiver.
The following procedure describes the approval process:
- Remove fuse FA5 from the rear junction box (RJB).
- Wait at least 5 seconds
- Replace fuse FA5 in RJB
- Within 5 seconds of replacing the fuse (and restoring power to the receiver), press and hold the OFF button on the remote control
- Confirmation of successful matching is shown by the indicator on the remote control turning red for 2 seconds
NOTE: The matching process is performed by the FFBH receiver having been disconnected and then restored to power. Using a fuse is the easiest method, but can be accomplished by disconnecting the battery or removing the harness connector from the receiver unit.
Receiver
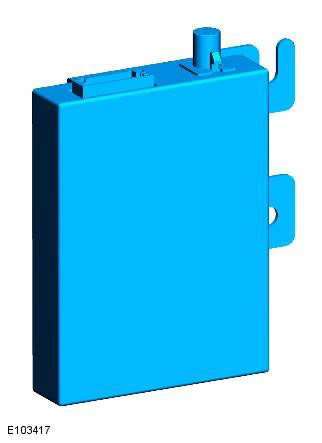
The receiver is located on the left side of the luggage compartment. The receiver is located on an integral bracket, which in turn is attached to the audio system bracket, which houses the High Definition (HD) radio receiver.
The receiver is connected to the antenna on the left window via a coaxial cable. RF signals from the remote control are received by the antenna and transmitted via the antenna matching unit and the coaxial cable to the receiver. The receiver processes the signals and transmits the corresponding messages to the FFBH via a special bus.
(The text of the article was taken from the website: www.LRman.ru)
Antenna and antenna matching unit
Antenna matching unit:
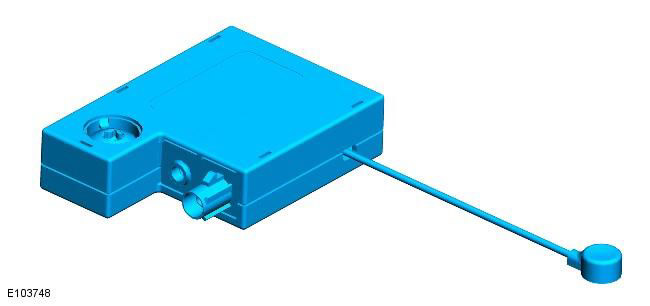
The FFBH antenna is located on the left rear window and uses the same antenna elements as those used by the Digital Audio Broadcasting (DAB) system.
The antenna matching unit is located above the DAB antenna, behind the ceiling trim. The crossover wire from this unit is connected directly to the pin on the antenna, located on the glass. The receiver is connected to the matching unit with a coaxial cable.
The antenna, located on the glass, receives radio frequency signals from the remote control and transmits them through the matching unit and coaxial cable to the FFBH receiver.
Comments on this article