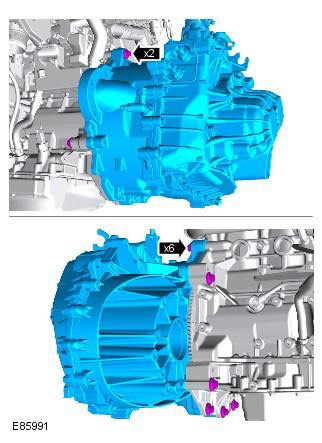
2. Install the transmission assembly. Tightening torque: 65 Nm
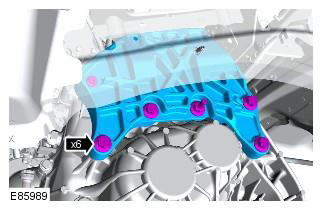
3. Install the gearbox support bracket. Tightening torque: M12 80 Nm. M8 24 Nm
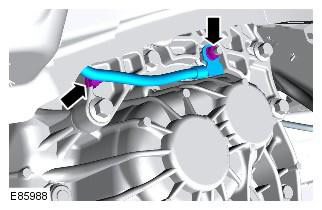
4. Attach the ground cable to the gearbox bracket. Tightening torque: 25 Nm
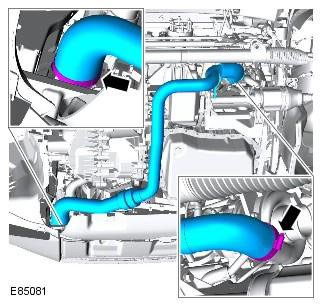
5. Install the turbocharger exhaust pipe.
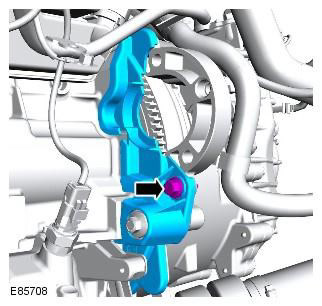
6. Install the front flywheel cover. Tightening torque: 60 Nm
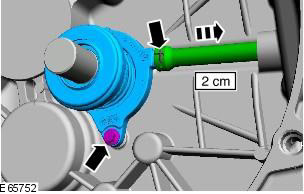
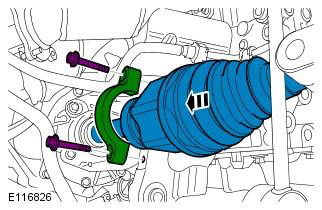
7. Establish the right semiaxle. Tightening torque: PTO shaft support 25 Nm
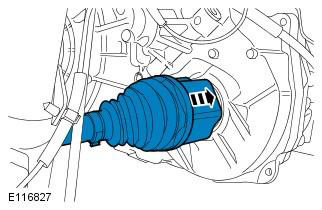
8. Establish the left half shaft.
9. Install the adjusting tool on the front subframe.
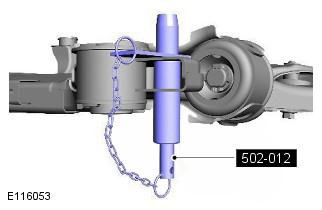
10. Install the front subframe. Tightening torque: Support bracket bolts 25 Nm. Subframe bolts: Stage 1: 140 Nm. Stage 2: 240°
CAUTION: Use only new subframe bolts.
NOTE: Install but do not fully tighten the front subframe mounting bolts.

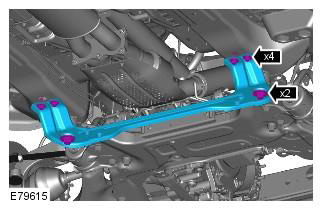
11. Install the cross member of the subframe. Tightening torque: Cross member bolts 45 Nm. Subframe bolts: Stage 1: 140 Nm, Stage 2: 240°
CAUTION: Use only new bolts.
NOTE: Install but do not fully tighten the rear subframe mounting bolts.
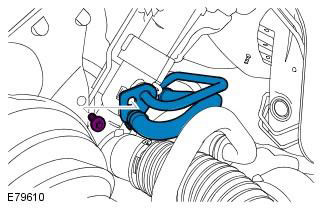
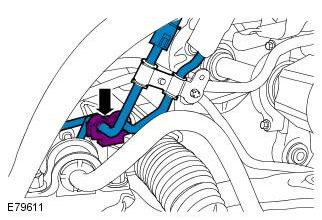
12. Install the bottom support pad. Tightening torque: 110 Nm
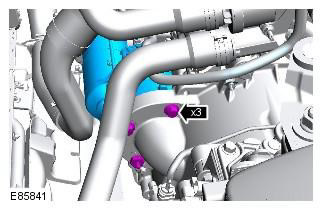
13. Install the fuel line.
14. Attach pressure lines of the steering mechanism. Tightening torque: 25 Nm
15. Install the power steering fluid tube into the clamp.
16. Attach the catalytic converter distribution pipe.
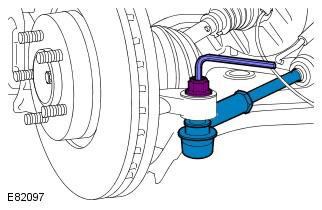
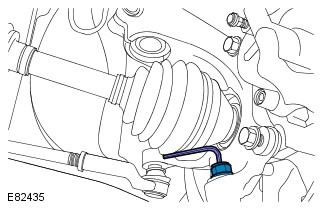
17. Connect the ball joints of the left and right tie rod ends. Tightening torque: 80 Nm
WARNING: Use new nuts.
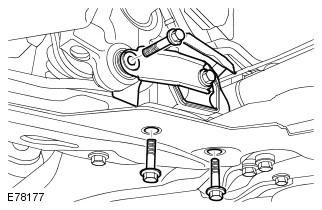
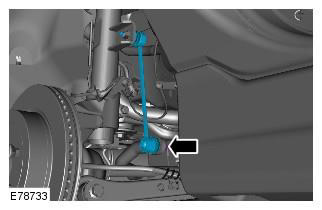
18. Install the ball joint of the lower suspension arm. Tightening torque: 110 Nm
WARNING: Install a new lower arm ball joint nut.
CAUTION: Do not allow the ball joint to rotate.
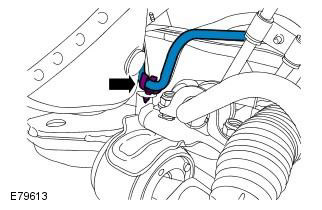
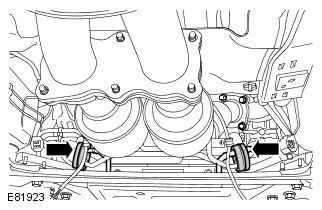
19. Attach both front struts to the stabilizer bar. Tightening torque: 55 Nm
WARNING: Use new nuts.
CAUTION: Do not allow the ball joint to rotate.
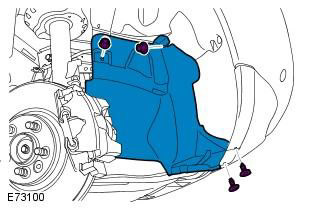
20. Install both wing mudguard extension panels.
NOTE: The illustration shows the right side, on the left side the procedure is the same.
21. Install the front wheels with tires. Refer to procedure: Wheel and tire (204-04 Wheels and tires, Removal and installation).
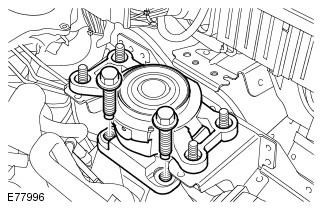
22. Establish 2 bolts of fastening of a transmission to a body. Tightening torque: 175 Nm
23. Remove the support from under the engine.

24. Install the starter. Refer to procedure: Starter (303-06B Starting system - 2.2L Duratorq - Td4, Removal and installation).
25. Install the transmission selector block. Refer to Procedure: Gear Shift Lever (308-06 Manual transaxle/gearbox external controls, Removal and installation).
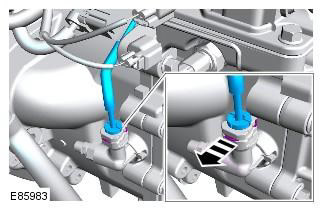
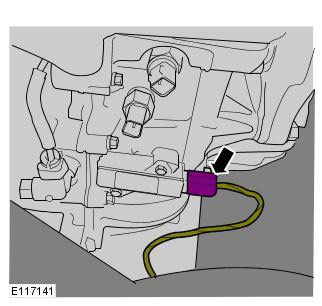
26. Connect the clutch slave cylinder hydraulic hose and secure with a clamp.
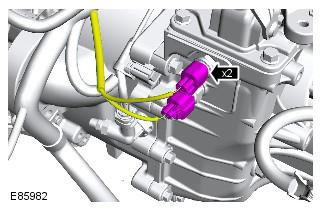
27. Connect electric sockets of the switch of position of 1st and reverse gears.
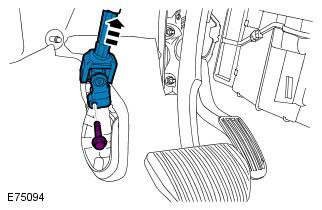
28.
NOTE: The moment of locking the latches should be accompanied by a distinct click.
29. Connect a steering column to the steering mechanism. Tightening torque: 25 Nm
WARNING: Install a new steering column flexible coupling bolt.
30. Fill the gearbox with transmission fluid. Refer to Procedure: Draining Transmission Fluid and Refilling Transmission Fluid (308-03 Manual/Transaxle Transmission, General Procedures).
31. Install the battery tray. Refer to procedure: Battery installation shelf (414-01 Battery, battery mount and wires, Removal and installation).
32. Remove air from the clutch system. Refer to Procedure: Bleeding Clutch System (308-00 Manual Transmission / Transaxle Transmission and Clutch - General Information, General Procedures).
33. Fill the power steering system with working fluid and remove air from the system. Refer to Procedure: Bleeding Power Steering System (211-00 Steering system - General information, General procedures).
Comments on this article