Contents: Removal ⇩ Installation ⇩
Removal
1. Remove both upper A-pillar trim panels.
For more information, refer to A-Pillar Trim Panel (76.13.26)
2. Remove both upper B-pillar trim panels.
For more information, refer to Upper Pillar Trim Panel (76.13.28)
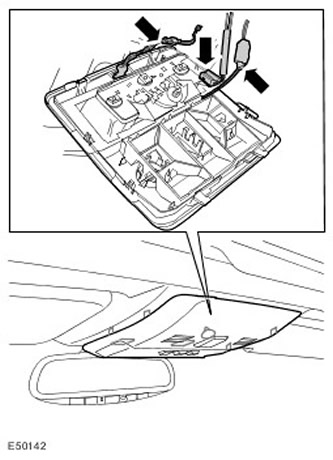
3. Remove the front upper console.
- Carefully release the 7 clamps.
- Disconnect the electrical connector.
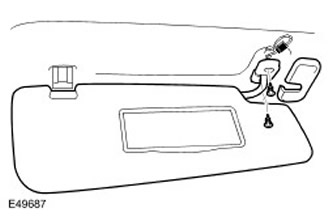
4. Remove the sun visor.
- Remove the cover.
- Remove 2 screws.
- Release the clamp.
- Disconnect the electrical connector.
- Repeat the above procedure on the other side.
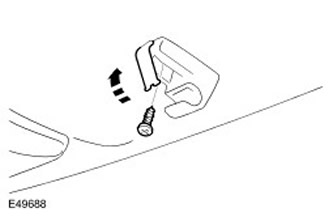
5. Remove the sun visor retainer.
- Remove the screw cover.
- Remove the screw.
- Repeat the above procedure on the other side.
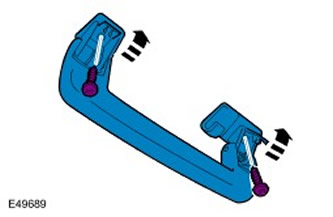
6. Remove the passenger's handrail.
- Remove the 2 screw covers.
- Remove 2 screws.
- Repeat the above procedure on the other side.
7. Remove the headliner to gain access. Release the 4 clips.
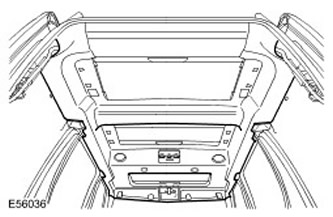
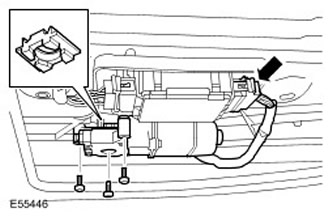
8. Remove the sunroof motor.
- Disconnect the electrical connector.
- Remove 3 Torx head screws.
- Remove the spacer sleeve.
Installation
1. Install the sunroof motor.
- Install the spacer sleeve.
- Tighten the Torx head screws (tightening torque 4 Nm).
- Connect the electrical connector.
3. Install passenger handrails.
- Screw in the screws.
- Install the screw covers.
- Install the clamps.
- Screw in the screws.
- Install the screw covers.
- Connect the electrical connectors.
- Connect the electrical connector.
- Carefully secure the clamps.
For more information, refer to Upper Pillar Trim Panel (76.13.28)
7. Install both upper A-pillar trim panels.
For more information, refer to A-Pillar Trim Panel (76.13.26)
[The article is based on information from the website: lrman.ru]
8. Using the T4 device, select the settings for the new sunroof motor.
9. If the battery is disconnected, the one-touch and trauma safety functions will be unavailable. Close the sunroof panel and keep the switch pressed for another 20 seconds until the sunroof completes a full cycle. This will complete the sunroof calibration procedure and reset these functions.
Comments on this article