


Contents: Removal ⇩ Installation ⇩
Removal
CAUTION: Replace the brake pads as a set for the entire axle, otherwise braking efficiency may be reduced.
CAUTION: If the brake pad wear indicator light comes on, the brake pad wear sensor must be replaced.
1.
CAUTION: Never work on a vehicle supported solely by a jack. Always support the vehicle securely.
Raise and support the vehicle.
2. Remove the wheel and tire assembly.
3.
CAUTION: The brake pad wear indicator sensor is very easy to damage. Do not use a lever to remove the sensor. The operation must be performed manually.
Left side only: Disconnect the brake pad wear indicator sensor.
4. Remove the lower brake caliper bolt.
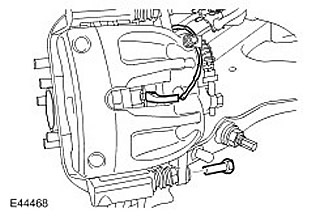
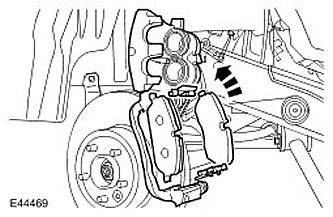
5. Remove the brake pads.
- Rotate the brake caliper upward.
- Remove 2 clamps.
Installation
1.
CAUTION: Do not use compressed air to clean brake components. Dust from friction materials is harmful if inhaled.
Clean the brake caliper body and backing plate with clean brake fluid.
2. Inspect the slave cylinder piston seals and guide pins for damage.
3. Immerse the end of the bleeder tube in a suitable container containing a small amount of the specified brake fluid. Attach the bleeder tube to the bleeder nipple and loosen the nipple slightly.
4. Press the pistons into the brake caliper housing. Tighten the bleeder screw. (tightening torque 14 Nm).
5. Disconnect the air bleed tube and remove the container.
6. Install the brake pads. Install two clamps.
7. Turn the brake caliper down. Tighten the bolt. (tightening torque 35 Nm).
8. Connect the brake pad wear indicator sensor.
9. Install the wheel and tire assembly. Tighten the wheel nuts. (tightening torque 140 Nm).
10. Repeat the above procedure on the other side of the vehicle.
11. Press the brake pedal, check the level of working fluid in the brake hydraulic reservoir and top up if necessary.
Comments on this article