Contents: Dismantling ⇩ Installation ⇩
Dismantling
1. Disconnect the negative battery terminal.
2. Remove the multifunction switch from the steering column.
LIGHTING, Headlight assembly - models up to 2004 model year, Switch - combination, direction indicators/headlights/horn.
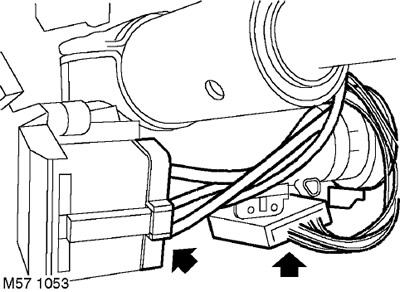
3. Disconnect the multi-pin electrical connectors from the ignition switch and immobilizer coil.
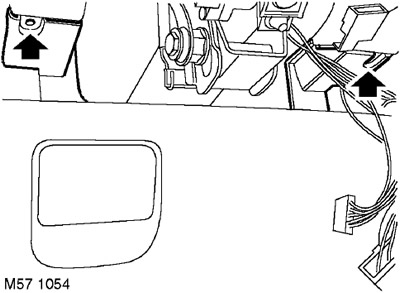
4. Remove the 2 screws securing the steering column trim and remove the trim.
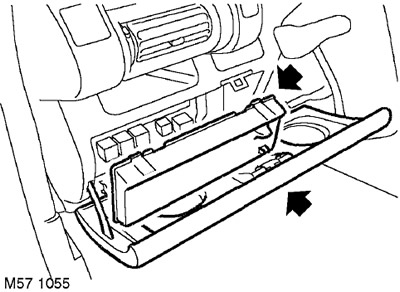
5. Lower the glove box lid and remove the fuse box cover.
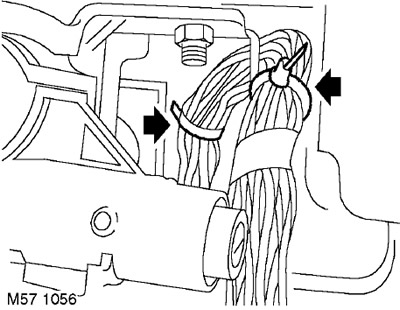
6. Carefully cut the 2 electrical wiring clamps located to the left of the steering column and release the electrical wiring.
7. Loosen the 2 electrical wiring clamps located to the right of the steering column and remove the electrical wiring.
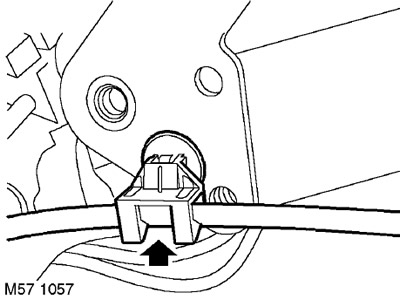
8. Automatic transmission models: Release the ignition lock cable from the lock located on the steering column.
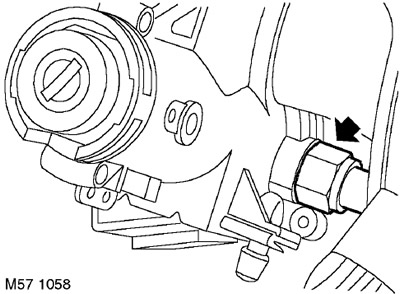
9. Models with automatic transmission: Loosen and disconnect the ignition lock cable from the steering column.
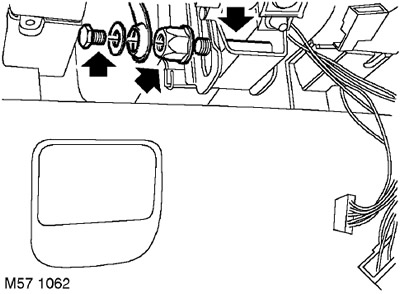
10. Models with automatic transmission: Loosen the steering column tilt adjustment lever mounting bolt and remove the lever.
11. Models with automatic transmission: Loosen the nut of the adjuster clamp bolt and remove the bolt.
12. Models with automatic transmission: Disconnect the ignition lock cable from the steering column.
13. Automatic transmission models: Install the pinch bolt and nut to secure the support bracket.
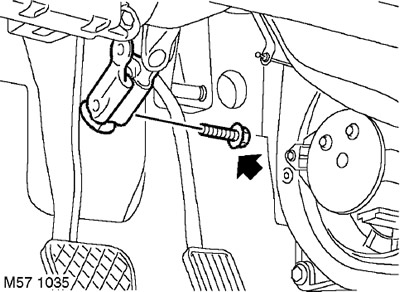
14. Loosen the bolt securing the steering shaft to the steering gear drive pinion.
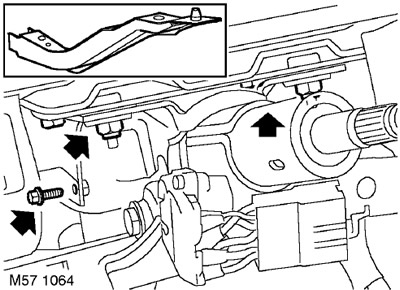
15. Remove the bolt securing the steering column to the fuse box support bracket.
16. Remove the 2 nuts and 2 bolts that secure the steering column to the upper amplifier.
17. Save the vibration isolation pad.
18. Disconnect the steering column from the support bracket and the steering gear drive pinion.
19. Remove the steering column assembly.
20. Remove the 2 cable clamps from the steering column.
21. Remove the ignition lock cable retainer.
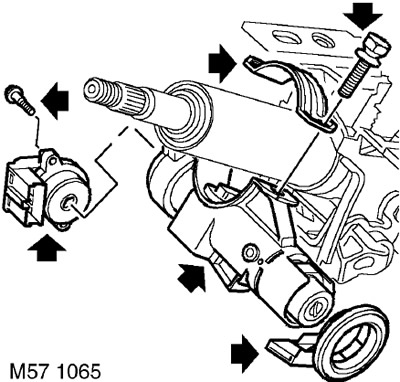
22. Unscrew the 2 ignition switch mounting screws and remove the switch.
23. Remove the immobilizer coil.
24. Clamp the steering column assembly in a vice.
25. Knock out or drill out the shear bolts securing the steering wheel lock mechanism.
CAUTION: If the steering column is to be reused, be careful not to damage or deform it in the vice.
26. Remove the steering wheel lock mechanism.
CAUTION: If the locking mechanism is to be reused, be careful not to damage the locking mechanism housing.
Installation
1. Remove the steering column from the vice.
2. Install new cable clamps to the steering column.
3. Automatic transmission models: Install the ignition lock cable retainer.
4. Install the steering column into the vehicle, align the steering shaft with the steering gear drive pinion, aligning the coupling sleeve with the pointer on the pinion tail.
5. Install the steering column onto the studs and screw on the nuts, without tightening them completely yet.
6. Tighten the bolts and install the vibration-insulating pad on the swivel support. Tighten the bolts to 14 Nm.
7. Tighten the nuts to a torque of 14 Nm.
8. Tighten the steering shaft mounting bolt to the drive pinion to a torque of 32 Nm.
CAUTION: When tightening nuts and bolts, the weight of the vehicle must be supported by the suspension.
9. Automatic transmission models: Remove the tension bolt from the adjuster and install the ignition lock cable.
10. Automatic transmission models: Install the adjuster pinch bolt and tighten the nut to 10 Nm. Make sure the bolt and plastic stopper are correctly positioned in the hole in the steering shaft mounting bracket.
11. Automatic transmission models: Install the tilt steering column adjustment lever and tighten the bolt to 12 Nm. Before tightening the bolt, turn the lever to the uppermost position. Hold the pinch bolt nut to prevent it from turning.
12. Models with automatic transmission: Remove the ignition key.
13. Models with automatic transmission: Connect the ignition lock cable to the steering column and tighten it to a torque of 4 Nm.
14. Automatic transmission models: Install the steering wheel lock mechanism onto the steering column and tighten the shear bolts. Do not tighten the shear bolts completely yet.
15. Automatic transmission models: Insert the ignition key, check the steering wheel lock mechanism and make sure the key turns without sticking.
16. Models with automatic transmission: Make sure the ignition lock cable is functioning properly.
17. Models with automatic transmission: Remove the ignition key.
18. Automatic transmission models: Tighten the shear bolts completely and remove the heads.
19. Automatic transmission models: Install the immobilizer coil.
20. Models with automatic transmission: Install the ignition switch on the steering column, tighten the screws that secure it.
21. Automatic transmission models: Secure the ignition lock cable to the retainer.
22. Models with automatic transmission: Make sure the ignition lock cable is installed correctly.
23. Tighten the side bolt to 10 Nm.
24. Position the electrical wiring correctly and secure it with clamps.
25. Replace the fuse box cover and close the glove box lid.
26. Connect the multi-pin electrical connectors to the ignition switch and immobilizer coil.
27. Install the cover and secure it with screws.
28. Install the multifunction switch on the steering column.
LIGHTING, Headlight assembly - models up to 2004 model year, Switch - combination, direction indicators/headlights/horn.
29. Connect the negative battery terminal.
Comments on this article