Dismantling
1. Disconnect "negative" battery terminal.
WARNING: Fuel vapors are highly flammable and in an enclosed area are also toxic and explosive. When working with fuel, it is necessary to have a foam type, carbon dioxide fire extinguisher at hand (CO2), gas or powder.
2. Before starting work, clean the areas adjacent to the radiator and fuel fittings. Be careful not to damage the heatsink when installing it.
3. Place a container under the radiator to collect spilled fuel.
4. Lay a rag around the fuel pipes to collect escaping fuel.
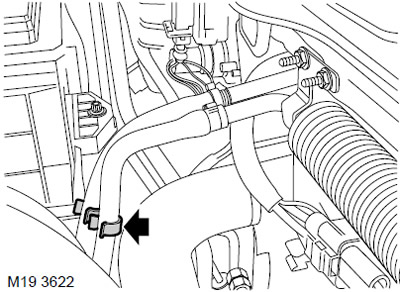
5. Remove the bracket holding the inlet and outlet fuel hoses together.
6. Disconnect the fuel outlet hose from the return drain line.
CAUTION: Before disconnecting or removing system components, make sure that the surfaces adjacent to the connection points are free of dirt. Install plugs in fittings and piping to keep dirt out of the system.
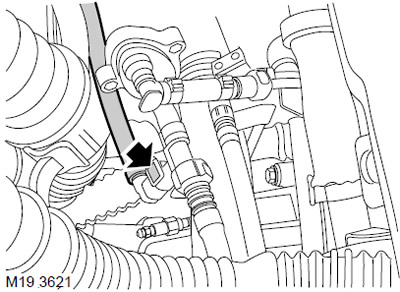
7. Disconnect the fuel supply hose from the fuel cooler. Dispose of the clamp.
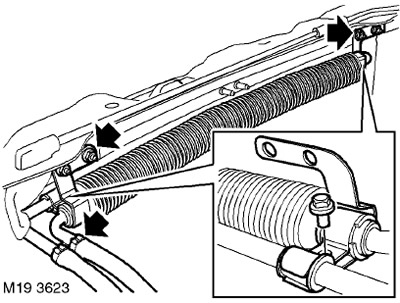
8. Turn away 4 nuts of fastening of arms of a radiator of cooling of fuel to the top crossbar of a frame of a radiator and carefully and remove a radiator.
9. Mark the position for ease of assembly and remove the 2 bolts securing the brackets to the fuel cooler. Remove brackets with rubber bushings.
Installation
1. Install brackets with rubber bushings to fuel cooler.
2. Tighten the bolts securing the brackets to the fuel cooler, tightening torque 10 Nm.
3. Install the fuel cooling radiator on the upper cross member of the radiator frame and tighten its fastening nuts to 10 Nm.
4. Wipe the connecting parts of the fuel hoses.
5. Connect the fuel supply hose and secure it with a new clamp.
6. Connect the outlet hose to the backflow line.
7. Establish the bracket fastening together bringing and taking away fuel hoses.
8. Attach "negative" terminal to the battery.
Comments on this article