Contents: Removal ⇩ Installation ⇩
Removal
NOTE: New air suspension components are supplied with Voss type fittings already installed and torqued to the correct value. Therefore, if installing a new component, do not install new Voss type fittings.
1. Use T4 to release the air suspension pressure. For more information, refer to Releasing and Raising Air Suspension Pressure (60.50.38)
2.
CAUTION: Never work on a vehicle supported solely by a jack. Always support the vehicle securely.
Raise and support the vehicle.
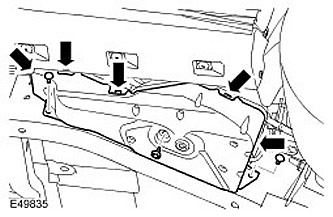
3. Remove the lower cover of the air suspension air compressor.
- Remove 3 bolts.
- Open 5 latches.
4.
CAUTION: To avoid contamination of the system, plug all open connections.
NOTE: Access to the upper compressor lock bolt is very limited. It is recommended to use an end head with a 1/4-inch connection square and a gimbal adapter.
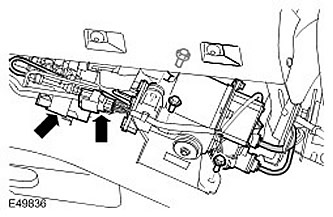
Remove the air suspension air compressor.
- Disconnect 3 air lines.
- Disconnect the two electrical connectors.
- Remove three bolts.
(The article is based on data from the website: www.lrman.ru)
Installation
1.
CAUTION: Make sure that the air suspension wire harness and lines are not pinched by the air suspension air compressor mounting bracket.
CAUTION: Position the air suspension air compressor top cover correctly.
NOTE: Before installing the two lower bolts, install, but do not fully tighten, the upper bolt.
Install the air suspension air compressor.
- Tighten the bolts to 10 Nm.
- Connect the air lines.
- Connect the electrical connectors.
2. Install the air compressor lower cover of the air suspension. Install the bolts and tighten them. (tightening torque 9 Nm).
3. Use T4 to increase the pressure in the air suspension. For more information, refer to Releasing and Increasing the Pressure in the Air Suspension System (60.50.38)
Comments on this article