Removing
CAUTION: Do not loosen or remove the large protruding hex plug on the differential case.
1.
WARNING: It is forbidden to carry out work on a vehicle supported only by a jack. Be sure to place secure supports under the vehicle.
Raise and support the vehicle.
2. Remove rear wheels.
3. Remove the muffler assembly. For more information, refer to Muffler - Vehicle not included: Diesel fuel filter (30.10.11)
4. Remove the right rear axle shaft. For more information refer to Rear Axle (47.11.01)
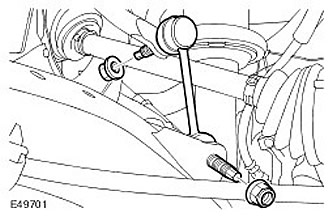
5.
ATTENTION: Do not allow the ball joint to turn by holding it with a wrench on the provided hexagon.
Remove the left rear stabilizer link. Loosen and discard two nuts.
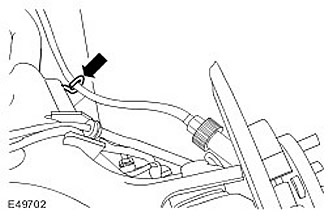
6. Remove the parking brake cable from the left lower arm.
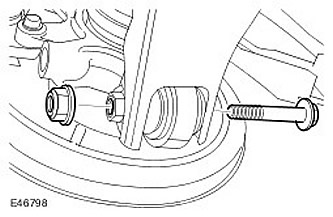
7. Disconnect the left rear toe adjustment link. Turn out a bolt.
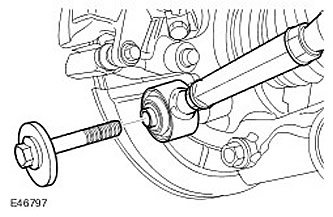
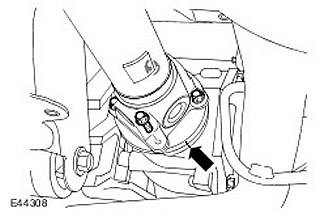
8.
CAUTION: Do not damage the ball joint boot. Damage to the protective cover leads to premature failure of the hinge.
Release the left rear hub support from the lower arm.
- Turn out a bolt.
- Support the left rear hub support with a suitable support.
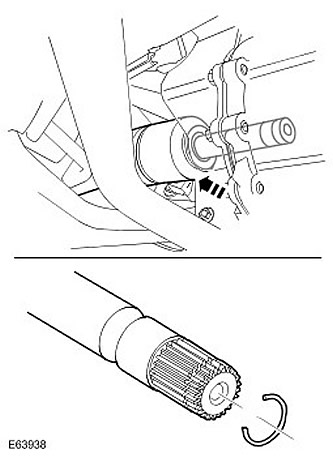
9.
NOTE: The illustration shows the right side, the left side is the same.
Disconnect the left rear axle shaft from the axle assembly. Remove the snap ring and discard it.
10.
CAUTION: Mark the position of the propshaft flange in relation to the pinion flange.
Disconnect the propeller shaft from the drive flange on the rear axle.
- Loosen and discard the four bolts.
- Hang the cardan shaft using a suitable clamp.
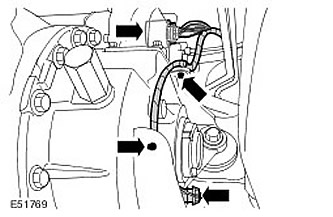
11. Vehicles with a differential lock motor: Disconnect the two electrical connectors. Release the two cable harness clips.
12. Using a transmission jack, support the rear axle assembly.
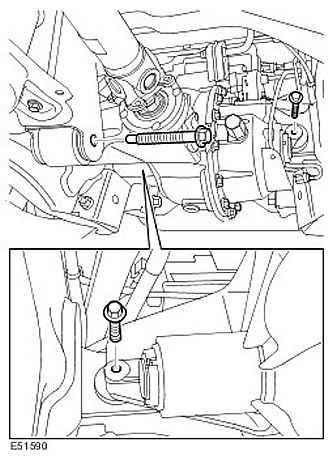
13.
CAUTION: Before disconnecting or removing components, clean the area around the contact surfaces and connections. Plug open connections to prevent contamination.
With the help of someone else, remove the rear axle assembly.
- Turn out three bolts.
- Disconnect the ventilation line.
Installation
1. With assistance from others, install the rear axle assembly.
- Tighten the front bolt to 203 Nm.
- Tighten the rear bolts to 175 Nm.
- Connect the ventilation line.
2. Vehicles with a differential lock motor: Connect the electrical connectors. Attach the wiring harness clamps.
3.
NOTE: Install new bolts.
Connect the propeller shaft to the drive flange on the rear axle.
- Clean the mating surfaces of the elements.
- Tighten the bolts to 150 Nm.
4. Install a new retaining ring on the left axle shaft.
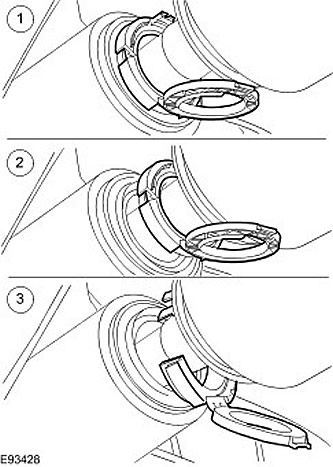
5.
NOTE: Do not fully insert the axle shaft until the oil seal guard has been removed.
Attach the left axle shaft to the axle assembly.
- 1) Open the axle shaft seal protection and install the axle shaft.
- 2) Release the axle seal protection from the axle seal.
- 3) Remove the axle seal protection.
- 4) Fully install axle shaft.
- 5) Make sure the circlip is fully seated and is holding the axle shaft.
6.
CAUTION: Do not damage the ball joint boot. Damage to the protective cover leads to premature failure of the hinge.
Attach the left rear hub support to the lower control arm. Tighten the nut and bolt to 275 Nm.
7. Attach the left rear toe adjustment link. Tighten the bolt to 175 Nm.
8. Connect the parking brake cable to the left lower lever.
9.
NOTE: Install new nuts.
Install the left rear stabilizer link. Tighten the nuts to 115 Nm.
10. Install the right rear axle shaft. For more information refer to Rear Axle (47.11.01)
11. Install the muffler assembly. For more information, refer to Muffler - Vehicle not included: Diesel fuel filter (30.10.11)
12. Install wheels. Tighten the wheel nuts to 140 Nm.
Comments on this article