Special tool
 Flexible Plate Locking Tool 303-947 (LRT-12-145)
 |
Removing
1. Disconnect the wire "masses" from the battery. For more information, refer to Specification
2.
WARNING: Do not work on or under a vehicle that is only supported by a jack. Always place secure supports under the vehicle.
Raise and support the vehicle.
3. Remove a transmission. For more information refer to Gearbox (44.20.01)
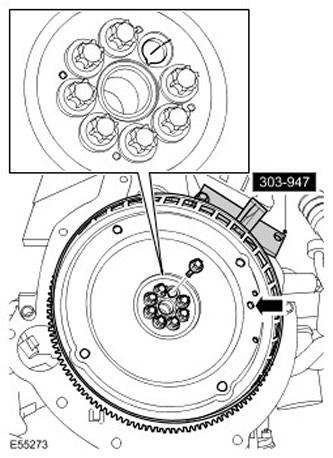
4. Alignment of the flexible plate.
- Rotate the crankshaft so that cylinder #1 is at TDC. The distribution mounting hole in the flexible plate will be horizontal as shown in the figure.
- Block the flexible plate with the special tool.
- Remove the indicated Torx head bolt to expose the timing mark.
- Mark the position of the bolt hole with a mark relative to the crankshaft.
5. Remove the torque converter flexible plate.
- Remove the 7 remaining Torx head screws.
- Remove the spacer.

Installation
1. Install the torque converter flexible plate.
- Clean the contact surfaces of the parts.
- Install the spacer.
- Align the bolt hole with the alignment mark so that it matches the mark previously made on the crankshaft.
- Block the flexible plate with the special tool.
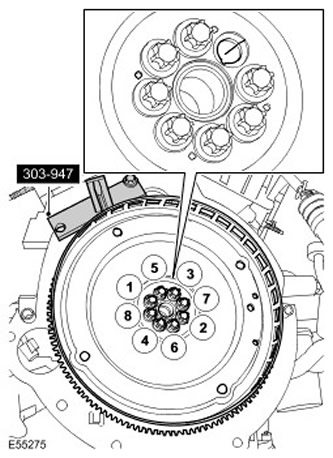
- Tighten the Torx head bolts evenly in 2 steps in the sequence shown.
- Tighten Torx Head Bolts (tightening torque 15 Nm).
- Tighten Torx Head Bolts (tightening torque 72 Nm).
2. Install the gearbox. For more information refer to Gearbox (44.20.01)
3. Connect the wire "masses" to the battery. For more information, refer to Specification
Comments on this article