Contents: Removal ⇩ Installation ⇩
Removal
1. Disconnect the ground cable from the battery. For more information, refer to Specification
2. Remove the fuel rail. For more information, refer to Fuel Rail (19.60.04)
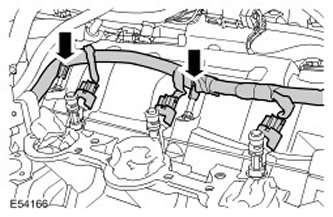
3. Move the injector wiring harness to the side.
- Release the 2 clamps.
- Disconnect the 3 fuel injector electrical connectors.
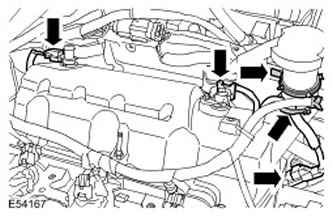
4. Disconnect the 3 electrical connectors.
- Disconnect the wire harness clamp from the filler neck.
- Record the installation position of the knock sensor wiring harness relative to the oil filler tube, and then remove and discard the wire tie.
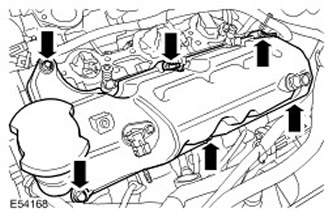
5.
CAUTION: Before disconnecting or removing parts, make sure the area around mating surfaces and connections is clean. To prevent contamination of the system, plug all open connections.
Remove the cylinder head cover.
- Remove 3 bolts.
- Remove 3 studs.
6.
NOTE: Do not perform further disassembly if the part is removed only for access.
Remove the gasket and discard it.
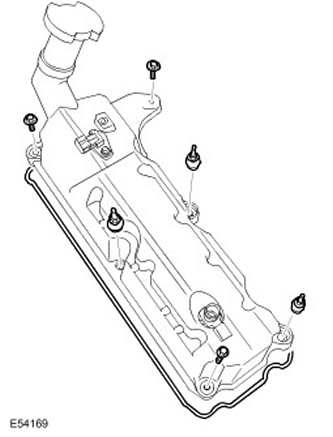
7.
NOTE: Record the installation positions of the parts.
Remove the bolts and studs. Remove the seals and discard them.
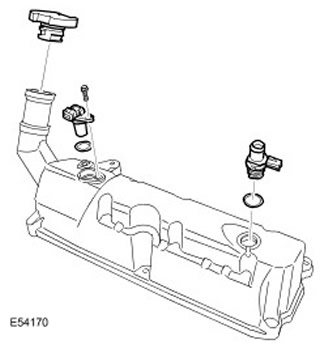
8. Remove the camshaft position (CMP) sensor.
- Remove the bolt.
- Remove the sealing ring and discard it.
10. Remove the oil filler cap.
Installation
1. Install the oil filler cap.
2. Install the engine ventilation valve. Install a new O-ring.
3. Install the CMP sensor.
- Install a new O-ring.
- Tighten the bolt (tightening torque 6 Nm).
The article is based on information from the website (lrman.ru)
4. Screw in the bolts and studs.
- Install new O-rings.
- Install a new gasket.
- Clean the contact surfaces of the parts.
- Tighten the bolts and studs evenly and gradually in the sequence shown. (tightening torque 10 Nm).
- Secure the wire harness with a clamp.
CAUTION: Make sure the knock sensor wiring harness is in its original installed position.
Install the fuel injector wiring harness.
- Secure it with clamps.
- Connect the fuel injector electrical connectors.
- Connect the 3 electrical connectors.
- Install a new wire tie.
8. Connect the ground cable to the battery. For more information, refer to Specifications.
Comments on this article